
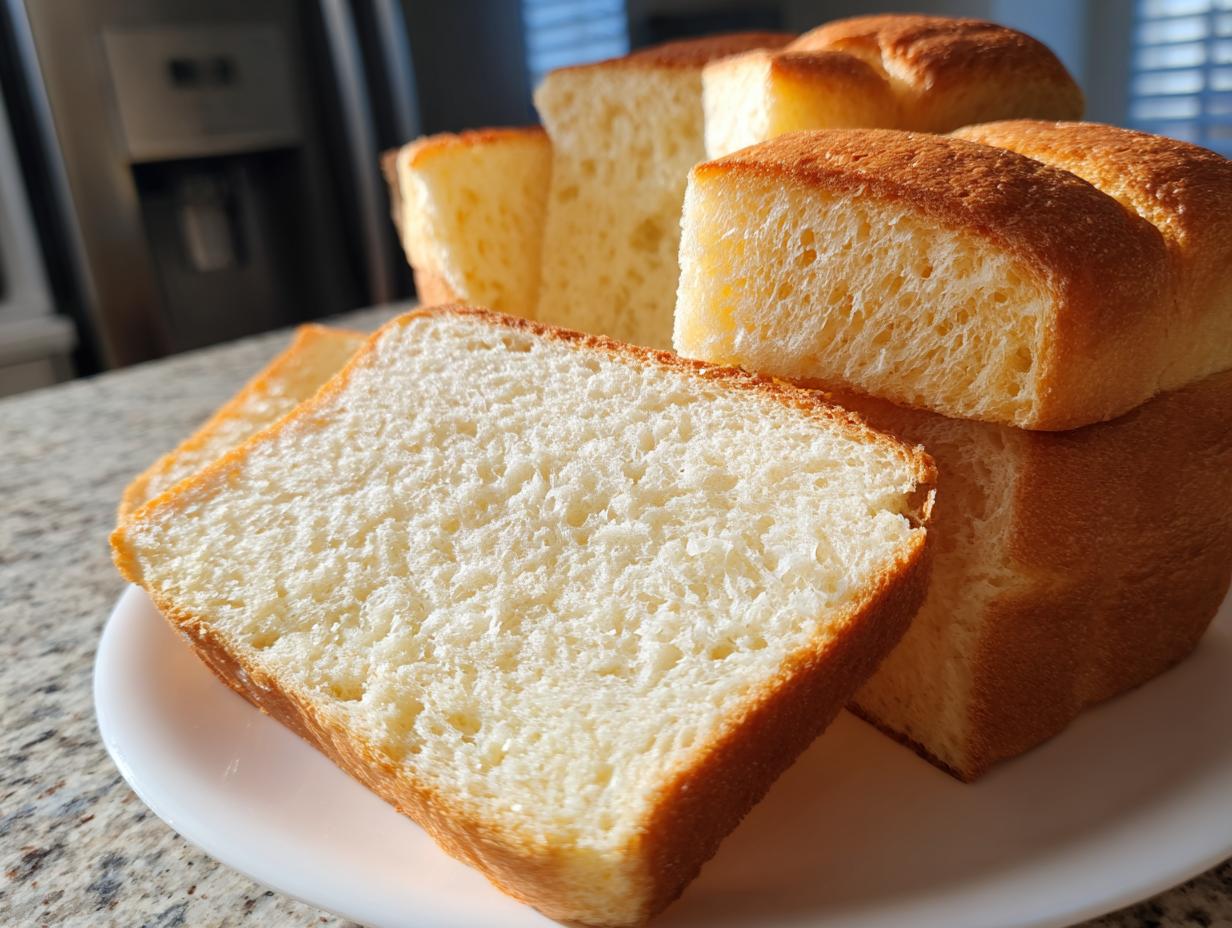
Are you tired of sourdough loaves that are beautiful but basically glorified bricks? I completely get it. Transforming that tangy starter into a genuinely soft, fluffy loaf that slices perfectly for lunchboxes has always felt like advanced magic, but that’s where the science comes in! As someone who studied Food Science and develops professional recipes for a living, I’m here to tell you that this **sourdough sandwich bread** recipe is your ticket to success. This is the ultimate **Beginner Sourdough Sandwich Bread** that always yields a reliable, **Sliceable Sourdough Loaf** without that heavy, rustic density. We’re aiming for pure comfort here!
- Why This is the Best Sourdough Sandwich Recipe for Softness
- Ingredients for Your Fluffy Sourdough Recipe
- How to Make Sourdough Sandwich Bread: Step-by-Step
- Baking Your Homemade Sandwich Bread Sourdough
- Tips for Success Making Beginner Sourdough Sandwich Bread
- Sourdough Sandwich Bread Variations
- Storage and Reheating Instructions for Your Loaf
- Frequently Asked Questions About This Easy Sourdough Loaf
- Nutritional Estimates for Sourdough Sandwich Bread
- Share Your Alchemy Chef Sourdough Sandwich Bread
- Nutritional Estimates for Sourdough Sandwich Bread
- Share Your Alchemy Chef Sourdough Sandwich Bread
Why This is the Best Sourdough Sandwich Recipe for Softness
When you’re striving for that classic, pull-apart texture, you need to adjust the expected sourdough structure a little bit. This recipe is engineered by me, Juliana Cruz, specifically to avoid the overly chewy, open crumb that makes nice slices impossible. We introduce fats and sugars—things often left out of rustic loaves—to guarantee a tender result. That 20 grams of avocado oil and the touch of honey aren’t just for taste; they interrupt the gluten development just enough to create that gorgeous, **Buttery Sourdough Crumb** you crave.
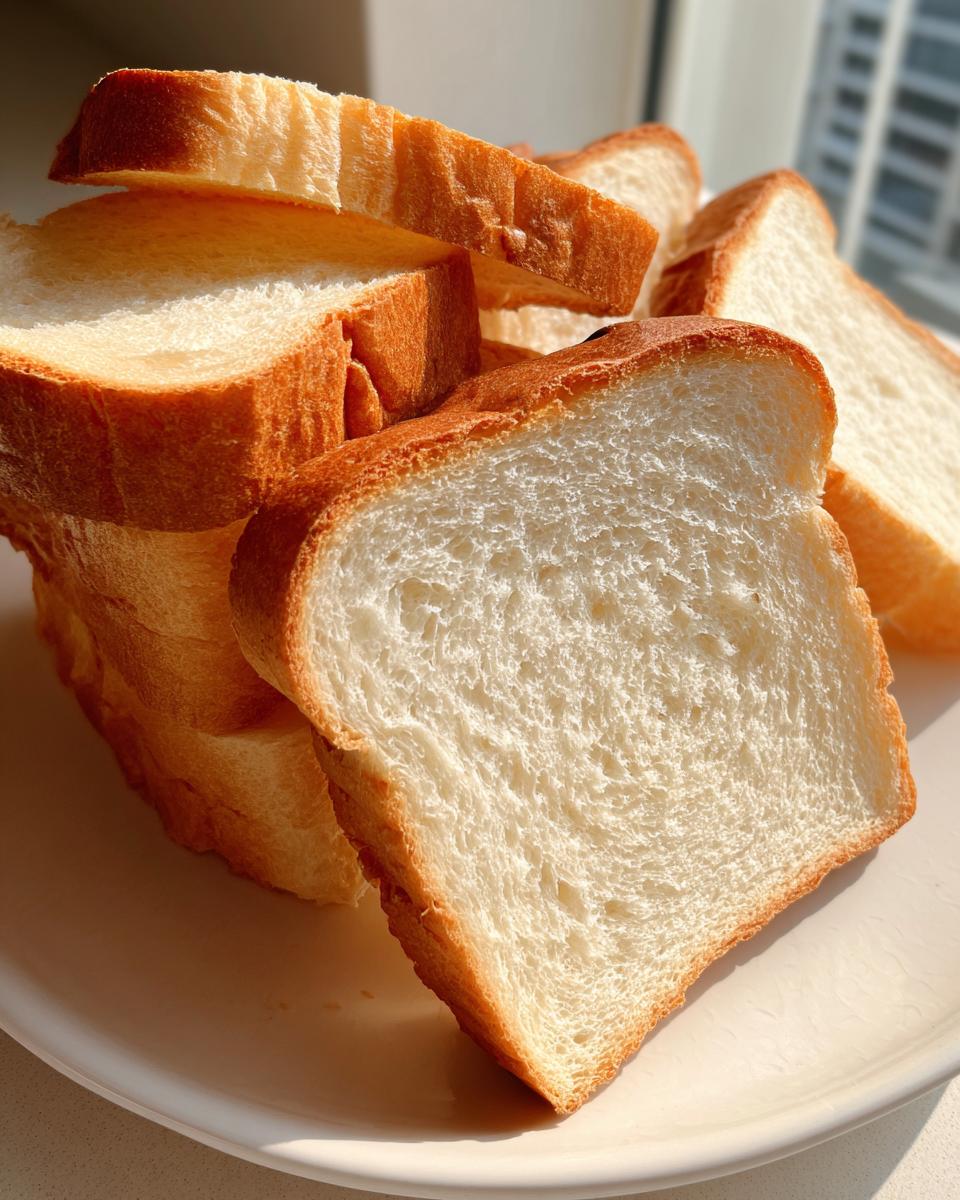
This **Soft Sourdough Sandwich Bread** relies on controlled fermentation instead of aggressive kneading. We want structure, yes, but structure that yields easily when you press it. If you’ve been disappointed by dense boules refusing to fit nicely in the toaster, you’re going to absolutely love how this loaf behaves. We honor the natural leavening process while ensuring the final product is truly a *sandwich* bread. Trust me, once you master this technique, you won’t look back!
For more thoughts on achieving maximum softness, I always look to bakers who prioritize that pillowy texture, like what I found when researching the best ways to approach this, such as techniques discussed over at The Sourdough Lady.
Ingredients for Your Fluffy Sourdough Recipe
Alright, let’s get down to the building blocks for this magic! Remember, the quality of your starter is everything for that **Perfect Sourdough Loaf**. Mine needs to be absolutely bubbly and peaked—if your starter is sluggish, your bread will be too. Don’t rush the feeding process leading up to this bake!
Here are the simple components you need to whip up this wonderful loaf:
- 150g active sourdough starter
- 325g warm filtered water
- 20g avocado oil
- 25g honey
- 500g unbleached bread flour
- 10g salt
You can read more about how others structure their ingredient lists for that extra soft texture over at Muscle Momma Sourdough.
Ingredient Notes and Substitutions
I chose avocado oil over olive oil because it has a very neutral flavor, letting the honey and the sourdough tang shine through, plus it keeps the crumb really soft. The honey is key to tenderness, almost like magic for beginners! If you don’t have honey on hand, pure maple syrup works brilliantly as a direct substitute. It gives a slightly different, deeper note, but the bread will still be soft.
For the flour, use good quality bread flour, which generally has higher protein content, helping support that airy structure. If you only have a high-protein all-purpose flour, you can use it, but I’d recommend adding just a tiny pinch more salt to help stabilize the dough a little. This keeps things straightforward for your **Easy Sourdough Loaf**!
How to Make Sourdough Sandwich Bread: Step-by-Step
Now for the part where we turn that liquidy bowl of ingredients into something that actually looks like bread dough! Follow these steps closely, and you’ll be amazed at how reliable this **sourdough sandwich bread** recipe is. We’re using gentle movements here because we want that soft texture, not a super open, rustic crumb.
We start by mixing everything gently. You’ll combine the starter, water, oil, and honey first until it looks milky—just making sure those flavors start melding. Then, add your flour and salt. Mix it by hand until you have what I call a ‘shaggy’ mess. Seriously, stop mixing just when you see no more dry pockets of flour.
Cover it up and let it rest for a full hour. This is the autolyse, where the flour starts drinking the water, and it makes everything easier later on. If you are looking for guidance on easy starting methods, checking out the tips shared by Kayla Zenner can really help new bakers feel confident!
Mixing and Developing Strength for Your Sourdough Sandwich Bread
Once the rest is up, we build strength, but gently! We need four sets of stretch and folds, spaced exactly 30 minutes apart. This builds the structure needed for a beautiful, **Sliceable Sourdough Loaf** without overworking the dough.
To do a stretch and fold, just reach under one side of the dough, lift it gently until it stretches high—don’t rip it!—and then fold that stretched top section right over the center. Turn the bowl a quarter turn and repeat. Do this four times for one set. After that set, cover it and wait 30 minutes. Do this process four times total over two hours.
After the final folds, cover your bowl and leave it for bulk fermentation. This part is crucial! You’re looking for the dough to increase in volume by only about 30% to 50%. Don’t wait for it to double; that’s too much for this softer structure. Keep an eye on it and learn what that visual rise looks like.
Shaping and Proofing for the Perfect Sourdough Loaf
When the bulk fermentation looks right, gently turn the dough out onto a lightly floured surface. We need to shape this into a tight log. You’re aiming to create surface tension without degassing the dough too much—think of tucking the sides in underneath to create a taught ‘skin’ on top. This tight shape is what helps it climb up the loaf pan perfectly.
Grease up a standard 9×5 inch loaf pan really well—I like using cooking spray and a little extra oil. Place your shaped loaf seam-side down into that pan. Cover it again, but now we wait for the final proof! For this specific loaf, you want it to rise until it’s just about one inch above the rim of the pan. This visual cue ensures you get that satisfying dome without over-proofing, which helps guarantee a **Perfect Sourdough Loaf** that doesn’t collapse when baking.

Baking Your Homemade Sandwich Bread Sourdough
Okay, the time has come to bake the magic! You’ve done all the patient stretching and waiting, so now we just need the oven to do its part. Make sure you preheat your oven to 375°F (190°C). It needs to be fully hot before that loaf goes in!
Remember how we greased the 9×5 inch pan earlier? If you didn’t, go back and do it now—sticking is the enemy of every **Homemade Sandwich Bread Sourdough** baker out there. Bake the loaf for about 35 to 45 minutes. I always pull out my instant-read thermometer because, from a science perspective, that’s the hard data we need!
You’re looking for an internal temperature of 205°F (96°C). That specific temperature tells my Food Science brain that the starches are fully set, which prevents that gummy texture. When it hits that mark, pull it out immediately! Don’t let it sit in that hot metal pan; take the **sourdough sandwich bread** right out and turn it onto a wire rack to cool completely. We’ll talk about why cooling is non-negotiable in a moment, but for now, just enjoy that golden crust!
If you want to peek at how others achieve that perfect golden crust, I always find reliable timing tips over at Supergolden Bakes.
Tips for Success Making Beginner Sourdough Sandwich Bread
Okay, listen up, because these little tricks are what separate the good loaves from the truly fantastic ones. If you are new to **Sourdough for Beginners**, you might be tempted to push the dough forever during bulk fermentation, but that’s actually one of the biggest mistakes for this specific loaf!
Here are a few things I absolutely insist you pay attention to:
- Starter Must Be Active: Seriously, don’t skimp on this. Your starter should have at least doubled within 4-6 hours after feeding before you mix your dough. If it’s sluggish, your final loaf will be dense, no matter how perfect your stretch and folds are.
- Watch the Rise, Not the Clock: Bulk fermentation time varies wildly based on your kitchen temperature. We only look for that 30% to 50% rise. If you let it go too long, you’ll get big holes, which means zero chance of a beautifully **Sliceable Sourdough Loaf**!
- The Cooling Wait is Torture, But Necessary: This is my number one tip for avoiding gummy bread. You must let the loaf cool *completely*—like, for hours—on a wire rack before slicing. When bread comes out of the oven, the starches are still setting up. Slicing early releases steam and makes that lovely crumb turn gluey. Be patient!
For reliability when you’re still learning the visual cues, I often check successful examples, like those shared by Tammy’s Recipes, to compare my dough’s look versus the finished product at her site.
Sourdough Sandwich Bread Variations
While this base recipe is absolutely perfect in its simplicity—yielding a loaf the kids will actually eat, bless them—I know many of you are eager to jazz things up a bit! Since we’ve perfected that soft, tender structure, we can add mix-ins without destroying the sliceability of our loaf. The key is always to add things either during the final stretch and fold or right before shaping.
If you want to go healthier but keep that soft texture, you should definitely try a **Honey Wheat Sourdough**. I’ve found that replacing 100g of the bread flour with whole wheat flour works beautifully, especially since the honey already helps tenderize the crumb. You might need one extra quick stretch and fold since whole wheat absorbs liquid a bit slower. If you want to see my exact ratios on that conversion, there are great ideas over at Muscle Momma Sourdough!
For something savory, which is fantastic for dinner rolls or grilled cheese, try adding dried rosemary and a sharp cheddar. If you use cheese, I recommend grating about 100g and adding it right when you do your final shaping—tuck it in gently so it doesn’t melt out during the proof in the pan. This keeps the flavor concentrated inside that soft interior. These variations never fail when I need something a little different for sandwiches!
Storage and Reheating Instructions for Your Loaf
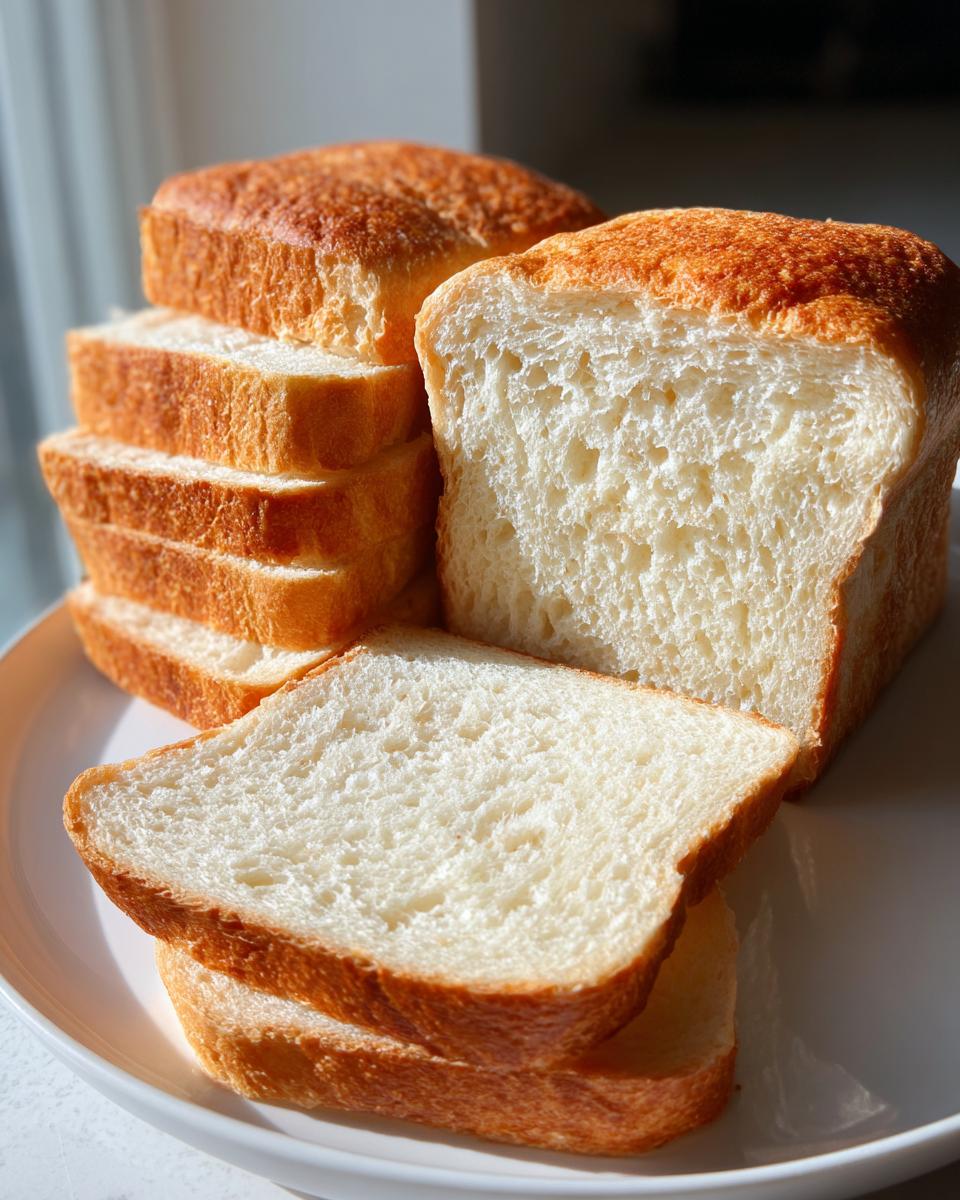
Storing this beautiful, soft **sourdough sandwich bread** correctly is so important to keep that **buttery sourdough crumb** from going stale fast. Since this loaf has honey and oil, it stays softer than a rustic sourdough for longer, but I still don’t recommend the fridge! The cold air turns it hard fast.
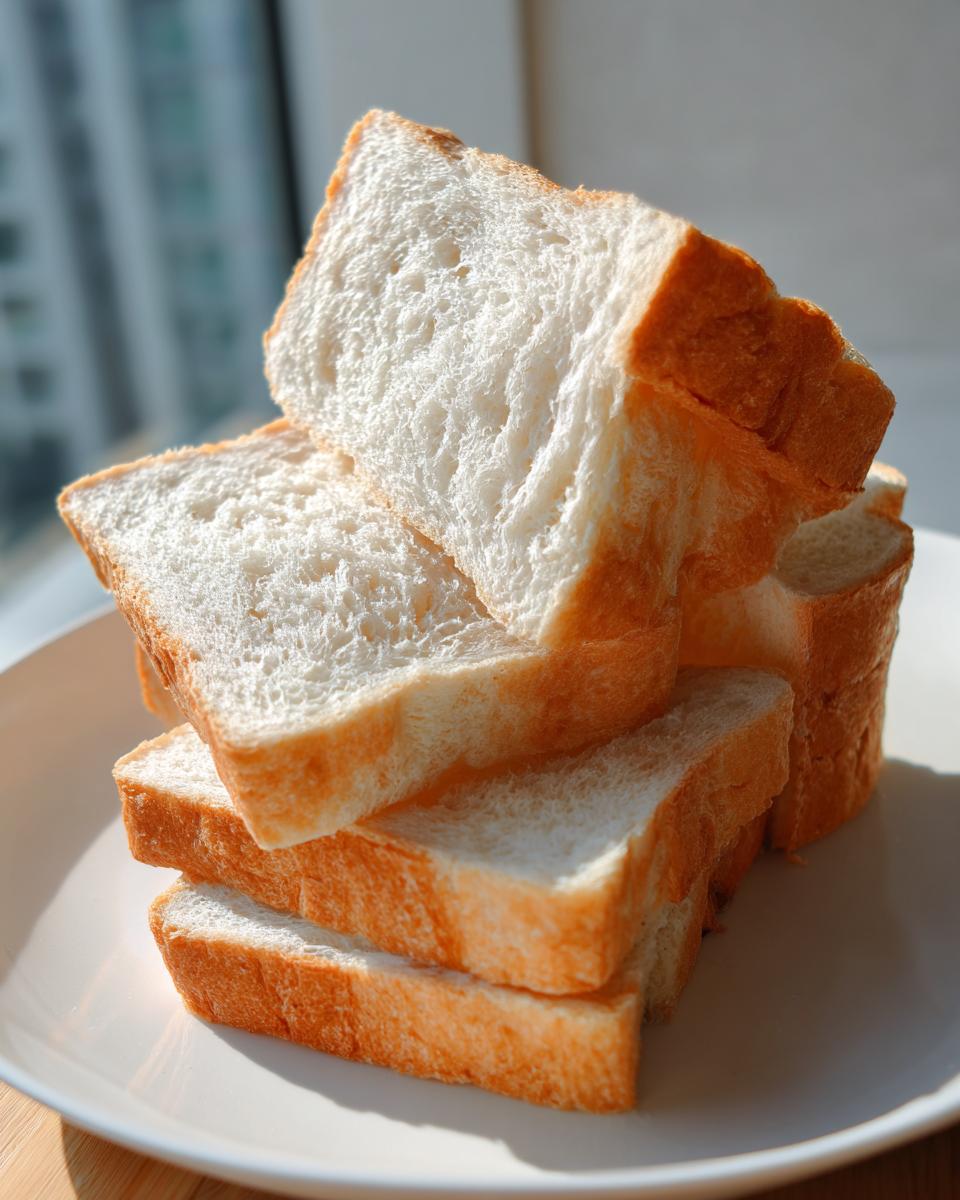
Keep the loaf tightly wrapped in plastic wrap or tucked into a large zip-top bag at room temperature for up to three days. If you know you won’t finish it that fast, slice it first! Sliced bread freezes beautifully; just stack the slices with parchment paper in between them. Those frozen slices are amazing the next day when you want quick **Sourdough Bread for Toasting**!
If it does get a little firm after day three, don’t toss it! Just give a single slice a quick 10-second zap in the microwave, or even better, toast it. That slight reheat brings back all the tenderness we worked so hard to create.
Frequently Asked Questions About This Easy Sourdough Loaf
I know when you start baking sourdough, your head swims with questions! It’s okay; every baker—myself included, even with my Food Science background—has had to troubleshoot these exact same things to finally get that **Perfect Sourdough Loaf**. Here are the things I get asked most often about making sure this **Easy Sourdough Loaf** turns out right.
Why is my sourdough sandwich bread still dense, not fluffy?
If your loaf isn’t fluffy, 99% of the time it comes down to your starter or your proofing. Make sure your starter is truly active and bubbly—it should have easily doubled 4 to 6 hours after feeding. Second, check your bulk fermentation. For a soft loaf, we are aiming for a modest rise, about 30% to 50% increase. If you let it ferment too long, the cell structure collapses during baking, and you end up with density. We want gentle, consistent lift, not explosive oven spring!
How can I make this less tangy for picky eaters?
This is such a great concern, especially when trying to convert someone to **Picky Eater Sourdough Bread**! The tanginess comes from lactic and acetic acid development during long, cool ferments. To minimize this for a **Quick Sourdough Sandwich** flavor, you need to keep the fermentation time shorter at room temperature, as detailed in the main instructions. Use warm water (around 80°F) to speed things along, and avoid letting the bulk ferment go for more than 6 hours total. A shorter fermentation time keeps the acids low, resulting in a much milder, sweeter profile that everyone loves, even those scared of sourdough!
Can I skip the stretch and folds? I’m intimidated by them.
Oh, I totally understand that hesitation! But skipping them means you skip the structure needed for a great soft loaf. Instead of skipping, just be mindful! Because we use oil and honey, the dough is inherently softer than a classic artisan loaf. I recommend checking out visual guides on gentle folding techniques, similar to what I’ve seen recommended by other home bakers on Instagram Reels. Just remember: stretch gently, fold neatly, and stop when the dough feels slightly smoother than when you started. It’s about building strength slowly, not wrestling with it!
For more visual pointers on how to handle the dough without fear, the detailed guides over at Feastical really helped me outline this process clearly for my readers.
Nutritional Estimates for Sourdough Sandwich Bread
As a Food Science enthusiast, I always crunch the numbers, even though I believe the gut-healthy benefits of a **Long Fermented Sandwich Bread** often outweigh a simple macro count. Keep in mind that these estimations are based on dividing the total batch into 16 level slices using the exact ingredients listed. Your results might vary slightly based on the exact flour and honey brands you use!
Here’s the breakdown for one slice:
- Serving Size: 1 slice
- Calories: 250
- Fat: 4g
- Saturated Fat: 0.5g
- Trans Fat: 0g
- Carbohydrates: 48g
- Fiber: 2g
- Sugar: 2g
- Protein: 8g
- Cholesterol: 0mg
While the numbers look similar to commercial bread, remember that the natural fermentation process starts breaking down phytates and making nutrients more accessible, which is why many people find this type of bread easier on their systems compared to quick-rise yeast loaves. That’s the real **Gut Healthy Sourdough Bread** benefit!
Share Your Alchemy Chef Sourdough Sandwich Bread
Now that you’ve coaxed that beautiful, soft loaf from your starter, I’d absolutely love to know how it went! Did you achieve that **buttery sourdough crumb**? Did your family finally agree that this is the best **sourdough sandwich bread** they’ve ever tasted?
Please jump down to the comments section and leave a star rating for this **Simple Sourdough Bread Recipe** and tell me what you used it for—grilled cheese? French toast? I read every single comment, and your feedback helps me continue perfecting these recipes for everyone.
If you snapped a picture of your triumph, tag me on social media! Seeing the magic happen in your kitchen—that’s why I do all this recipe development work. If you need a reminder on how I approach decadent sourdough bakes, check out the delicious tips others have shared, like in this guide from a fellow baker over at CM Barn Dominium. Happy baking!
Nutritional Estimates for Sourdough Sandwich Bread
As a Food Science enthusiast, I always crunch the numbers, even though I believe the gut-healthy benefits of a Gut Healthy Sourdough Bread often outweigh a simple macro count. Keep in mind that these estimations are based on dividing the total batch into 16 level slices using the exact ingredients listed. Your results might vary slightly based on the exact flour and honey brands you use!
Here’s the breakdown for one slice:
- Serving Size: 1 slice
- Calories: 250
- Fat: 4g
- Saturated Fat: 0.5g
- Trans Fat: 0g
- Carbohydrates: 48g
- Fiber: 2g
- Sugar: 2g
- Protein: 8g
- Cholesterol: 0mg
While the numbers look similar to commercial bread, remember that the natural fermentation process starts breaking down phytates and making nutrients more accessible, which is why many people find this type of bread easier on their systems compared to quick-rise yeast loaves. That’s the real Gut Healthy Sourdough Bread benefit!
Share Your Alchemy Chef Sourdough Sandwich Bread
Now that you’ve coaxed that beautiful, soft loaf from your starter, I’d absolutely love to know how it went! Did you achieve that **buttery sourdough crumb**? Did your family finally agree that this is the best **sourdough sandwich bread** they’ve ever tasted?
Please jump down to the comments section and leave a star rating for this **Simple Sourdough Bread Recipe** and tell me what you used it for—grilled cheese? French toast? I read every single comment, and your feedback helps me continue perfecting these recipes for everyone.
If you snapped a picture of your triumph, tag me on social media! Seeing the magic happen in your kitchen—that’s why I do all this recipe development work. It’s taking that simple ‘alchemy’ and turning it into an everyday meal. If you need a reminder on how I approach decadent sourdough bakes, check out the delicious tips others have shared, like in this guide from a fellow baker over at CM Barn Dominium. Happy baking!
PrintSoft and Fluffy Sourdough Sandwich Bread Loaf

This recipe creates a reliable, sliceable sourdough sandwich bread with a soft, buttery crumb, perfect for beginners. It yields a loaf that is great for everyday sandwiches and toasting.
- Prep Time: 30 min
- Cook Time: 45 min
- Total Time: 7 hours 55 min
- Yield: 1 loaf 1x
- Category: Bread
- Method: Baking
- Cuisine: American
- Diet: Vegetarian
Ingredients
- 150g active sourdough starter
- 325g warm filtered water
- 20g avocado oil
- 25g honey
- 500g unbleached bread flour
- 10g salt
Instructions
- Combine the starter, warm water, avocado oil, and honey in a large bowl. Mix until the liquid looks milky.
- Add the bread flour and salt to the wet ingredients. Mix by hand until a shaggy dough forms and no dry flour remains.
- Cover the bowl and let the dough rest for 1 hour (autolyse period).
- Perform four sets of stretch and folds, spaced 30 minutes apart. Gently stretch a portion of the dough up and fold it over the center, rotating the bowl after each stretch.
- After the final set of folds, cover the dough and allow it to bulk ferment at room temperature for 4 to 8 hours, or until it has increased in volume by about 30-50% and shows signs of activity.
- Gently shape the dough into a tight log and place it seam-side down into a greased 9×5 inch loaf pan.
- Cover the loaf pan and allow the dough to proof at room temperature for 1 to 3 hours, or until it has risen about 1 inch above the rim of the pan.
- Preheat your oven to 375°F (190°C).
- Bake the loaf for 35 to 45 minutes, or until the crust is golden brown and the internal temperature reaches 205°F (96°C).
- Remove the bread from the pan immediately after baking and cool completely on a wire rack before slicing.
Notes
- Using filtered water helps maintain a stable environment for the starter activity.
- For a gut-healthy sourdough sandwich bread, extend the bulk fermentation time in a cooler environment for a longer, slow rise.
- This recipe produces a loaf that is excellent for picky eater sourdough bread needs due to its mild flavor.
Nutrition
- Serving Size: 1 slice
- Calories: 250
- Sugar: 2
- Sodium: 250
- Fat: 4
- Saturated Fat: 0.5
- Unsaturated Fat: 3.5
- Trans Fat: 0
- Carbohydrates: 48
- Fiber: 2
- Protein: 8
- Cholesterol: 0