
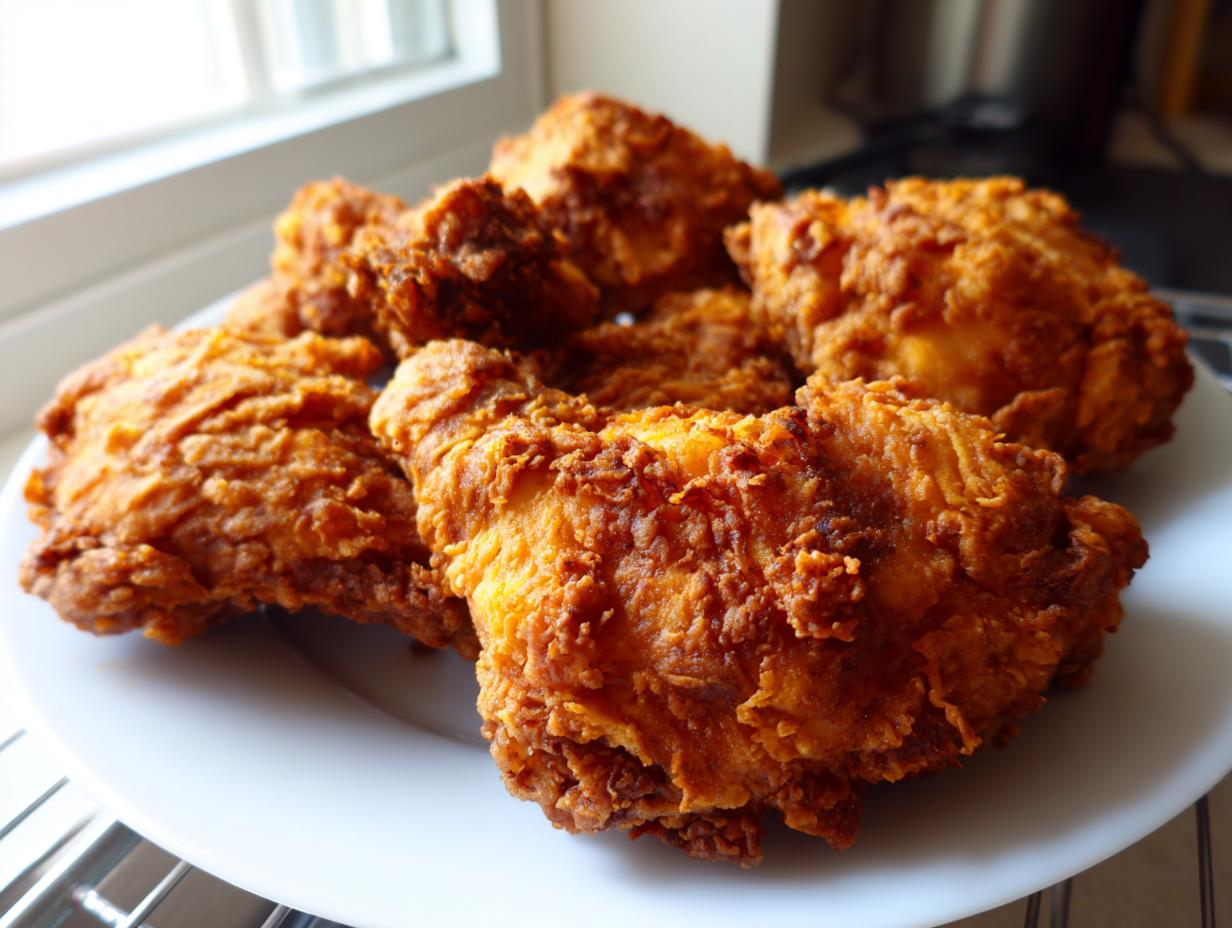
I’m going to let you in on a secret right now: achieving that perfect fried chicken texture—the kind that’s impossibly juicy inside yet shatters with a golden, crunchy crust—isn’t luck. It’s science! Here at Alchemy Chef, founder Jules Cruz uses her Food Science background and professional recipe testing experience to create foolproof meals. This recipe for Buttermilk Southern Fried Chicken is proof. We nail that tender inside thanks to a long soak, and we guarantee the ultimate crispiness through a specific coating technique. Forget soggy dinners; this is the most reliable, scientifically perfected recipe for the best homemade fried chicken you’ll ever pull from your Dutch oven.
- Why This Buttermilk Southern Fried Chicken Recipe Works
- Ingredients for the Best Homemade Fried Chicken
- How To Make Fried Chicken: Step-by-Step Technique
- Tips for Foolproof Fried Chicken Success
- Ingredient Notes and Substitutions for Fried Chicken
- Serving Suggestions for Your Savory Chicken Dinner Ideas
- Storage and Reheating Instructions for Leftover Fried Chicken
- Frequently Asked Questions About Perfect Fried Chicken
- Estimated Nutritional Data for Classic Fried Chicken
- Share Your Everyday Alchemy
Why This Buttermilk Southern Fried Chicken Recipe Works
Listen, achieving that legendary texture—juicy and crispy chicken—isn’t just about cranking up the heat. It comes down to understanding how proteins react to acid and starch. This recipe is designed around two core principles that guarantee success every single time you make fried chicken.
- The Buttermilk Brine: The lactic acid in the buttermilk acts as a gentle tenderizer, slightly denaturing the proteins in the chicken. This means your meat stays incredibly moist, even when deep-fried. It’s pure magic for creating that tender inside.
- The Coating Structure: We build a robust, craggy exterior that locks moisture in and delivers the crunch you dream about.
If you want to see what other folks are doing to get that perfect soak, check out these amazing crispy buttermilk techniques!
The Secret to Ultra-Crispy Fried Chicken
This is where we move beyond simple flour dredging. We rely on structure! The inclusion of cornstarch in our dry mix is key because it drastically increases the crisp factor. When that starchy, wet-to-dry coating hits the hot oil, it creates those beautiful, brittle, golden shards you see on the best pieces. We use a quick double-dip—buttermilk, flour, buttermilk, then flour again—to ensure every nook and cranny has a thick, crunchy chicken coating.
Ingredients for the Best Homemade Fried Chicken
When you’re making the best homemade fried chicken, you can’t skimp here. The quality of your ingredients directly translates to the quality of your final, delicious dinner. We keep these components super organized—brine first, then the dredge—so everything moves smoothly when it’s time to fry. Trust me, grabbing quality bone-in pieces makes all the difference in achieving incredible Southern Fried Chicken.
For more great tips on getting that perfect crust, check out this advice on foolproof crispy chicken!
For the Buttermilk Brine
You need about three pounds of chicken here, bone-in and skin-on—that’s what gives you the best flavor and texture!
- 4 cups buttermilk
- 2 tablespoons kosher salt
- 1 tablespoon black pepper
- 1 teaspoon cayenne pepper
For the Crunchy Dredge Coating
This mix is where we sneak in the cornstarch for that extra crunch factor. Don’t leave it out!
- 4 cups all-purpose flour
- 1/2 cup cornstarch
- 2 tablespoons garlic powder
- 2 tablespoons onion powder
- 1 tablespoon paprika
How To Make Fried Chicken: Step-by-Step Technique
Alright, this is where the alchemy happens! Making incredible fried chicken isn’t hard, but you have to follow the structure. This process takes time, but every minute of waiting is worth the payoff: perfectly juicy and crispy chicken.
Preparing the Buttermilk Brined Chicken
First things first: marinate! Get your chicken immersed in that gorgeous buttermilk mixture. You absolutely need a minimum of four hours for this, but seriously, let it hang out overnight in the fridge. That acid tenderizes everything beautifully. When you take the pieces out, resist the urge to wipe them dry! The coating needs that wet suction cup effect provided by the residual buttermilk. Just let the really big drips fall back into the bowl before moving on.
Achieving the Perfect Fried Chicken Coating
Now we build that fortress of flavor! Work piece by piece. I scoop a piece out of the buttermilk and drop it right into the seasoned flour. You have to *press* that flour on, don’t just roll it around! Really push into it to create those craggy, uneven bits that turn into crunch. For the ultimate texture, follow the double-dip method: coat it, dip it *quick* back into the buttermilk, and then back into the flour for a final, heavy coat. Set these heavily coated beauties on a wire rack, just like the best cooks do, so the coating doesn’t get soggy underneath. You can see how they approach moisture retention over at The Rustic Elk.
Deep Frying for Golden Brown Chicken
Temperature control is your best friend here! You need your oil, ideally in a cast iron skillet, sitting steady at 325°F (160°C). Don’t rush this—use that thermometer! If you’re dropping in too many pieces at once, the oil temperature crashes, and you end up with greasy, pale chicken. Fry small batches for about 6 to 8 minutes per side. We are aiming for an internal temperature of 165°F (74°C) to ensure it’s safe but still wonderfully juicy. If you want to see a fantastic visual guide on keeping that heat steady, check out these step-by-step frying visuals!
Tips for Foolproof Fried Chicken Success
Look, I know frying can look intimidating—it’s hot oil, after all—but once you nail the safety and temperature controls, you unlock the secret to the crispiest fried chicken recipe imaginable. My background in recipe development taught me that consistency is everything, especially when dealing with deep frying. Follow these expert tips, and your fried chicken won’t just be good; it’ll be restaurant-worthy every single time.
For more assurance and great tips on making your coating perfect, you absolutely have to read through this guide on foolproof crispy chicken techniques. It backs up everything I’m about to tell you!
Managing Oil Temperature for Consistent Fried Chicken
This is the single most important thing you have to watch when making fried chicken. If your oil is too cold, the coating absorbs a ton of grease before it sets, and you end up with soggy, pale, sad chicken. If it’s too hot, the outside burns before the inside actually cooks through to that safe 165°F.
My number one recommendation is to use a cast iron skillet. It holds heat way better than thinner pots, which is crucial when you drop in cold chicken pieces. After each batch comes out, you *must* let the oil recover its temperature back up to 325°F (160°C) before you plunge the next batch in. Don’t rush it! That small bit of patience prevents your golden brown chicken from becoming a greasy mess.
Also, don’t forget that little addition mentioned in our notes: if you mix 1 teaspoon of baking powder right into that flour dredge, you get even more bubbles and surface area for crisping!
Ingredient Notes and Substitutions for Fried Chicken
Sometimes you look at a recipe and think, “Oh, I’m out of buttermilk!” or “Do I have to use that specific oil?” Don’t panic! Part of the magic Jules learned in Food Science is understanding ingredient functionality. We can always create delicious, reliable fried chicken even if we have to make a slight swap. This recipe is hardy, but knowing how to adapt it makes it truly yours.
For example, if you don’t have actual buttermilk on hand, you can easily whip up a substitute. Just take 4 cups of regular milk—whole milk works best for richness—and stir in 4 tablespoons of white vinegar or fresh lemon juice. Let that sit on the counter for about 10 minutes until it visibly curdles a little. Voilà! You’ve got your acid activator ready for that tenderizing brine.
When it comes to the frying medium, this recipe calls for vegetable oil because it has a high smoke point and is relatively neutral. However, for the most authentic, old-school flavor, you really want to think about shortening or even lard. Shortening gives you that amazing richness and helps the crust set beautifully without smoking out your kitchen. If you want to dig deeper into classic flavor profiles, Paula Deen’s approach to buttermilk brined chicken is legendary, and you can read up on her methods here: Paula Deen Buttermilk Fried Chicken. Just remember: whatever fat you choose, keep that temperature steady!
Serving Suggestions for Your Savory Chicken Dinner Ideas
Okay, you’ve pulled off the most glorious plate of fried chicken—it’s golden, it’s crunchy, and it smells like heaven. Now what? You can’t just eat it standing over the sink, right? (Although, I’ve definitely been tempted!). This comfort food chicken recipe demands equally comforting accompaniments. I always think back to my dad’s meals when planning the sides; he believed potatoes were mandatory.
The classic approach is always the winner. You need something creamy to balance out that peppery crunch. A big scoop of homemade mashed potatoes smothered in rich brown gravy is non-negotiable if you want the full Southern experience. If you’re looking for a tried-and-true method for getting those perfect potatoes and gravy pairings, you have to check out the dinner inspiration over at Country Fried Chicken Dinner—it’s a masterclass!
If you’re going for something a little lighter to cut through the richness, coleslaw is your best friend. A sharp, vinegary slaw works magic against the deep-fried batter. Cornbread is another must-have for soaking up any residual flavor from the plate. Honestly, once you master this crispy fried chicken recipe, the sides are just there to clean up the glorious mess!
Storage and Reheating Instructions for Leftover Fried Chicken
Nobody wants to find day-old fried chicken has lost its crunch, right? It’s the eternal struggle of making too much of this amazing food! But don’t worry your pretty little head; I’ve tested the best ways to store and reheat this masterpiece so that it tastes almost exactly like it just came out of the fryer. This is crucial for any great comfort food chicken recipe.
First, the storage rules. You *must* let the leftovers cool down slightly at room temperature—maybe 30 minutes—but don’t leave them out for hours; food safety is important! Once cooled, transfer the pieces to an airtight container. If you’re stacking them, stick a little square of wax paper or paper towel between the pieces. This prevents steam buildup, which is the mortal enemy of crispiness. The chicken is good in the fridge for up to three days. I promise, it holds up beautifully because of that initial buttermilk brine!
Now, the reheating part. Please, *please* do not microwave it. Microwaving turns those beautiful, crunchy edges into soft rubber instantly. That’s just sad. If you want that glorious, golden brown chicken texture back, you have two options, and both give you a fantastic result.
Your best bet is the oven or the air fryer. For the oven, preheat it to about 375°F (190°C). Lay your pieces on a clean wire rack set over a baking sheet—just like we did when they first came out of the oil. That airflow underneath is what keeps the bottom from steaming! Heat them for about 10 to 12 minutes. You want them hot all the way through, and you’ll hear that satisfying sound as the coating crisps back up.
If you have an air fryer, that’s even faster! Set it to 350°F (175°C) and pop the chicken in a single layer (don’t overcrowd!). It usually only takes about 5 to 7 minutes. It brings back the crunch remarkably well. You’ll be enjoying your amazing leftover deep fried chicken in no time!
Frequently Asked Questions About Perfect Fried Chicken
I know when you’re looking for the definitive Crispy Fried Chicken Recipe, you’re going to have a few lingering questions. Frying is a technique, and technique always brings up questions about variables! Don’t worry, I’ve pulled together the most common things folks ask me when they are trying to achieve that perfect, golden brown chicken crust right in their own kitchen.
Can I use chicken breasts instead of thighs for this fried chicken recipe?
Oh, absolutely! You can use any cut you love. However, you have to manage your time very carefully, especially since breasts don’t have bones adding insulation like the drumsticks or thighs do. If you use breasts, you’ll fry them for less time—maybe 5 to 6 minutes per side instead of 8. The biggest risk with chicken breast is drying it out completely. Keep that oil temp steady at 325°F, and use your thermometer! If you’re using just thighs and drums, that’s great, but for a detailed guide focused just on those cuts, check out the great tips on Fried Chicken Thighs!
What is the best oil to use for deep fried chicken?
For safety and effectiveness, you want an oil that has a high smoke point so it doesn’t break down right when hitting high heat. Peanut, canola, or pure vegetable oil are fantastic, reliable workhorses for this deep fried chicken recipe. Now, if you really want that classic Southern flavor that punches you in the best way, you should look at shortening or even lard. Those fats add an unmistakable richness that pure vegetable oil just can’t mimic. The only catch with shortening is that it melts a bit quicker, so you have to be extra diligent watching that oil temperature!
How do I prevent the coating from falling off my fried chicken?
This is the classic failure point, isn’t it? Soggy coating! The reason this happens is poor adhesion between the chicken and the flour. Remember the double-dip method we covered? That’s step one. You have to ensure that the crust is well-adhered. After the first quick coat of flour, that second dip in the buttermilk brings a fresh layer of moisture, and when you press it into the *final* coating of seasoned flour, you are physically molding a thick jacket onto the meat. Really press down until you see the little flakes and crevices forming. Those are your crunch zones!
Estimated Nutritional Data for Classic Fried Chicken
When you bring out something as delicious and comforting as fried chicken, I know you might be curious about what goes into your plate! As a recipe developer, I always run the numbers, but I want to be super clear: these figures are estimates. They are based on the components listed in this recipe—using the specified cuts of chicken and the deep-frying method—and they will change based on the exact size of your pieces and how much oil your crust absorbs. That’s the reality of deep fried chicken!
But for a beautiful, hearty serving, here is what you can generally expect from this Savory Chicken Dinner Idea:
- Serving Size: 1 piece
- Calories: 450
- Fat: 28g
- Saturated Fat: 8g
- Protein: 35g
- Carbohydrates: 15g
- Sodium: 750mg
See that high protein count? That’s what happens when you start with quality meat and use that incredible buttermilk brined chicken technique! It helps keep things incredibly savory. Enjoy this satisfying meal knowing that you mastered one of the best comfort food chicken recipes out there!
Share Your Everyday Alchemy
Wow. You did it! You channeled your inner chef and successfully turned humble ingredients into this absolutely stunning, Ultra-Crispy Buttermilk Southern Fried Chicken. I’m so proud of you for tackling a technique like deep-frying and coming out with something so magnificent. This is what Alchemy Chef is all about: unlocking that everyday magic!
Now, I desperately want to see your results! Did you get that perfect craggy crust? Did those drumsticks stay juicy? Head over to the comments below and tell me everything. Did you find that this recipe has officially replaced every other fried chicken recipe you’ve ever attempted? I bet it has!
If you love this classic fried chicken as much as my family does, please do me a huge favor and leave us a five-star rating right below—it helps other home cooks find reliable recipes like this one. And certainly, share a snap of your glorious, golden brown chicken on social media! Tag us so we can see your delicious creations. If you’re looking for more inspiration on buttermilk techniques, you might enjoy seeing what’s cooking over at Sugar & Soul!
Thank you for inviting my kitchen chemistry into yours. Happy cooking!
PrintUltra-Crispy Buttermilk Southern Fried Chicken

Make the best homemade fried chicken with this foolproof recipe. We use a buttermilk brine and a specific dredging technique to achieve a juicy interior and an ultra-crispy, golden-brown crust.
- Prep Time: 20 min
- Cook Time: 35 min
- Total Time: 4 hours 55 min
- Yield: 4 servings 1x
- Category: Dinner
- Method: Deep Frying
- Cuisine: American Southern
- Diet: None
Ingredients
- 3 lbs bone-in, skin-on chicken pieces (thighs and drumsticks recommended)
- 4 cups buttermilk
- 2 tablespoons kosher salt
- 1 tablespoon black pepper
- 1 teaspoon cayenne pepper
- 4 cups all-purpose flour
- 1/2 cup cornstarch
- 2 tablespoons garlic powder
- 2 tablespoons onion powder
- 1 tablespoon paprika
- Vegetable oil or shortening, for frying
Instructions
- In a large bowl, combine the buttermilk, kosher salt, black pepper, and cayenne pepper. Add the chicken pieces, ensuring they are fully submerged. Cover and refrigerate for at least 4 hours, or preferably overnight, for the best results.
- In a separate shallow dish, whisk together the flour, cornstarch, garlic powder, onion powder, and paprika. This is your dry dredge mixture.
- Remove the chicken from the buttermilk, letting excess drip off, but do not wipe it dry.
- Working with one piece at a time, dredge the chicken thoroughly in the flour mixture, pressing the flour onto the chicken to create a thick, craggy coating. For extra crispiness, dip the floured chicken back into the remaining buttermilk for a quick second dip, then return it to the flour mixture for a final, heavy coating. Set the coated chicken aside on a wire rack.
- Pour enough vegetable oil into a deep, heavy-bottomed pot or Dutch oven to reach a depth of about 2 inches. Heat the oil to 325°F (160°C). Use a thermometer to maintain this temperature.
- Carefully place 3 to 4 pieces of chicken into the hot oil, ensuring you do not overcrowd the pot, which lowers the oil temperature.
- Fry the chicken for about 6 to 8 minutes per side, turning occasionally, until the internal temperature reaches 165°F (74°C) and the crust is deep golden brown and crunchy. Adjust frying time based on the size of the pieces.
- Remove the cooked chicken from the oil and place it on a clean wire rack set over a baking sheet to drain excess oil. Do not place it on paper towels, as this can steam the crust and reduce crispiness.
- Allow the fried chicken to rest for 5 minutes before serving. Repeat the process with the remaining chicken, ensuring the oil returns to 325°F (160°C) between batches.
Notes
- For an extra crunchy coating, add 1 teaspoon of baking powder to your dry dredge mixture.
- If you are cooking in batches, keep the finished chicken warm in a 200°F (95°C) oven while you finish frying the rest.
- Use a cast iron skillet for superior heat retention, which helps maintain the oil temperature for consistent crispiness.
Nutrition
- Serving Size: 1 piece
- Calories: 450
- Sugar: 1
- Sodium: 750
- Fat: 28
- Saturated Fat: 8
- Unsaturated Fat: 20
- Trans Fat: 0
- Carbohydrates: 15
- Fiber: 0
- Protein: 35
- Cholesterol: 110