
Oh, honey, if you’re hunting for that one dessert that seems too decadent to be true but takes zero effort—I found it! Forget turning on that hot oven during these warmer months; we’re diving straight into the deep end with the ultimate no-oven treat: the million dollar pie. Honestly, when I first started developing reliable recipes for people, ease and incredible flavor were my non-negotiables. Coming from a science background doesn’t mean you can’t love comfort food, right? This classic version knocks it right out of the park because it relies on the perfect alchemy of rich cream cheese, sweet crushed pineapple, and that essential-for-texture, crunchy pecan topping. Trust me, this million dollar pie is pure gold.
- Why This Classic No-Bake Million Dollar Pie is Your New Favorite
- Essential Ingredients for an Authentic Million Dollar Pie
- Step-by-Step Instructions to Master the Million Dollar Pie
- Tips for the Perfect Set and Texture in Your Million Dollar Pie
- Serving Suggestions for Your Indulgent Creamy Treats
- Storage and Make Ahead Freezer Pies Instructions
- Frequently Asked Questions About Million Dollar Pie
- Nutritional Estimate for Your Creamy Million Dollar Pie
- Share Your Million Dollar Pie Creations
Why This Classic No-Bake Million Dollar Pie is Your New Favorite
Listen, I’m all about baking from scratch, but sometimes you just need perfection without the fire hazard! That’s why this pie is a staple for me, especially when I need amazing No Bake Dessert Recipes. It hits all the right notes: rich, tangy, sweet, and unbelievably creamy. If you thought pies meant hours in front of the oven, think again. This is one of those truly Easy Creamy Pies that disappears seconds after you put it on the table.
- It’s the ultimate crowd-pleaser for potlucks and summer parties.
- Zero oven time means a cooler kitchen!
- The flavor is deep and indulgent—it truly tastes like a million bucks!
Quick Prep Time for Your Million Dollar Pie
This is the real magic show right here. You are looking at maybe 15 minutes of actual work, tops, to get this whole thing assembled into the pie plate. I mean, you whip the crust, you beat the filling, you pour it in. Done! The rest of the time is pure, glorious waiting while it firms up in the fridge. That gorgeous chilling time is totally hands-off, which is exactly what we want when we need Quick Dessert Recipes.
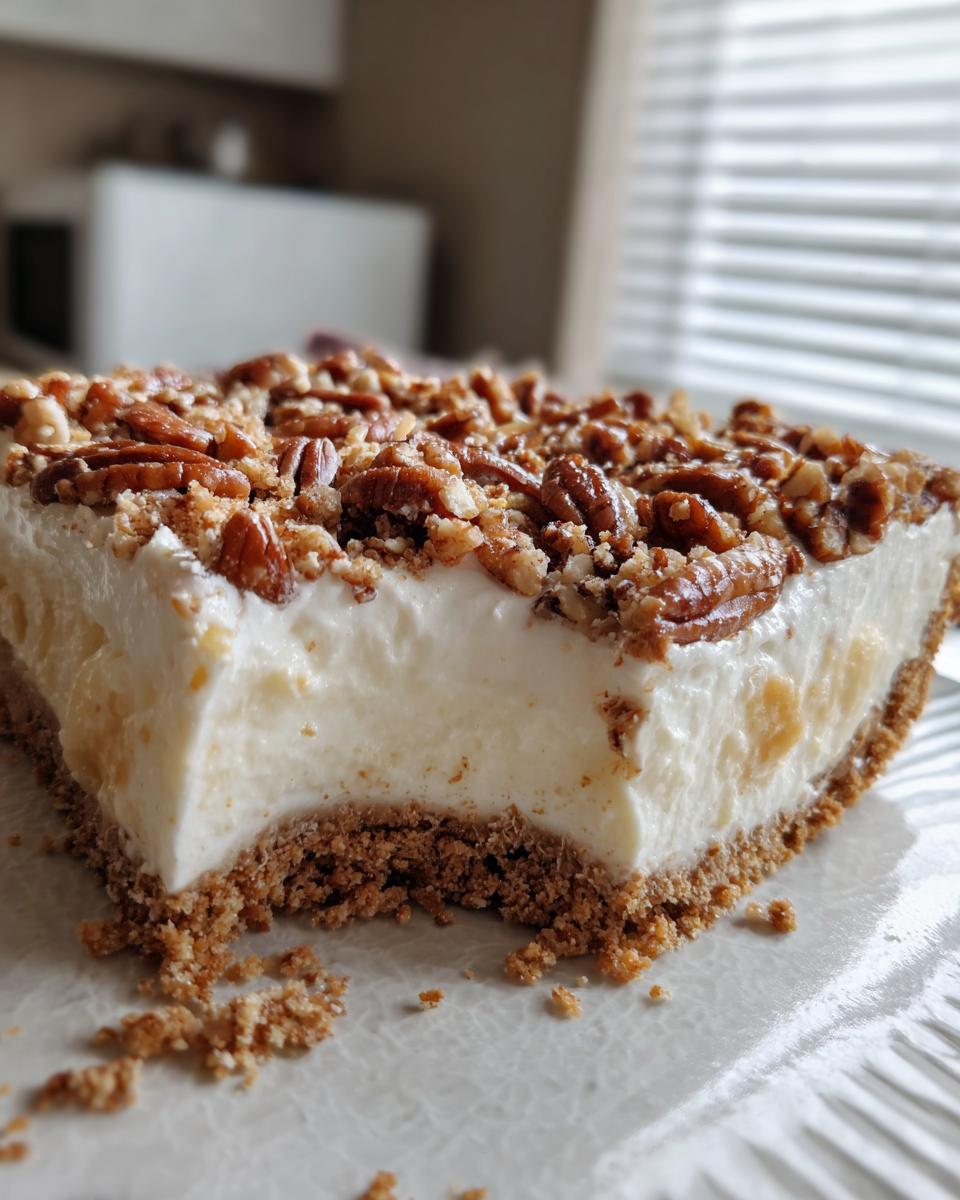
Essential Ingredients for an Authentic Million Dollar Pie
You know, Jules (that’s me!) believes that if an ingredient is important, you need to know exactly what it is and how to treat it. That’s the food science coming out in me—reliable results start with spot-on ingredients! For this particular Million Dollar Pie, we’re keeping things classic, relying on that sweet and tangy pairing we love. Having everything measured out before you start is half the battle, especially since this is a no-bake situation. When you use these exact components, you get that signature rich flavor that makes people ask for the recipe immediately. If you’re grabbing your ingredients, feel free to peek at what I use to nail the filling’s texture every single time.
- 1 1/2 cups graham cracker crumbs (for that crumbly base!)
- 1/4 cup granulated sugar (just for the crust, it helps it hold together)
- 6 tablespoons unsalted butter, melted (nothing substitutes real butter flavor, ever!)
- 8 ounces cream cheese, softened (make sure this is truly room temperature!)
- 1 (14 ounce) can sweetened condensed milk (this is the magic sweetener)
- 1/2 cup crushed pineapple, well drained (yes, *well drained*, trust me)
- 1 teaspoon vanilla extract
- 1 cup frozen whipped topping, thawed (or Cool Whip, because sometimes convenience wins)
- 1/2 cup chopped pecans, toasted (for that perfect little crunch on top)
Ingredient Notes and Substitutions for Your Million Dollar Pie
Okay, let’s talk about the two things that can make or break this pie: the pineapple and the nuts. My biggest warning, and I can’t stress this enough, is that you absolutely must drain that crushed pineapple until it’s practically dry. If you skip this, your pie filling will stay soupy, and that’s not a million-dollar texture, is it? You can press it between a few layers of paper towels if you need to! Also, if pecans aren’t your thing, or maybe you ran out, the recipe totally works if you swap them for 1 cup of sweetened, shredded coconut. It gives it a slightly different tropical vibe, which is lovely, but make sure it’s sweetened coconut to keep the balance right!
Step-by-Step Instructions to Master the Million Dollar Pie
Getting this masterpiece together is really straightforward, but precision matters, especially when you’re dealing with a no-bake foundation. Having studied the science behind why these things set up correctly, I can tell you that temperature control is everything here, particularly when you hit that mixing stage. Follow these steps exactly, and you’ll have saved yourself the heartbreak of a soupy center. Remember, that long chill time isn’t optional; it’s what turns this lovely mixture into a sliceable dream! You can find some visually helpful guides over at their site if you like seeing the process in action!
Preparing the Graham Cracker Crust for the Million Dollar Pie
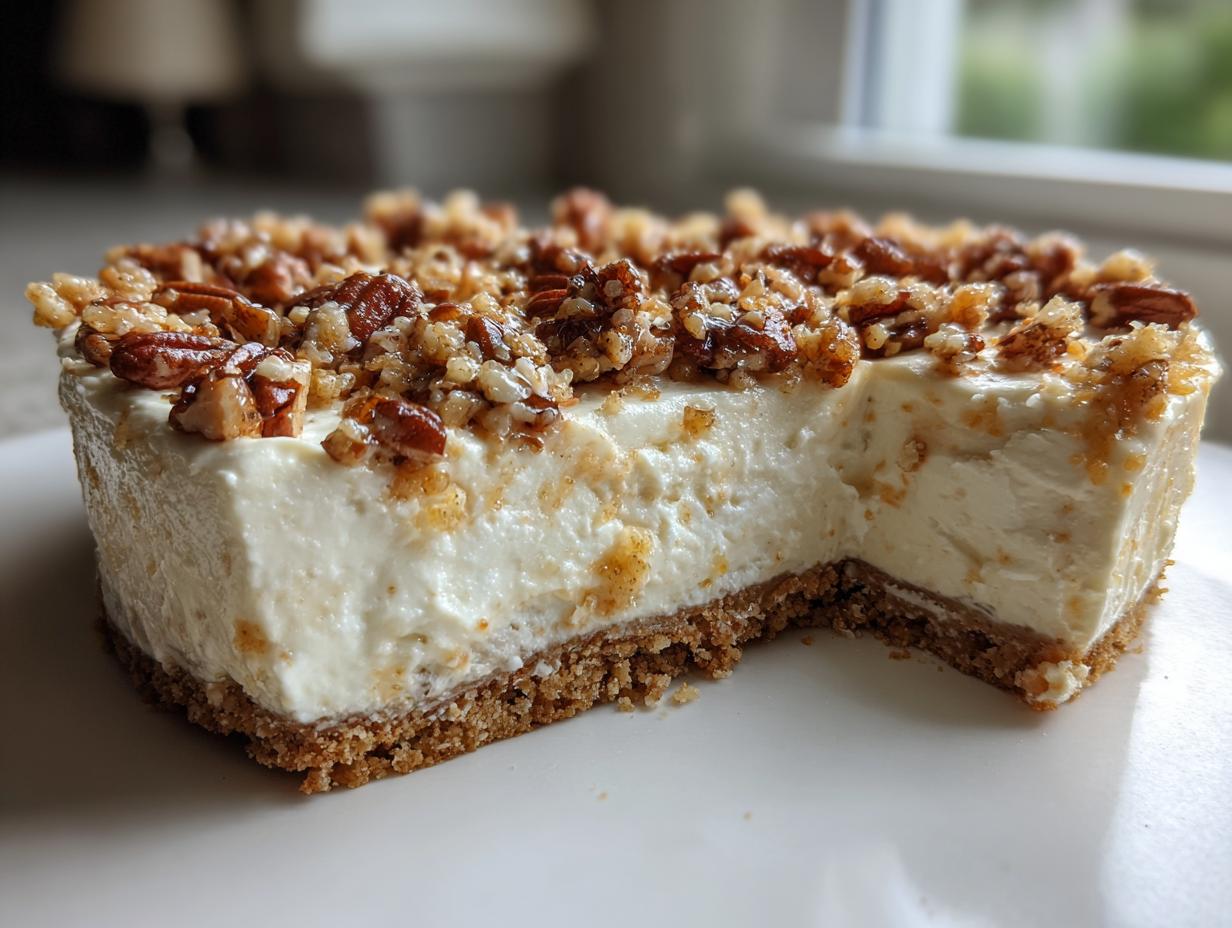
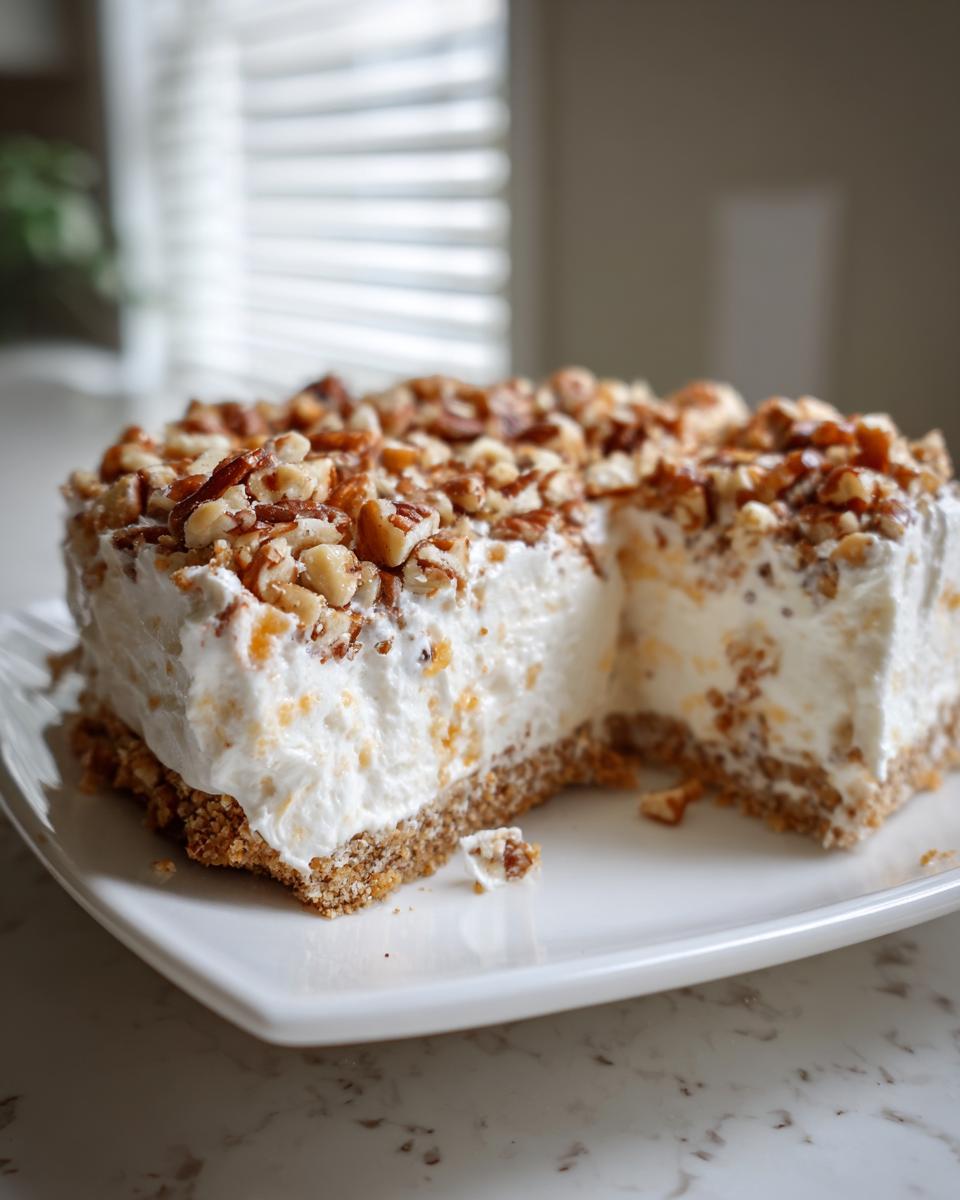
First up, we build the foundation—this buttery, sweet base we all love for our Graham Cracker Crust Desserts. In a medium bowl, just combine those graham cracker crumbs with the quarter cup of sugar. Then, pour in the melted butter and mix it up well. You want every crumb to look nice and wet, almost like wet sand when you squeeze it. Press this mixture firmly and evenly into the bottom and all the way up the sides of your 9-inch pie plate. I use the bottom of a measuring cup to really pack it down tight so it doesn’t crumble when we slice it later. Once it’s packed, stick it in the fridge for at least 15 minutes. This short chill helps everything firm up before the creamy filling lands on it.
Creating the Creamy Filling for Your Million Dollar Pie
Now for the fun part—the actual creamy layer! Grab your large mixing bowl. This is where temperature really counts. Make sure that cream cheese is truly soft—if it’s cold, you’ll get lumps, and we absolutely don’t want lumps in our million-dollar treat! Beat that softened cream cheese until it’s completely smooth and airy. Then, with the mixer running low, slowly beat in that can of sweetened condensed milk until everything is totally welcomed together.
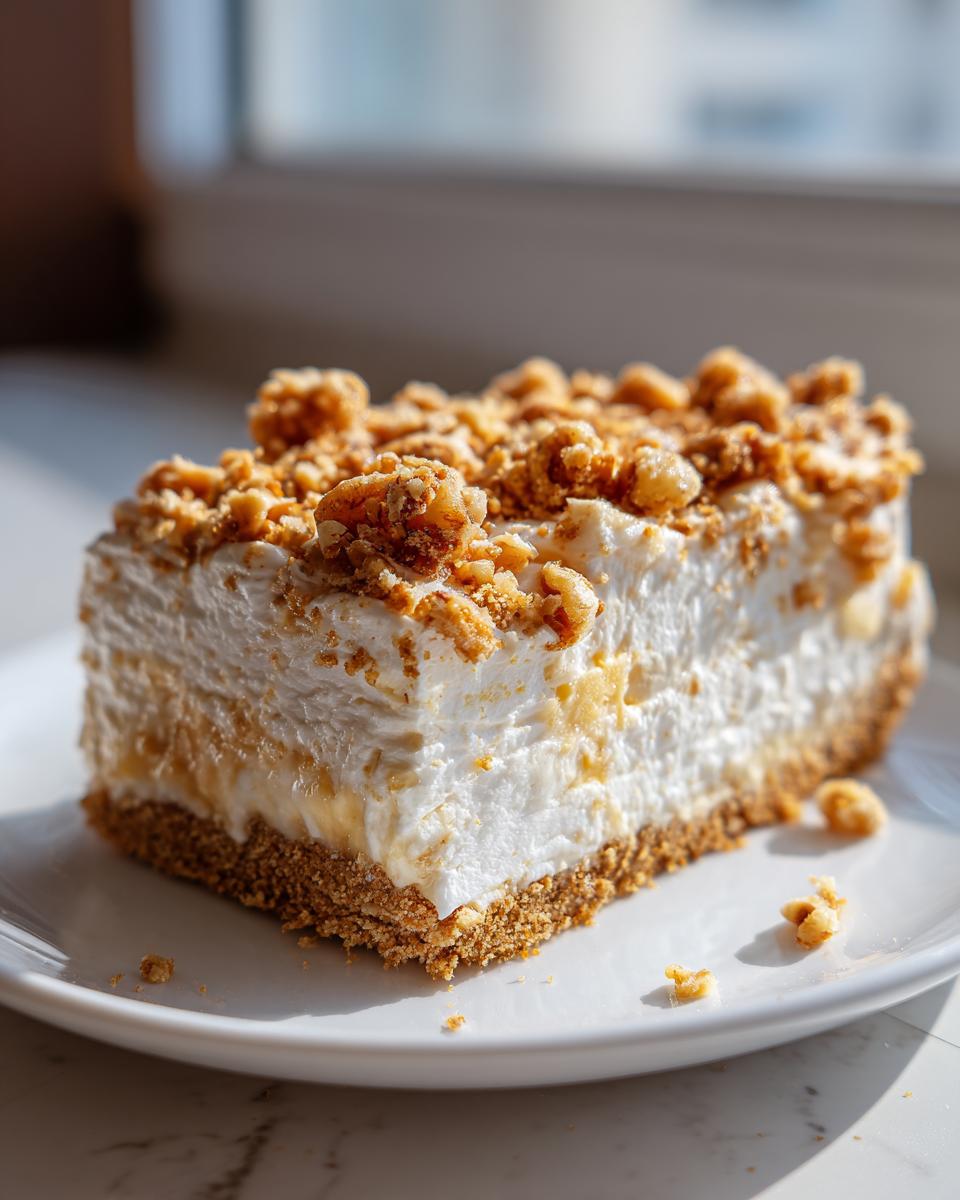
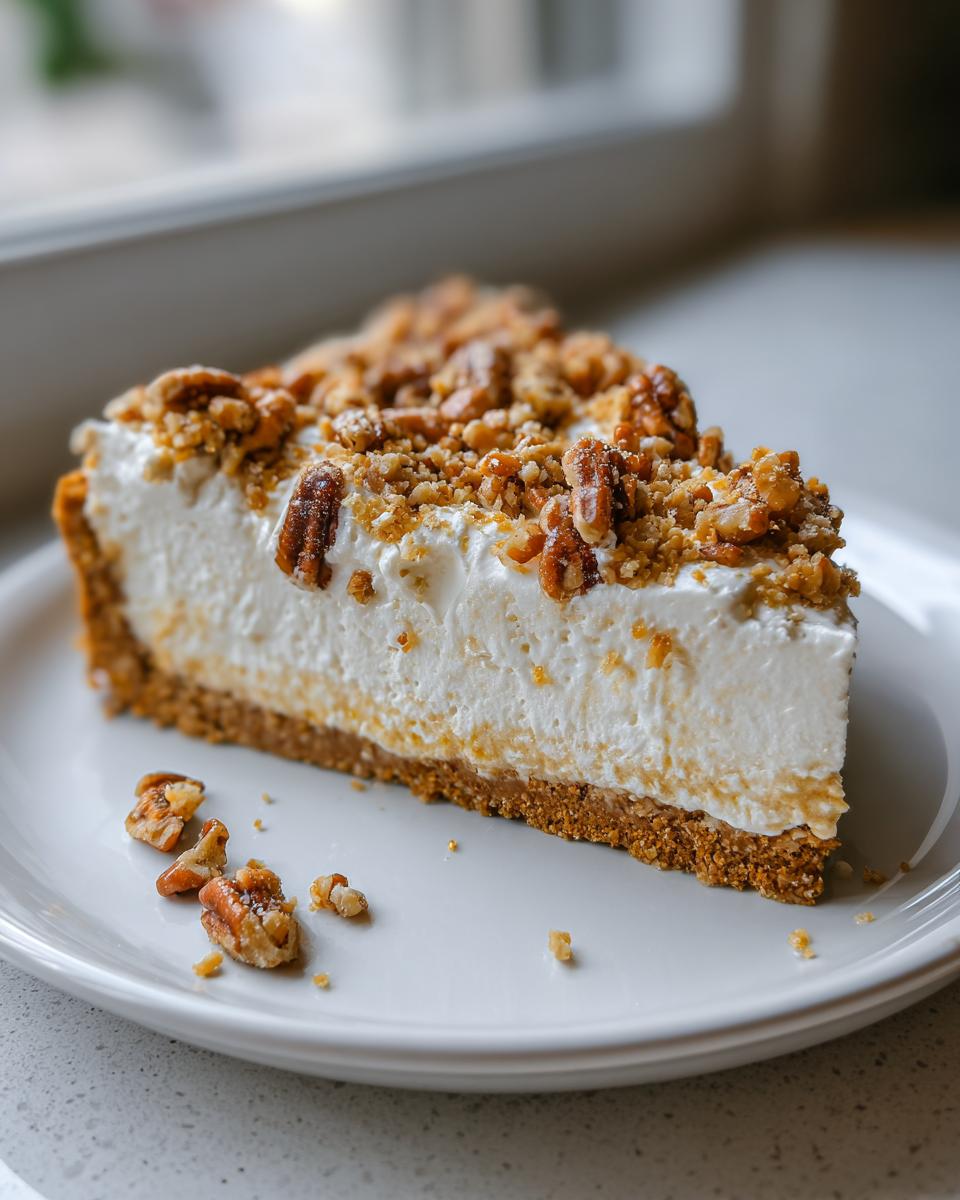
Next, mix in your vanilla extract and that super well-drained crushed pineapple. Mix just until it disappears—don’t overwork it here! The final step for building that light, fluffy texture is folding in the thawed whipped topping. Use a spatula for this, not the mixer, please! Fold gently, back and forth, until you don’t see any white streaks left. If you beat the whipped topping in, you deflate all the air, and we lose that beautiful loftiness that makes this pie so delicious.
Tips for the Perfect Set and Texture in Your Million Dollar Pie
Nobody wants a beautiful pie that slumps when you try to serve it, right? Especially with a no-bake gem like this, the set is everything! My biggest success tip centers around two simple chores you shouldn’t skip. First, please, please remember to toast those pecans! Toss them in a dry skillet over medium heat for just a few minutes until you can really smell that nutty aroma. Letting them cool before sprinkling them on top prevents them from melting the whipped topping layer.
Second, and this is truly the key to avoiding that runny filling nightmare? Chilling time is non-negotiable. Four hours is the absolute minimum if you want firm slices. But if you can resist for even longer—say, pop it in the fridge overnight—the texture becomes almost fudge-like and handles slicing beautifully. Patience is the secret spice in this and so many other Old Fashioned Comfort Desserts we make!
Serving Suggestions for Your Indulgent Creamy Treats
Now that you have this slice of heaven, how should you serve it? Since this pie—with its sweet creaminess and crunchy topping—is so rich, it pairs wonderfully with things that cut through that sweetness just a little bit. Think of it as a slightly lighter cousin to heavy, baked Southern Style Pies, but it still needs a little contrast!
The absolute best way to serve this is ice cold. Seriously, the colder it is, the firmer the structure and the more refreshing that pineapple tang becomes. Pull it from the fridge about five minutes before you slice it, but don’t let it sit out too long, or things get messy.
If you want to dress it up for a party, a small dollop of fresh, unsweetened whipped cream on the side of the plate is divine. It just balances out the intense sweetness from the condensed milk perfectly. Another fun idea? A sprinkle of finely grated orange zest right over the pecans adds a tiny burst of sunshine that really wakes up that cream cheese base. It’s these little touches that make a simple dessert feel extra-special, don’t you think?
Storage and Make Ahead Freezer Pies Instructions
So, you managed to have leftovers of this glorious Million Dollar Pie? Way to show restraint! Don’t worry if you made this ahead of time for a massive gathering; this recipe cleans up beautifully in storage. Since this is a no-bake dessert with dairy products, the fridge is your best friend for short-term holding.
For leftovers, just cover that pie plate tightly with plastic wrap. Make sure the wrap isn’t actually touching the pecan topping, or you risk pulling some nuts off when you unwrap it later. It stays perfectly delicious in the refrigerator for about three to four days. Any longer than that, and the graham cracker crust starts to get a little soft, which is sad.
Now, let’s talk freezing because this is one of the best Make Ahead Freezer Pies you can whip up! Yes, you can absolutely freeze this! You just have to prepare it slightly differently. Once the pie is fully set (after that minimum 4-hour chill), you need to cover the top surface tightly with plastic wrap first, then follow that with a layer of aluminum foil. Putting both layers on ensures you block out any freezer smells. It freezes beautifully for up to a month. When you want to eat it, just let it thaw overnight in the refrigerator. You might need to gently press down any moisture that pools on top before serving, but trust me, that creamy filling handles the freeze like a champ!
Frequently Asked Questions About Million Dollar Pie
I get so many wonderful messages from folks making this pie, and usually, the questions center around setting it up perfectly or swapping ingredients! It’s natural; we all have slightly different pantries. Don’t sweat it if your ingredients don’t match mine exactly, but always know that the core structure relies on that creamy base. Here are some of the most common things I hear, so you can bake with total confidence!
Can I make a million dollar pie without cream cheese?
Oh, that’s tricky! Honestly, the cream cheese is non-negotiable if you want that signature tangy lift that cuts through the sweetness of the condensed milk. It provides structure and flavor complexity that you just don’t get otherwise. If you absolutely must substitute—maybe due to dietary needs—you could try using an equal amount of mascarpone cheese. It’s richer and less tangy, so you might need to add a tiny squeeze of lemon juice to mimic that sharpness. But I have to warn you, the texture will be softer, moving it closer to a rich cheesecake texture rather than this light, dreamy filling. Think of it as a sibling recipe, not the same pie!
What makes this a million dollar pie instead of a millionaire pie?
This is one of those funny naming quirks in American desserts where two names mean basically the same thing! For my kitchen, and based on what I found scrolling through old cookbooks, the term million dollar pie usually signals the filling made with cream cheese, often featuring pineapple and pecans. The term “Millionaire Pie” sometimes leans toward versions that swap out the pineapple for chocolate and coconut—very also delicious, but a different flavor profile entirely! I stick to the cream cheese/pineapple/pecan combo because it is the classic Southern treat I keep perfecting. They both promise luxury, though!
How long does the million dollar pie need to chill?
If you’re in a rush, you *can* serve after about four hours if you used a very cold whipped topping and had a cold filling base going into the crust. But look, if you want those gorgeous, neat slices that stand up straight on the plate—the kind that make folks ooh and aah—you need to commit to overnight chilling. Letting this pie sit in the fridge for 8 to 12 hours makes a huge difference in how firm those Dessert Recipes with Condensed Milk become. It allows the sugars in the condensed milk to fully bond with the dairy solids. It’s worth the wait, I promise!
Nutritional Estimate for Your Creamy Million Dollar Pie
Because we love treating ourselves, but maybe we also like to know *what* exactly we are enjoying, right? I always feel that magic happens when you understand your food, even the super indulgent stuff like this million dollar pie. Now, I have to give you the standard disclaimer here: since I’m not exactly packing my pies with measuring scales in my home kitchen, these numbers are estimates based on the standard ingredients I list above, using conventional dairy products. They should give you a fantastic ballpark idea of what you’re diving into!
When you break down this truly decadent slice, you’re getting incredible flavor rewards. It’s perfect for those special occasions! Here’s the breakdown per serving:
- Serving Size: 1 slice
- Calories: about 410
- Fat: 22g (That beautiful butter and cream cheese working hard!)
- Saturated Fat: 12g
- Carbohydrates: 50g
- Sugar: 35g (It’s dessert, after all!)
- Protein: 6g
- Cholesterol: 45mg
Don’t forget, the toasted pecans add wonderful healthy fats and fiber, while the cream cheese and condensed milk give you that amazing richness that makes folks think this pie costs a fortune!
Share Your Million Dollar Pie Creations
And there you have it! The ultimate, effortless, no-bake dream dessert. I am so thrilled when you all try my recipes, especially the ones that feel like a little slice of Southern heaven, just like this million dollar pie.
Once you cut into that chilled, perfect wedge, please let me know how it turned out for you! Over on the recipe card, I’d love for you to drop a rating. Five stars means I did my job right, but honestly, knowing you loved it is what matters most to me.
Snap a picture! I live for seeing your beautiful results on social media. Tag me so I can see how you garnished your pie, whether you stuck to the classic pecans or went wild with coconut! You can find great examples of other bakers’ successes on their posts.
If you enjoyed making this easy, creamy triumph, I hope you’ll stick around! We have so many other Old Fashioned Comfort Desserts that rely on simple techniques to make massive flavor impacts. Go ahead, give this recipe your best shot. You deserve a little piece of that million-dollar magic today!
If you want to see the original inspiration that pops up sometimes, check out the reel I linked below. Happy baking—or rather, happy *not*-baking! See how they make their version!
PrintClassic No-Bake Million Dollar Pie with Cream Cheese and Pecans

Make this rich, creamy, and easy Million Dollar Pie without turning on your oven. It features a graham cracker crust, a sweet filling made with cream cheese and condensed milk, and a topping of pineapple and pecans for texture.
- Prep Time: 15 min
- Cook Time: 0 min
- Total Time: 4 hours 15 min
- Yield: 8 servings 1x
- Category: Dessert
- Method: No-Bake
- Cuisine: American
- Diet: Vegetarian
Ingredients
- 1 1/2 cups graham cracker crumbs
- 1/4 cup granulated sugar (for crust)
- 6 tablespoons unsalted butter, melted
- 8 ounces cream cheese, softened
- 1 (14 ounce) can sweetened condensed milk
- 1/2 cup crushed pineapple, well drained
- 1 teaspoon vanilla extract
- 1 cup frozen whipped topping, thawed (or Cool Whip)
- 1/2 cup chopped pecans, toasted
Instructions
- Prepare the crust: Combine graham cracker crumbs and 1/4 cup sugar in a bowl. Pour in the melted butter and mix until the crumbs are evenly moistened. Press the mixture firmly into the bottom and up the sides of a 9-inch pie plate. Chill the crust for at least 15 minutes while you prepare the filling.
- Make the filling base: In a large bowl, beat the softened cream cheese until it is smooth and fluffy. Gradually beat in the sweetened condensed milk until fully combined.
- Add flavor and fruit: Mix in the well-drained crushed pineapple and vanilla extract until just blended.
- Fold in whipped topping: Gently fold in the thawed whipped topping until no streaks remain, keeping the mixture light.
- Assemble the pie: Pour the cream cheese mixture into the chilled graham cracker crust and spread evenly.
- Chill: Cover the pie loosely with plastic wrap and refrigerate for at least 4 hours, or until the filling is firm. This chilling time is essential for a proper set.
- Garnish and serve: Before serving, sprinkle the toasted chopped pecans evenly over the top of the pie. Slice and serve cold.
Notes
- Drain the crushed pineapple very well; excess liquid will prevent the filling from setting correctly. Press the pineapple between paper towels to remove as much moisture as possible.
- For a slightly different flavor, substitute the pineapple with 1 cup of shredded, sweetened coconut.
- Toast the pecans lightly in a dry skillet over medium heat for 3-5 minutes until fragrant, stirring often. Let them cool before using as a topping.
Nutrition
- Serving Size: 1 slice
- Calories: 410
- Sugar: 35g
- Sodium: 280mg
- Fat: 22g
- Saturated Fat: 12g
- Unsaturated Fat: 10g
- Trans Fat: 0g
- Carbohydrates: 50g
- Fiber: 1g
- Protein: 6g
- Cholesterol: 45mg