
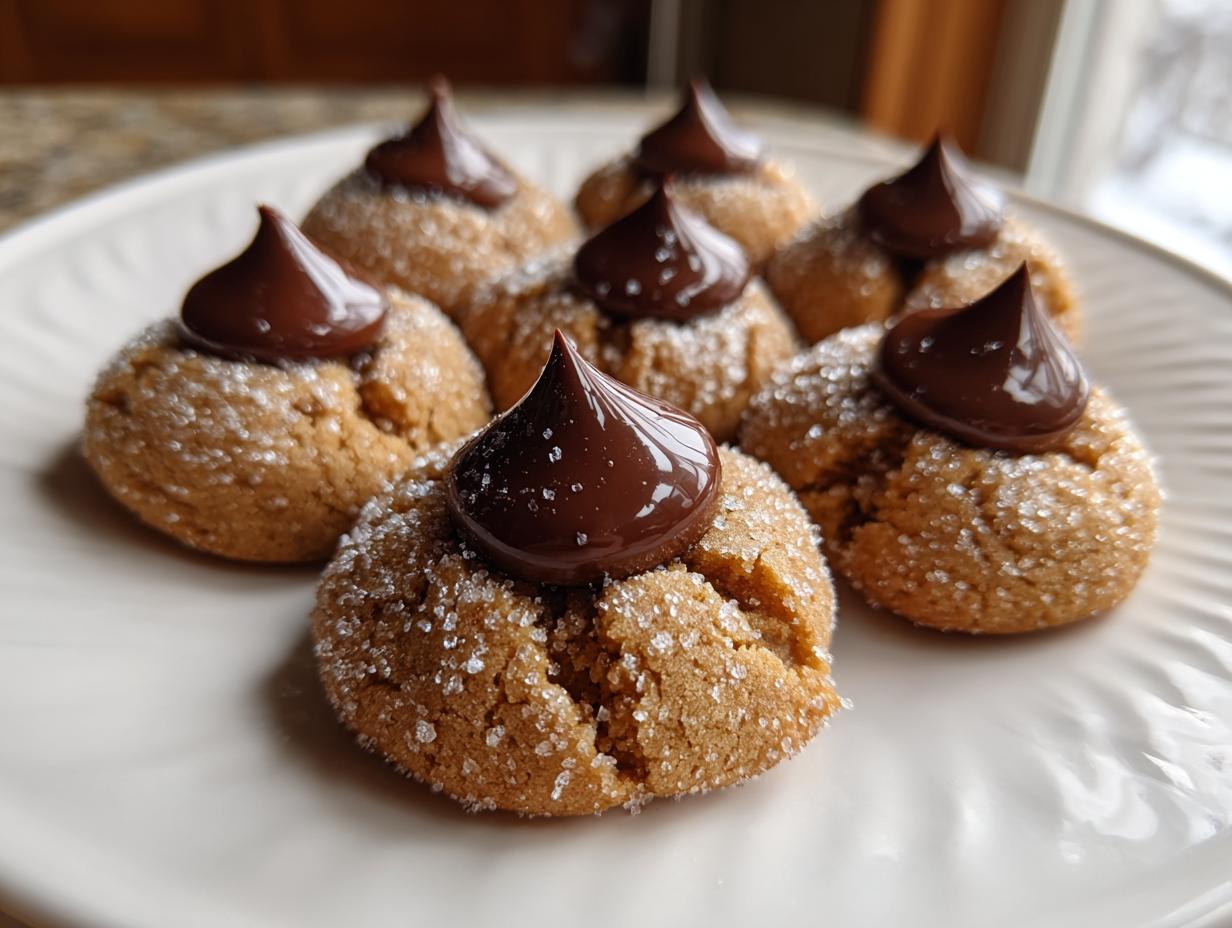
Isn’t there just a special kind of alchemy that happens when the holidays approach? You take simple flour, peanut butter, and a little chocolate, and suddenly you have comfort, history, and pure joy mixed together. When I set out to create our definitive recipe for what everyone calls **Kiss Cookies**, I wanted reliability above all else. Because my background is in Food Science and professional recipe development, I tested this batch relentlessly to make sure every single cookie, every single time, comes out perfectly soft and chewy with that classic chocolate ‘kiss’ pressed right on top. Trust me, the science behind this reliable classic makes all the difference!
- Why This is the Best Kiss Cookies Recipe You Will Ever Make
- Gathering Ingredients for Perfect Kiss Cookies
- Step-by-Step Instructions for Classic Kiss Cookies
- Tips for Success with Easy Kiss Cookie Recipes
- Storage and Reheating Instructions for Homemade Candy Cookies
- Variations on Kiss Cookies: Beyond Peanut Butter
- Serving Suggestions for Your Classic Holiday Cookies
- Frequently Asked Questions About Hershey Kiss Cookies
- Understanding the Nutrition in Your Kiss Cookies
Why This is the Best Kiss Cookies Recipe You Will Ever Make
Okay, friends, this isn’t just another recipe you find scribbled on a napkin. As a recipe developer, I’m obsessed with making sure the magic works every time, especially with baked goods. That’s why this is officially the Best Peanut Butter Blossom Recipe you’ll ever try!
- We bake them just shy of done so they stay wonderfully Soft and Chewy Blossom Cookies when cooled.
- Freezing those little Hershey’s Kisses beforehand is my non-negotiable rule—it stops them from totally melting into a puddle!
- The balanced sugar ratio guarantees that signature crackle on the outside while keeping that soft middle.
The Science Behind Soft and Chewy Kiss Cookies
It all comes down to consistency! Using room-temperature butter and eggs allows them to cream together perfectly, trapping tiny air pockets. These pockets create space inside the cookie structure. That precise mix of granulated and brown sugar ensures moisture retention. This scientific approach means your cookies puff just right during baking without spreading out too much. It’s the key to that perfect, slightly cracked dome!
Gathering Ingredients for Perfect Kiss Cookies
Okay, let’s organize our lab supplies! When you’re making these classic Kiss Cookies, ingredient quality really matters, especially since we’re keeping the base simple. I always stick to creamy JIF peanut butter—it just has the right consistency for that perfect dough. Remember, this recipe is designed to be reliable, so following these measurements exactly is my number one request. Grab everything before you start mixing!
- 1 ½ cups all-purpose flour
- ¾ teaspoon baking soda
- ½ teaspoon salt
- ¾ cup creamy peanut butter (JIF brand used in my testing!)
- ½ cup unsalted butter, very soft room temperature
- ⅓ cup granulated sugar (for the dough)
- ½ cup granulated sugar (for that beautiful outer coat)
- ⅓ cup light brown sugar, packed
- 1 large egg, room temperature
- 2 teaspoons vanilla extract
- 28 Hershey’s Kiss candies, unwrapped and frozen
If you want to check out other fantastic ideas for soft peanut butter treats, you should definitely sneak a peek at what Molly is doing over at her site. It’s always good to have backup inspiration!
Ingredient Notes and Substitutions for Your Kiss Cookies
Two things are absolutely crucial here, and you shouldn’t skip them. First, you MUST freeze those Hershey’s Kisses for at least 20 minutes before you bake! If they’re room temperature, they’ll just melt away completely when they hit that hot cookie. Second, the peanut butter. Creamy is best for that smooth dough, but if you are craving some texture in the actual cookie base—not just the topping—feel free to swap in crunchy peanut butter. It works brilliantly and still maintains reliability!
Step-by-Step Instructions for Classic Kiss Cookies
Alright, let’s turn these ingredients into magic! Baking these requires good timing, but don’t stress. We are aiming for that beautiful crackle and that perfect Hershey’s Kiss pressed right on top. Remember, before you even touch the butter, make sure that oven is warming up to 375°F (190°C) and your baking sheets are lined. Set those frozen Kisses nearby, because their moment comes fast! If you want to see how others handle the classic technique, this recipe really walks you through the process beautifully.
Mixing the Dough for Peanut Butter Blossoms Recipe
First things first: Cream your softened butter, peanut butter, the ⅓ cup of white sugar, and the packed brown sugar until they look light and happy—that takes a good few minutes. Now, don’t you dare overmix the flour! Add your dry ingredients slowly, mixing only on low speed just until you see everything combined into a soft dough. If you mix too much here, the cookies get tough, and we want soft and chewy, remember? Scrape down the bowl and move on to the next step.
Baking and Finishing Your Festive Candy Topped Cookies
Now for the fun part! Pour that remaining ½ cup of plain granulated sugar into a shallow dish. Roll your dough into uniform 1-inch balls and make sure they get a thick, complete coating of that sugar. Place them about two inches apart on your prepared sheets. Bake them for just 8 to 10 minutes—watch those edges; they should look set but the middle still needs to look a little soft. The second they come out of the oven, gently press one of those frozen Kisses right into the center. You need to do this immediately so the residual heat melts the chocolate just enough to stick. After a quick five-minute rest on the hot pan, transfer them to a rack to cool completely. You absolutely nailed it!
Tips for Success with Easy Kiss Cookie Recipes
Even with a reliable recipe like this one, every baker runs into little hiccups! I’ve pulled the best insider tips right from my testing notes to ensure you have zero disappointment. If you love seeing how others bake, this festive recipe shares some great visualization tips!
- Don’t Overbake! This is my biggest tip for achieving those soft and chewy results. Pull them out when the edges look set but the middle still looks a bit soft—they firm up beautifully on the tray.
- Freeze the Kisses: Seriously, freeze the wrapped candies! I usually stick them in the freezer while I’m mixing the dough, which gives them plenty of time to get rock solid.
- Handle Cracks: Sometimes those peanut butter dough balls crack when you roll them in sugar. Don’t worry about it! Those cracks look charming after baking and they provide the perfect little area for the chocolate to nestle into.
- Room Temperature is Key: Make sure your butter and egg are actually at room temperature, not cold from the fridge, so they cream together properly to trap that essential air.
Storage and Reheating Instructions for Homemade Candy Cookies
Keeping these treats soft and chewy after they’ve cooled down is just as important as getting them right in the oven! For the best texture, I always store my Homemade Candy Cookies in an airtight container at room temperature. You can place a slice of white bread next to them; it sounds old-fashioned, but it helps keep the cookies super soft overnight.
Now, if you’re trying to reheat them, be cautious! We don’t want to melt that beautiful chocolate top. Just warm them for about 10 seconds in the microwave—that’s really all it takes to soften the cookie base back up. Never try to reheat them if they are already fully cooled and the chocolate has hardened completely, as you risk making the chocolate seize or separate!
Variations on Kiss Cookies: Beyond Peanut Butter
You know, while the classic Peanut Butter Blossom is my heart, half the fun of baking is messing around with the dough underneath that perfect chocolate top! Once you master the base technique, you can totally pivot into other fantastic flavors. People are wild about swapping out the peanut butter dough for things that make these Red Velvet Kiss Cookies, or even chocolate! It’s amazing how the same sugar-rolling and pressing technique works for so many different cookie flavors.
We are talking about everything from cozy Snickerdoodle bases to intense chocolate cookies. If you want to try something really festive that smells incredible, you absolutely have to check out the gingerbread version when the holidays roll around. It’s the same concept, just wildly different spice!
Making Red Velvet Kiss Cookies
For the Red Velvet variation, you keep that same beautiful method of rolling the dough ball in sugar and pressing the Kiss in right out of the oven. The change is mainly in the flavor profile of the dough itself. You swap the peanut butter amount for cream cheese and add that signature splash of red food coloring. The texture is usually a little softer, almost cake-like, which pairs incredibly well with the rich, dark chocolate of the Hershey’s Kiss on top. It’s stunning on a holiday platter!
Serving Suggestions for Your Classic Holiday Cookies
These Classic Holiday Cookies are wonderful all on their own, but let’s talk about making them a real event! Because of the peanut butter goodness, they pair perfectly with a tall, cold glass of milk—it’s the ultimate throwback pairing. If you’re serving them after dinner, a robust cup of black coffee or a rich espresso really helps cut through that sweetness.
If you are creating a cookie tray, try balancing them with something tart or fruity. We love placing these next to our bright lemon shortbreads or maybe even some of the fun festive flavors mentioned in this collection. It makes for such a balanced plate!
Frequently Asked Questions About Hershey Kiss Cookies
I know you’ve got questions, because I certainly did when I first started testing these! Because we use specific techniques—like freezing the chocolate—sometimes bakers run into little snags. Don’t panic! These tips should get you sorted out so you have the prettiest platter of Hershey Kiss Cookies this season.
Why did my chocolate Kisses melt into the cookie?
This is almost always because the Kisses weren’t frozen long enough! If they are room temperature, the moment they touch the hot cookie coming out of the oven, they liquefy instantly. Make sure they are hard and chilled right up until the moment they go onto the cookie. If you’re finding them melting too fast even when frozen, it might mean your cookies are baking too long—you want that center slightly underdone!
Can I use a butter substitute or other peanut butter?
For the best results in this specific Peanut Butter Blossoms Recipe, stick to real butter and creamy peanut butter. The high-fat content in the butter is crucial for texture. If you absolutely must swap peanut butter, crunchy works fine, but creamy is better for a smooth dough base. I would strongly advise against using margarine or oil substitutes, as the fat balance will change, and you might end up with spread-out, greasy cookies instead of those pretty, puffy ones!
Can these be made ahead? How should I store them?
Yes, you can assemble these ahead, but there’s a big catch! You should only do the baking and rolling part. Wait until the cookies have cooled completely—and I mean completely—before you press the Kisses on top. If you press the Kiss on too early and then store them, the chocolate can sometimes get a weird, dusty look later on. Store them layered between parchment paper in an airtight container at room temperature. They are excellent for Kid Friendly Cookie Baking prep a day in advance!
What if I want to try Chocolate Kiss Cookies instead of peanut butter?
That’s a fantastic idea! If you want a fully chocolate version, you would substitute the peanut butter entirely and add cocoa powder to the dry ingredients, just like you would in a brownie. You might also need to slightly adjust your sugar, as the chocolate base is naturally less sweet than the peanut butter base. If you want a visual guide for a chocolate base, this sugar cookie base recipe can be easily adapted by adding cocoa!
Understanding the Nutrition in Your Kiss Cookies
Now, I know we aren’t exactly aiming for health food status here—these are glorious treats, after all! But because I love giving you the whole picture here at Alchemy Chef, I wanted to share the estimated nutritional breakdown for one of these wonderful Homemade Candy Cookies. Please keep in mind these numbers are based strictly on the recipe ingredients provided, serving size one cookie, and can change a bit based on your exact brand choices (like the peanut butter or the chip size).
- Serving Size: 1 cookie
- Calories: 150
- Sugar: 12g
- Sodium: 110mg
- Fat: 8g
- Protein: 4g
It looks like a perfect balance of sweet and satisfying fat for a wonderful little indulgence!
PrintClassic Peanut Butter Blossoms (Kiss Cookies)

Make the classic, soft, and chewy Peanut Butter Blossoms, a favorite holiday cookie topped with a melted chocolate kiss. This reliable recipe ensures perfect results every time.
- Prep Time: 15 min
- Cook Time: 10 min
- Total Time: 25 min
- Yield: 28 cookies 1x
- Category: Dessert
- Method: Baking
- Cuisine: American
- Diet: Vegetarian
Ingredients
- 1 ½ cups all-purpose flour
- ¾ teaspoon baking soda
- ½ teaspoon salt
- ¾ cup creamy peanut butter
- ½ cup unsalted butter, very soft room temperature
- ⅓ cup granulated sugar (for dough)
- ½ cup granulated sugar (for rolling)
- ⅓ cup light brown sugar, packed
- 1 large egg, room temperature
- 2 teaspoons vanilla extract
- 28 Hershey’s Kiss candies, unwrapped and frozen
Instructions
- Preheat your oven to 375°F (190°C). Line baking sheets with parchment paper.
- In a medium bowl, whisk together the flour, baking soda, and salt. Set aside.
- In a large bowl, cream together the soft butter, peanut butter, ⅓ cup granulated sugar, and brown sugar until light and fluffy.
- Beat in the egg and vanilla extract until just combined.
- Gradually add the dry ingredients to the wet ingredients, mixing on low speed until a soft dough forms.
- Pour the remaining ½ cup of granulated sugar into a shallow dish.
- Roll the dough into 1-inch balls. Roll each ball in the plain granulated sugar to coat completely.
- Place the coated dough balls about 2 inches apart on the prepared baking sheets.
- Bake for 8 to 10 minutes, or until the edges are set but the centers are still slightly soft.
- Immediately upon removing the cookies from the oven, gently press one frozen, unwrapped Hershey’s Kiss into the center of each cookie. The residual heat will soften the chocolate slightly.
- Let the cookies cool on the baking sheet for 5 minutes before transferring them to a wire rack to cool completely.
Notes
- Freezing the Hershey’s Kisses prevents them from melting completely into the cookie dough while baking.
- For the softest cookies, do not overbake. The cookies will firm up as they cool.
- You can substitute creamy peanut butter with crunchy if you prefer texture in the dough.
Nutrition
- Serving Size: 1 cookie
- Calories: 150
- Sugar: 12g
- Sodium: 110mg
- Fat: 8g
- Saturated Fat: 3g
- Unsaturated Fat: 5g
- Trans Fat: 0g
- Carbohydrates: 17g
- Fiber: 1g
- Protein: 4g
- Cholesterol: 20mg