
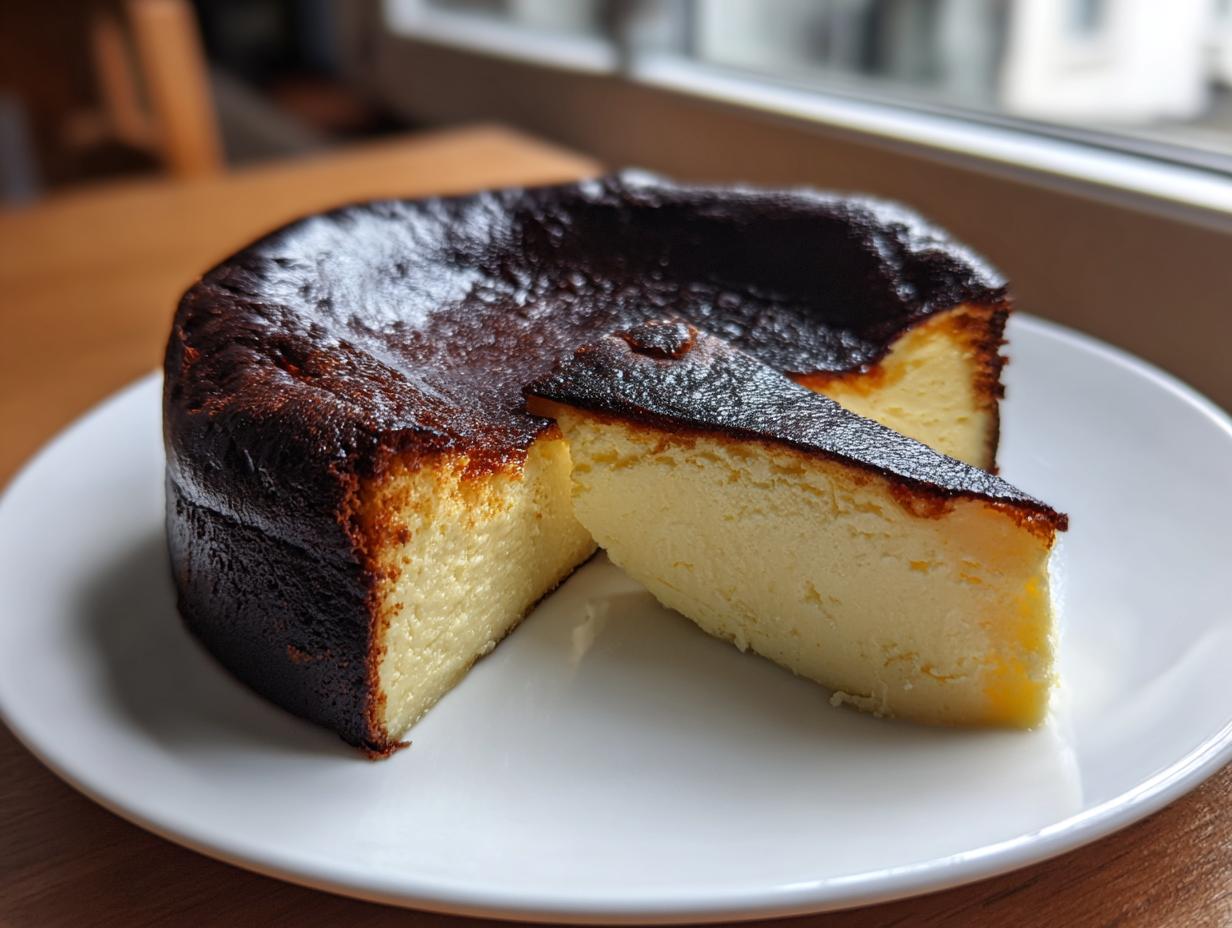
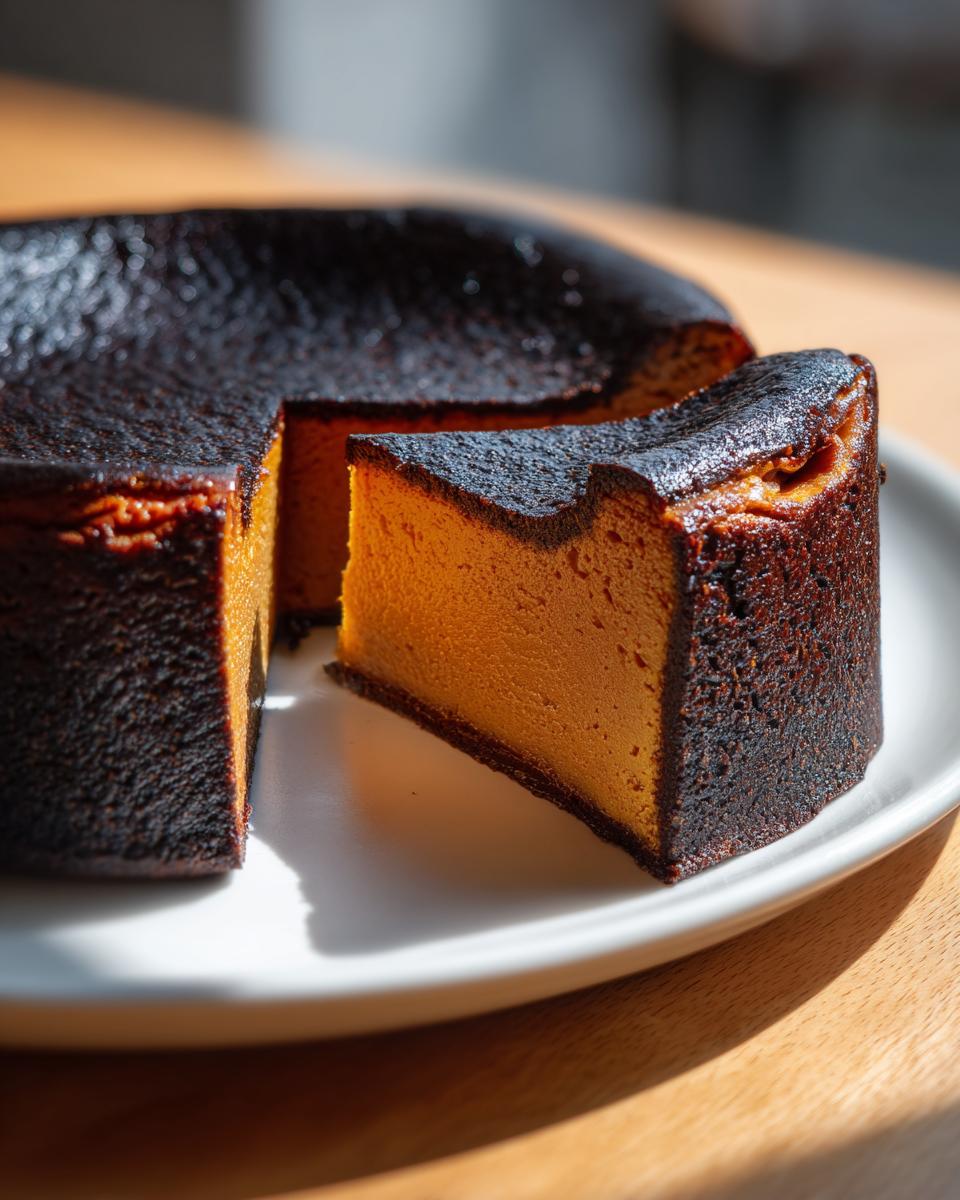
There’s just something irresistible about desserts that look like they’ve been lovingly pulled straight out of an old-world hearth—rustic, imperfect, and wonderfully dark on the edges. If you crave that kind of dramatic, impressive dessert without spending hours fussing over fiddly crusts, you’re going to adore what I have for you today. We are diving deep into the art of the **Basque Burnt Cheesecake**! This creation looks complicated, but trust me, it’s one of the best surprises in the baking world because it’s incredibly simple when you understand the science behind it. As someone who studied Food Science and developed recipes professionally for years, I promise you: this method is foolproof. This San Sebastian classic is ready to become your new go-to for a truly gourmet dessert at home. If you want to know more about the traditional Spanish side of this treat, check out the history over at The Spanish Apron.
- Why This Basque Burnt Cheesecake Recipe Delivers (The Alchemy Chef Promise)
- Essential Ingredients for Your Basque Burnt Cheesecake
- Step-by-Step: How to Prepare the Basque Burnt Cheesecake
- Tips for Success with Your Basque Burnt Cheesecake Recipe
- Serving Suggestions for This Decadent Spanish Desserts Style
- Storage and Reheating Instructions for Leftover Basque Burnt Cheesecake
- Frequently Asked Questions About Basque Cheesecake Recipe
- Nutritional Estimate for This Basque Burnt Cheesecake
- Share Your Kitchen Alchemy
Why This Basque Burnt Cheesecake Recipe Delivers (The Alchemy Chef Promise)
When I bring this stunning cheesecake to a gathering, everyone always asks if I spent all day wrestling with ice baths and fussy parchment paper. The answer is a resounding NO! That’s the magic here—it’s the ultimate promise of a no fail cheesecake recipe. We skip the water bath completely, which is really just extra stress we don’t need.
- It guarantees that gorgeous, rustic, collapsed look we are aiming for.
- It uses simple techniques that allow the phenomenal ingredients to shine through.
- You get that incredible texture contrast that makes this **creamy dessert idea** so addictive.
If you want to peek at exactly how to perfect that top layer, I wrote a piece on the secrets to the best temperature control over at Butter Joy Kitchen.
Achieving the Signature Creamy Dessert Ideas Texture
The key to that luscious, almost mousse-like interior? Room temperature dairy and eggs! When everything is the same temperature, it combines into one smooth emulsion without fighting each other. Then, we mix gently. We aren’t whipping air in like a traditional cake; we are just blending until it’s uniform. The high heat of the oven does the heavy lifting, setting the outside fast while allowing the middle to become that soft center cheesecake dream.
Mastering the Caramelized Top Dessert Finish
Let’s talk about the ‘burnt’ part, because that’s what trips people up! It’s not supposed to taste bitter or charcoal-y; it’s deep, complex caramelization. We are running the oven hot—a full 400°F—specifically so the sugars on top rapidly brown and scorch just enough. That deep color locks in flavor and creates that beautiful, slightly textured crust that cracks perfectly as it cools. It’s the hallmark of a proper Burnt Cheesecake Tutorial!
Essential Ingredients for Your Basque Burnt Cheesecake
Cooking is chemistry, and for this Basque Burnt Cheesecake, precision with temperature matters way more than measuring complexity! Remember, everything—and I mean everything—needs to be relaxed at room temperature before starting. This is my non-negotiable rule for the gourmet dessert at home experience. We need that gorgeous, smooth batter that only comes from happy, room-temp dairy.
Here’s what you need for that perfect 9-inch bake. If you want the full breakdown and the science behind the quantities, check out the details Eric shares over at Eric Flavors.
- 1.5 lbs cream cheese, room temperature
- 8 oz mascarpone cheese, room temperature
- 1 1/4 cups granulated sugar
- 4 large eggs, room temperature, plus 2 large egg yolks, room temperature
- 1 3/4 cups plus 1 tablespoon heavy cream
- Pinch fine sea salt
- 1 tablespoon all-purpose flour
Ingredient Notes and Substitutions
You’ll notice we use both cream cheese and mascarpone. The cream cheese gives us that classic tang, but the mascarpone is our secret weapon for extra decadence. It pumps up that luxurious mouthfeel we associate with the best cheesecake ever! Now, don’t panic about the flour—it’s just one tablespoon. This is designed to be a true crustless cheesecake recipe, so that tiny bit of flour helps stabilize the edges without making the center dense.
Step-by-Step: How to Prepare the Basque Burnt Cheesecake
Alright, get your 9-inch springform pan ready because things move quickly once you start mixing! Remember, your prep time here should be a zippy 15 minutes, which is amazing for what you’re about to pull out of the oven. First things first: you absolutely need to line that pan with two big sheets of parchment paper. Don’t fret about making it neat; honestly, I scrunch mine up a little bit just to embrace the rustic vibe. You want the paper to stick out way over the edges—like a big, crinkly collar. This overhang keeps the batter contained while it rises and collapses, and it makes removal so much easier later on. Once the pan is prepped, set your oven to preheat to 400°F (200°C). If you want to see a quick visual guide to this parchment trick, check out the photo tutorial over at Spatula Desserts!
Now comes the fun part—mixing! This whole Basque Burnt Cheesecake Recipe hinges on careful combining, especially for that 60 minutes in the oven later. Remember, we are working with room temperature ingredients, so they should blend like a dream!
Mixing the Batter: Gentle Incorporation is Key for Easy Cheesecake Baking
I ditch the electric mixer for this part because we need control. Grab a sturdy rubber spatula! First, press that room temperature cream cheese in a large bowl until it’s silky smooth. No lumps allowed! Fold in the mascarpone until it’s just happy and combined. Once smooth, beat in the sugar until you can’t feel any grit left. Now, introduce the eggs one by one, mixing just until each one disappears before adding the next, followed by the yolks. The key for easy cheesecake baking is going easy on the air incorporation here. When you stream in the heavy cream and salt, keep folding gently. Finally, sift that tiny bit of flour right over the top and fold until you just see a uniform color. Stop mixing right there! Overmixing after the flour goes in is how you kill that soft center!
Baking and Cooling for the Perfect Soft Center Cheesecake
Pour that luscious batter into your prepared, crinkly pan and pop it into the hot oven. Bake for 50 to 60 minutes. How do you know it’s done? Don’t rely on sight alone! The top should be that rich mahogany color—maybe even darkly charred in spots, which is totally what we want. But the real test is the wobble. When you gently shake the pan, the edges should look set, but the center needs to look like liquid custard still sloshing around. It should wobble dramatically! Don’t panic when it comes out; it will deflate a ton as it cools at room temperature for a solid three hours. After that, wrap it up and let it chill in the fridge for at least six hours, but honestly, overnight is where the magic solidifies the soft center cheesecake texture.
Tips for Success with Your Basque Burnt Cheesecake Recipe
I know we covered the basics in the steps, but let’s chat about a few insider tricks that make going from a good Basque Burnt Cheesecake to a truly unforgettable one. First, I have to stress the room temperature rule again. If your cream cheese is even slightly cold, you’ll fight lumps, and lumps kill the velvety texture we’re after. Give your dairy at least two hours out on the counter!
When it comes to the parchment paper, don’t try to be too neat. Scrunching it up gives the cheesecake those wonderfully crinkled, rustic sides that tell everyone this is authentic. It’s not meant to be perfect! Also, if you’re worried about springform pan leakage or you just want a smaller batch, this recipe is fantastic for trying Loaf Pan Cheesecake Baking. Just line a loaf pan really well, and you’ll need to cut that 60-minute bake time down a bit, so keep a close eye on it!
For the very best results, make sure you check out Adam’s guide on making this in a loaf pan over at Recipes by Adam for the timing adjustments!
Serving Suggestions for This Decadent Spanish Desserts Style
Okay, after all that anticipation, you finally pull this beauty out of the fridge. Don’t serve it ice cold! Remember, for the absolute dreamiest, creamiest bite—that signature velvety texture—you need to let it sit on the counter for about 30 to 45 minutes before slicing. Serving it closer to room temperature is the secret to the best cheesecake ever experience.
This dessert is so gorgeous on its own, it barely needs anything, but if you want to dress it up for your dinner party, keep it simple. A light dusting of powdered sugar makes a lovely contrast to that dark top. Or, if you want a pop of color for your **gourmet dessert at home**, fresh raspberries or thinly sliced strawberries are just perfect. They add a gentle tartness that cuts through the richness beautifully. If you need some inspiration on plate ideas, I love the presentation ideas shared at Recipe Tune!
Storage and Reheating Instructions for Leftover Basque Burnt Cheesecake
Even though this Basque Burnt Cheesecake is so wildly decadent you might think there won’t be any leftovers, it keeps like a dream!
You can absolutely store this rich cream cheese dessert covered tightly in the fridge for up to five days. That’s five days of effortless gourmet treats!
The trick, though, is how you serve it. When you pull a slice out of the fridge, resist the urge to dig in right away. Let it sit out on the counter for at least 30 minutes—closer to 45 if you want it truly silky again. We need that chill off to bring back that signature creamy texture we worked so hard for!
Frequently Asked Questions About Basque Cheesecake Recipe
It’s natural to have a few questions when you’re trying something as visually dramatic as this cheesecake for the first time—especially when the instructions sound almost too simple! Don’t you worry one bit. Baking shouldn’t be mysterious; it should be fun! I pulled together the questions I get most often about making this Basque Burnt Cheesecake to make sure your first attempt is perfect. And hey, if you want to dig into the history a little, Jaja Bakes has a fantastic write-up on the whole topic over at their site!
Do I really need to bake the Basque Burnt Cheesecake at such a high temperature?
Oh, trust me, it feels wrong, I know! You really, really do. The high heat—our 400°F—is the single most important thing that creates the texture contrast we love. It shocks the outside, caramelizing those sugars fast to form that gorgeous, dark skin, while the inside stays barely set and molten for that beautiful, signature wobble. It’s what turns it into a true Caramelized Top Dessert and not just a pale, sad baked cream.
Can I make this No Water Bath Cheesecake ahead of time?
You absolutely can, and I often recommend it! While the recipe says to let it cool on the counter for three hours, chilling it overnight is actually my personal favorite method. The texture firms right up, making it cleaner to slice (if you must slice it before eating it all!). Just remember my biggest serving rule: if you chill it overnight, pull it from the fridge about 45 minutes before serving. We want that incredible, silky center, and serving it too cold locks that creaminess away!
What is the difference between this and a New York Cheesecake?
That is such a great question, because both are amazing rich cream cheese desserts, but they live on totally different planets! The NY style is dense, smooth (thanks to the water bath!), and always relies on a firm, often graham cracker, crust. The Basque style, however, is crustless, baked hot and fast to maintain that molten core, and embraces being completely rustic and a little scorched on top. Think of the NY style as polished perfection and the Basque as deliciously rebellious!
Nutritional Estimate for This Basque Burnt Cheesecake
Because this creamy dessert involves rich dairy and sugar, I always feel it’s good practice to have a general idea of what’s in a slice. Keep in mind, these numbers are just an estimate based on the ingredients we used in this specific batch, so treat them as a guideline only! For the full details on the recipe we used, you can see the breakdown shared by Quick and Sweet Recipes.
For one generous serving (based on 8 servings yielding), you’re looking at:
- Calories: approximately 450
- Fat: 35g (with 22g Saturated Fat)
- Carbohydrates: 28g
- Protein: 8g
- Cholesterol: 180mg
Share Your Kitchen Alchemy
Now it’s your turn to work some magic! I put all my professional knowledge into making this **Basque Burnt Cheesecake** reliable, but the real magic happens when you try it for yourself. Did you get that perfect dark top? Was the center just as velvety as you hoped? Please head down to the comments and give this recipe a star rating—we made 8 perfect servings, so let me know how many you managed to save!
And seriously, tag me in your beautiful, wobbly creations online! Show off your rustic masterpiece, especially if you made it in a loaf pan, by tagging me—I absolutely love seeing your baking transformations. You can see some of the incredible results others are getting by checking out this reel! See what others are making over on Instagram: this short video.
PrintEasy Basque Burnt Cheesecake Recipe: Creamy Center and Caramelized Top
Create the stunning, rustic Basque Burnt Cheesecake with this straightforward recipe. You achieve the signature creamy, velvety interior and deeply caramelized exterior without needing a water bath. This is an impressive yet simple dessert.
- Prep Time: 15 min
- Cook Time: 60 min
- Total Time: 7 hours 15 min
- Yield: 8 servings 1x
- Category: Dessert
- Method: Baking
- Cuisine: Spanish
- Diet: Vegetarian
Ingredients
- 1.5 lbs cream cheese, room temperature
- 8 oz mascarpone cheese, room temperature
- 1 1/4 cups granulated sugar
- 4 large eggs, room temperature
- 2 large egg yolks, room temperature
- 1 3/4 cups plus 1 tablespoon heavy cream
- Pinch fine sea salt
- 1 tablespoon all-purpose flour
Instructions
- Line a 9-inch springform pan with two large sheets of parchment paper, allowing the paper to overhang on all sides. Do not worry about neatness; the rustic look is part of this dessert.
- Preheat your oven to 400°F (200°C).
- In a large bowl, use a rubber spatula to press the room temperature cream cheese until it is smooth.
- Add the mascarpone and mix until just combined and smooth.
- Add the granulated sugar and mix until the mixture is uniform and no sugar granules remain.
- Beat in the eggs one at a time, mixing only until each egg is incorporated before adding the next. Mix in the egg yolks.
- Slowly stream in the heavy cream and salt, mixing gently until the batter is smooth.
- Sift the flour over the batter and fold it in until just combined. Do not overmix.
- Pour the batter into the prepared pan.
- Bake at 400°F (200°C) for 50 to 60 minutes. The top should be deeply caramelized, almost black in spots, and the center should still wobble significantly when gently shaken.
- Remove the cheesecake from the oven. It will deflate as it cools. Let it cool completely on a wire rack at room temperature for at least 3 hours.
- Chill the cheesecake in the refrigerator for at least 6 hours, or preferably overnight, before serving.
- Serve at room temperature for the best creamy texture. Dust with powdered sugar or serve with fresh berries if desired.
Notes
- Use room temperature ingredients. This is key for a smooth, lump-free batter.
- Do not use a water bath. This cheesecake relies on high heat for its signature crust.
- For a denser texture, chill the cheesecake longer. For a more soufflé-like texture, serve closer to room temperature.
- This recipe works well in a loaf pan for a smaller, taller version; adjust baking time as needed.
Nutrition
- Serving Size: 1 slice
- Calories: 450
- Sugar: 35g
- Sodium: 250mg
- Fat: 35g
- Saturated Fat: 22g
- Unsaturated Fat: 13g
- Trans Fat: 0g
- Carbohydrates: 28g
- Fiber: 0g
- Protein: 8g
- Cholesterol: 180mg