
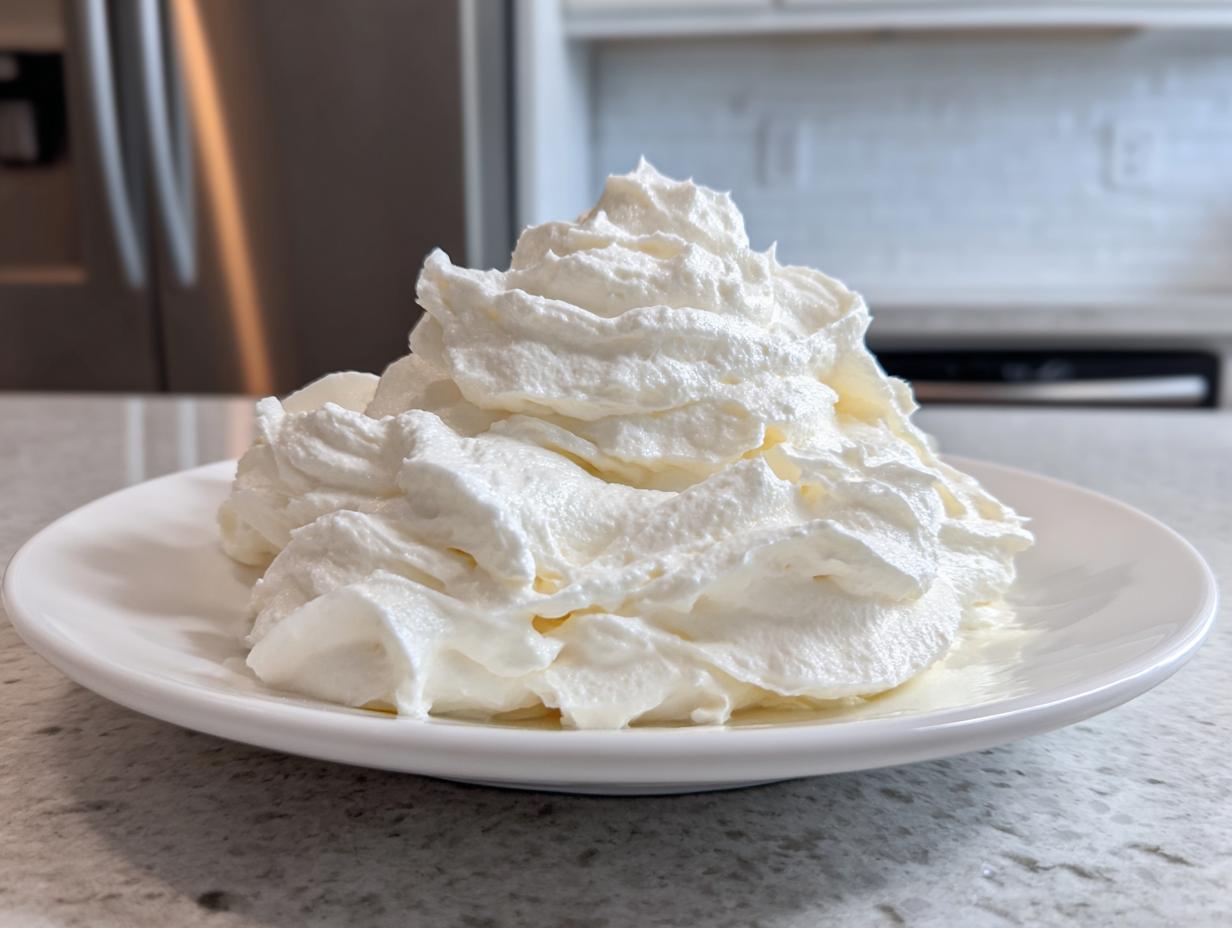
I can still vividly remember trying to frost my first birthday cake. It looked less like swirls and more like stiff, sad peaks that immediately slumped over. That struggle is exactly why I dedicated so much time to deconstructing the perfect topping! As someone who studied food science, I needed to know the ‘why’ behind the fluff. This recipe, the Ultimate Fluffy & Stable Vanilla American Buttercream Frosting, is the result of that quest. It’s rich, incredibly creamy, and unlike those overly sweet, gritty versions you find everywhere, this stellar vanilla buttercream delivers pure, smooth delight every time.
- Why This Vanilla Buttercream is Your New Go-To Recipe
- Ingredients for Perfect Vanilla Buttercream
- How to Make Fluffy Vanilla Buttercream Frosting Step-by-Step
- Tips for Achieving the Best Homemade White Frosting
- Stabilized Buttercream Recipe: Making Vanilla Buttercream Hold Its Shape
- American Buttercream Basics: Understanding This Classic Vanilla Buttercream
- Storage and Reheating Instructions for Your Vanilla Buttercream
- Frequently Asked Questions About Creamy Vanilla Frosting
- Serving Suggestions for Classic Vanilla Cake Topping
Why This Vanilla Buttercream is Your New Go-To Recipe
Seriously, ditch those frustrating recipes that leave you with sugary sludge! I spent years nailing down the exact science so you don’t have to re-whip things constantly. This is the easy vanilla buttercream frosting recipe that works, even if you’re just starting out. It just clicks! Plus, it’s stable.
What makes this my favorite? I wanted something that felt luxurious but was tough enough for real decorating. Because of the process, you get:
- Silky smooth results; no more gritty texture, ever.
- Incredible richness without being cloyingly sweet.
- The structure you need for gorgeous, crisp details—perfect fluffy buttercream for piping onto cupcakes or borders on cakes.
- It’s fast! You can have perfect frosting ready for assembly in less than 15 minutes. I learned this trick back when I needed a last-minute topping for a friend’s birthday cake, and now I rely on this easy recipe all the time.
Ingredients for Perfect Vanilla Buttercream
The beauty of this recipe, and most classic American buttercream, is that it relies on pantry staples you probably already have on hand. That’s part of why it’s such a satisfying quick and easy dessert topping! But, Jules here wants you to know that the *quality* and *state* of these simple items make all the difference between a gritty mess and that ultra-smooth texture we are chasing.
When you gather these, make sure you’re ready to go, because we are moving fast once the mixer starts. I always lay everything out first—my food science background screams at me to measure precisely!
Here is what you’ll need to create that amazing topping:
- 1 cup (226g) unsalted butter. This is crucial: it absolutely must be softened to room temperature. If it’s too soft or melted, your frosting will weep!
- 4 cups (480g) powdered sugar. You *must* sift this! Trust me, putting un-sifted sugar in will leave you with little hard white pebbles later, which ruins that perfectly creamy vanilla frosting mouthfeel.
- 1 teaspoon pure vanilla extract. Don’t cheap out on this; it’s one of the main flavors!
- 1/4 teaspoon salt. This little bit cuts the rich sweetness perfectly.
- 2 to 4 tablespoons heavy cream or milk. We use this sparingly to hit the exact consistency we need, whether for spreading or piping.
When you see the final product, you’ll understand why those specific preparations—softening and sifting—are non-negotiable for achieving the best results. You can check out more details on achieving that rich flavor profile over at Sweetly Cakes when you’re ready to compare notes!
How to Make Fluffy Vanilla Buttercream Frosting Step-by-Step
Okay, this is where the alchemy happens! It’s fast, truly—we’re talking under 15 minutes total, which is why I love using this for quick dessert topping emergencies. But speed doesn’t excuse rushing. The secret to that perfect mouthfeel—that smooth frosting recipe quality—is paying close attention to the process, especially how long you beat the mixture. Ready? Grab your stand mixer or a strong hand mixer. We are making magic right now. If you want to see the exact timing laid out by another fantastic baker, I always suggest popping over to check out Yum Savor for extra visual help!
Creaming the Butter for a Smooth Start
First thing: your butter must be at that perfect room temperature. You know it’s right when it feels plush but isn’t greasy. Pop the softened butter into the mixer bowl with the paddle attachment. We beat this alone, right on medium speed, until it looks completely smooth, almost like silk, which takes about 3 glorious minutes. Don’t skip this! You need a perfectly smooth base for the rest of this creamy vanilla frosting tutorial. Make sure to stop the mixer and scrape down the sides really well; unseen butter chunks are the enemy of smooth frosting!
Incorporating Sugar and Whipping for Lightness
When you add the sifted powdered sugar, you must go slow. Start on the absolute lowest speed—otherwise, you’ll end up wearing your beautiful sugar! Just one cup at a time, waiting until it’s barely mixed in before adding the next. Once all the sugar is in, toss in your vanilla and salt. Now, for the critical part: turn that mixer up to medium-high. You need to whip this for a full 3 to 5 minutes. Seriously! This long whipping is what incorporates the air that turns it from heavy icing into that light, fluffy vanilla buttercream everyone raves about. This is the main difference between mine and some of those disappointing recipes!
Adjusting Consistency for Spreading or Piping
After that vigorous whipping session, check the texture. If it seems wildly stiff, we introduce the liquid. Add the heavy cream or milk just one tablespoon at a time, beating well after *each* addition until it feels perfect for spreading across your cake layers. If you’re aiming for that gorgeous, stiff texture needed for fluffy buttercream for piping borders or detailed work, sometimes it’s better to add less liquid than you think you need. If it seems too soft after you’ve added the recommended amount, don’t panic! Just pop the whole bowl into the fridge for about 10 to 15 minutes. Chilling slightly makes it instantly firmer and ready for piping, just like the pros do it over at Savory Sweet Life suggests!
Tips for Achieving the Best Homemade White Frosting
Look, I want you to skip the grainy texture entirely. That’s why I’m sharing the absolute must-dos that I learned while developing this so you can get that pure, smooth frosting recipe every single time. My background in food science really hammers home the importance of controlling the environment, even for something as simple as this topping!
First off, let’s talk butter temperature again. I know it sounds boring, but it’s everything for a creamy result. I always test mine by pressing lightly with my finger; it should leave a soft indent but not sink straight through like warm pudding. If your butter is melted, you are making soup, not frosting! My father, the retired Navy chef, always said, “The texture is set before you even turn the mixer on, Jules.”
The second huge element is dealing with the powdered sugar. If you skip sifting it, you are basically trusting Lady Luck that all the little clumps won’t end up right in the middle of your gorgeous cake layer. Do yourself a favor and sift it right before you add it, one cup at a time, just like we discussed. For even more insights into perfecting your technique, you can always look at what the wonderful bakers over at Natasha’s Kitchen are doing!
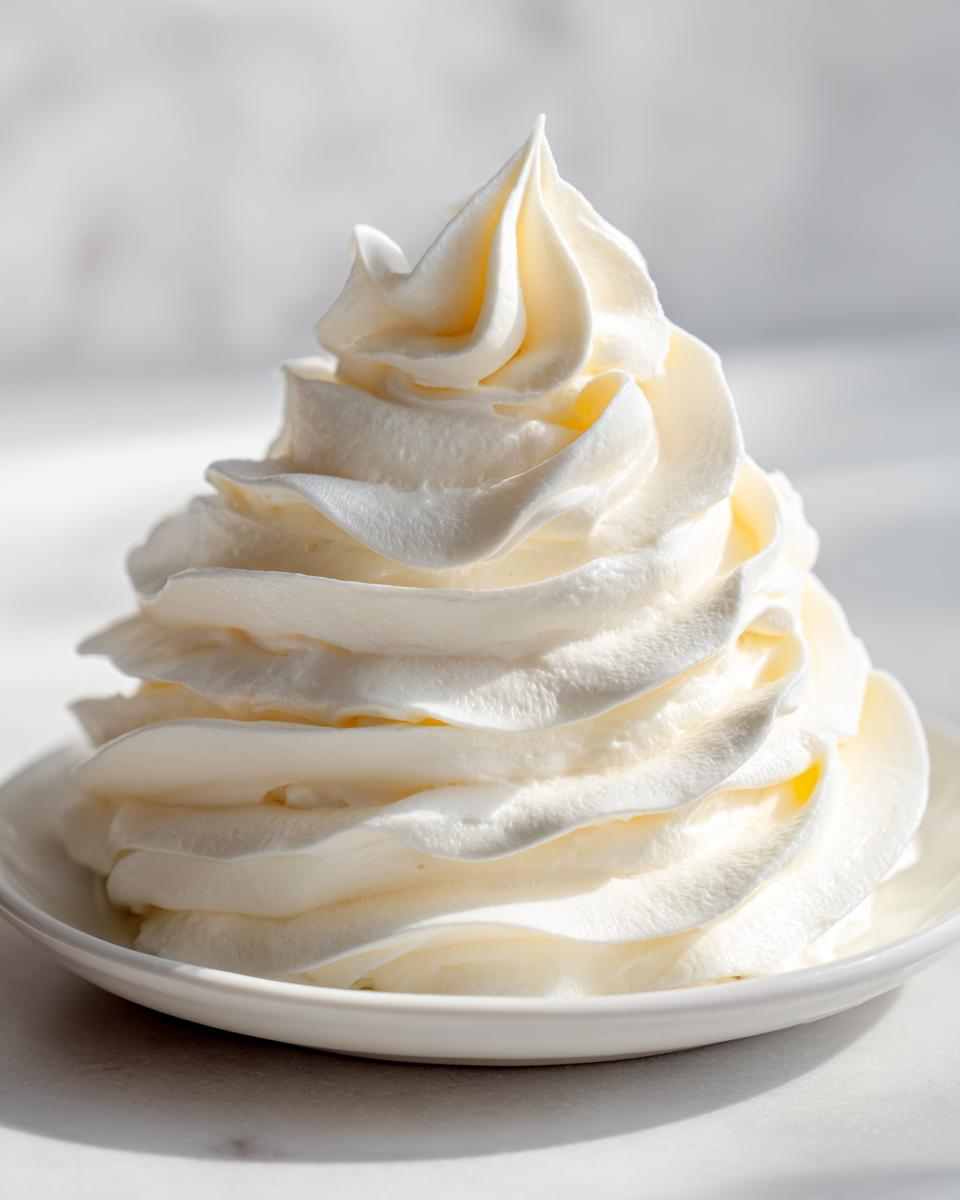
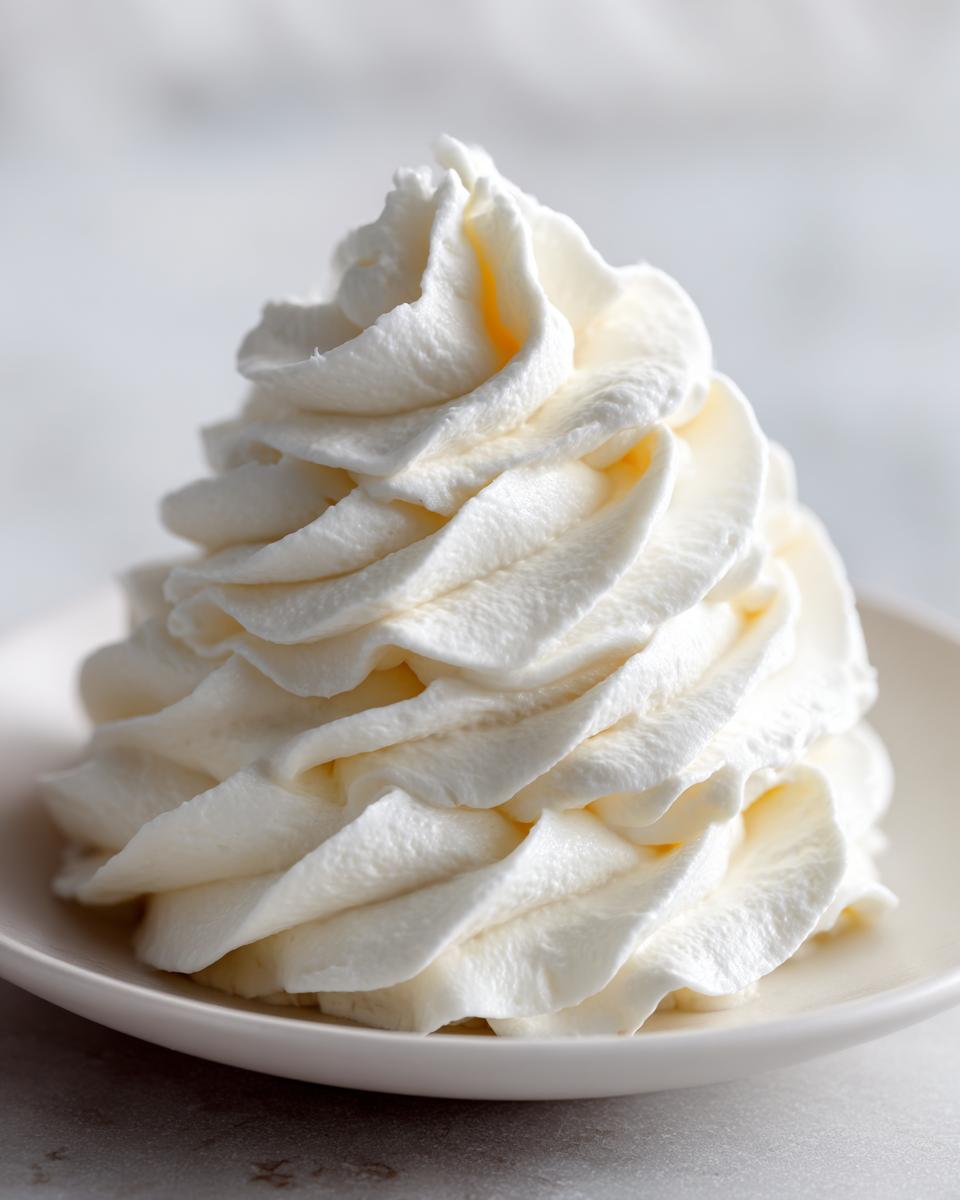
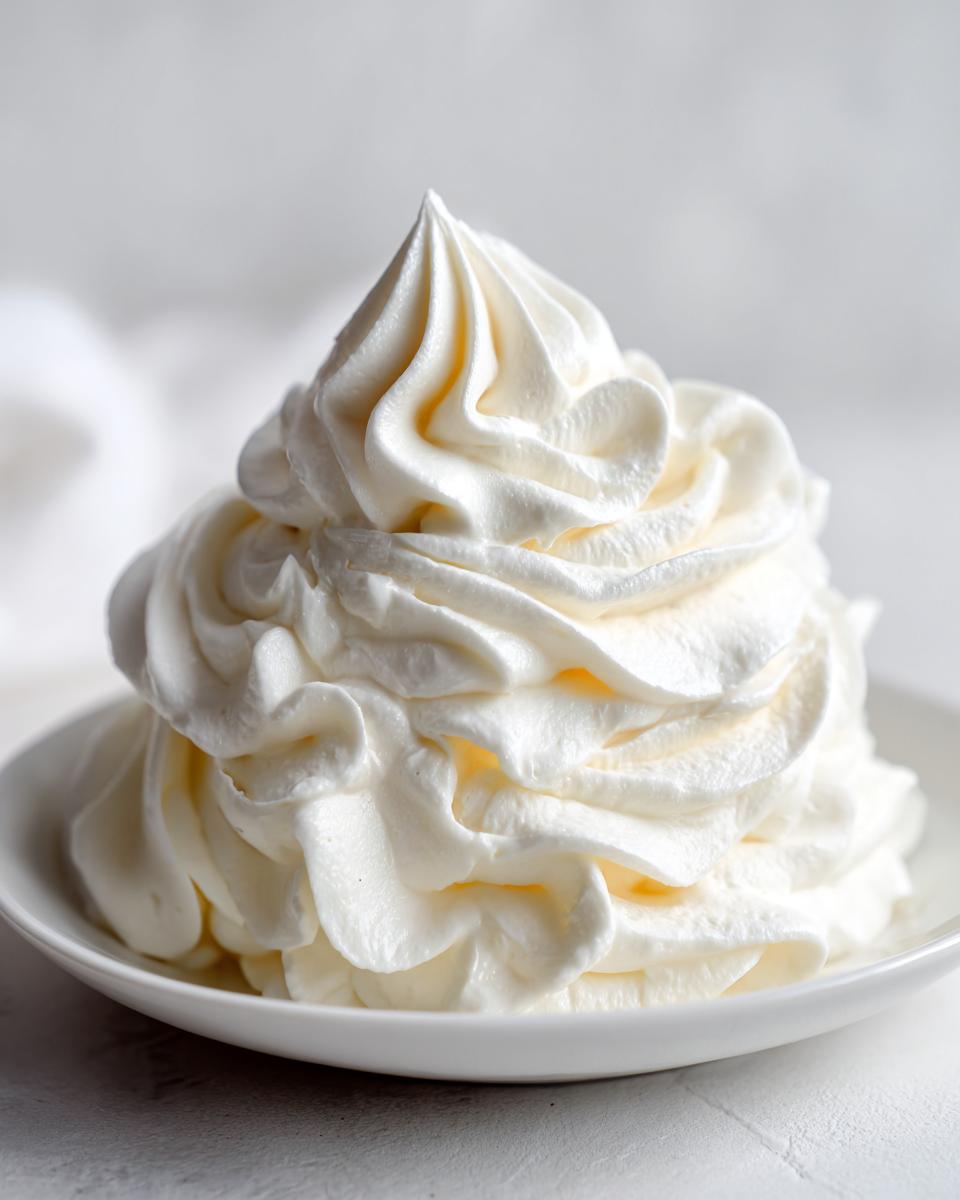
Stabilized Buttercream Recipe: Making Vanilla Buttercream Hold Its Shape
Okay, let’s talk structure, because no one wants a lovely layer cake that tilts halfway through dessert. Achieving that perfectly stabilized buttercream recipe texture is actually baked right into this American formula! Since this vanilla buttercream relies heavily on the fat from the butter and the sheer density of the powdered sugar, it naturally holds its shape much better than lighter, meringue-based frostings.
If you follow the whipping instructions—especially pushing those 3 to 5 minutes of high-speed mixing—you’re creating micro-air pockets that lock in structure. This gives you that sought-after, professional look, making it feel like true bakery style vanilla frosting. For really intricate piping work, however, my go-to trick is always to slightly reduce the liquid, or better yet, just chill it!
If your batter looks perfect but you know it’s a hot day or you need those sharp edges, place the bowl in the fridge for just 10 or 15 minutes. It firms up so beautifully, and you can whip it again briefly before putting it onto your cake. You can find some fantastic examples of how bakers use this structure over at Cook Tasty Bites!
American Buttercream Basics: Understanding This Classic Vanilla Buttercream
I’m going to level with you—this recipe is pure American Buttercream, and that’s exactly why it’s so trustworthy! When we talk about american buttercream basics, we are talking about the simplest, most beloved frosting foundation: butter and powdered sugar whisked together until dreamy. It’s totally different from the delicate Swiss or Italian meringue types that require thermometers and crazy egg-white whipping.
For the home baker, this means reliability and speed. My vanilla buttercream doesn’t need to sit over a double boiler; it whips up right in the bowl while you’re cleaning up your measuring cups! Because we aren’t relying on cooked elements, this version is slightly denser and definitely sweeter, but when balanced right, it provides that beautiful structure that makes decorating so satisfying. Folks love it because it’s what we all grew up expecting on a classic chocolate or vanilla layer cake. You can see how other bakers approach this essential base when looking at tutorials like the one on Cook Tasty Bites!
Storage and Reheating Instructions for Your Vanilla Buttercream
We’ve spent 10 minutes making this incredible, creamy vanilla frosting, and of course, we want it to last! Luckily, this American style vanilla buttercream stores beautifully because it’s mostly fat and sugar. You never want to waste a batch of perfect frosting, right?
If you have leftovers after frosting your cake or cupcakes, store it in an airtight container at room temperature for up to two days. Yes, that’s right—room temp! Since it doesn’t have cooked egg whites, it’s pretty happy out on the counter, provided your kitchen isn’t scorching hot. If you need to store it longer than that, pop it into the fridge, or go straight to the freezer if you made a massive batch for later!
Bringing chilled frosting back to life is the most important retrieval step. Never use it straight from the fridge if you want that beautiful, spreadable texture; it’ll be rock hard! If it’s been refrigerated, let it sit on the counter for an hour or two until it’s softened slightly. Then, put it back in the mixer bowl, add just a tiny splash (maybe a teaspoon) of milk or cream, and beat it on medium speed for a minute or two. It will smooth out perfectly. If it was frozen, give it a whole day to thaw in the fridge first, then follow the same easy reheating process. For a great reference on timing storage, check out the helpful guide over at Daisy Recipe!
Frequently Asked Questions About Creamy Vanilla Frosting
I know you might have a few last-minute doubts before you dive into the mixer. That’s totally normal! When you’re aiming for that creamy vanilla frosting tutorial quality, details matter. Here are the most common things folks ask me when they’re trying to achieve this perfect vanilla buttercream.
1. Can I skip sifting the powdered sugar?
Oh, I really advise against it! Sifting might feel like an unnecessary chore when you just want a smooth frosting recipe right now, but trust me, those little lumps of sugar do not melt away during the 5 minutes of whipping. They just sit there, making your beautiful frosting gritty. It’s the biggest secret to a truly professional, silky texture. If you skip sifting, you risk getting that disappointing crunch instead of that smooth, melt-in-your-mouth quality.
2. How do I make this vanilla buttercream extra white?
Since we are using pure vanilla extract, which is amber/brownish, it naturally gives the frosting a slight ivory or pale yellow tint—that’s a good thing, honestly! It shows you used the real stuff. If you absolutely need that stark, brilliant white for a specific décor piece, you have two options. First, use clear vanilla extract instead of pure vanilla extract, although you might lose a little depth of flavor. Second, and this is a trick I’ve used when developing recipes for bright white cakes, add the **tiniest** drop of violet or blue food coloring. It sounds wild, but it neutralizes the yellow tint, making the final product appear pure white. You can see some fantastic decorating ideas using stable frosting over at Cooking by Jade!
3. Is this truly a quick and easy dessert topping? How long does it really take?
Yes! This is why I called it the 10-minute frosting! Prep work aside (like getting your butter soft and sifting your sugar), the active mixing time is super short. Once the butter is ready, you are looking at about 3 minutes of creaming, 2 minutes of slow sugar incorporation, and then that crucial 3 to 5 minutes of high-speed whipping. If your mixer is strong, you can often have this ready to go in under 10 minutes total. It’s the definition of a no fail buttercream when time is tight!
4. Can I use salted butter instead of unsalted?
You certainly can, but you have to adjust the salt measurement! Unsalted butter gives me better control over the final flavor, which is important when you are going for that rich, classic taste. If you only have salted butter on hand, use it, but definitely skip adding the extra 1/4 teaspoon of salt we listed in the recipe, and then taste it before serving. If it still tastes a little flat, you can add a tiny pinch—less than you think you need!
Serving Suggestions for Classic Vanilla Cake Topping
Now that you have this unbelievably perfect, classic vanilla cake topping whipped up, you might be thinking, “What do I use it on first?” Honestly, I want to eat it with a spoon, but we have baked goods to adorn! This stabilized vanilla buttercream is incredibly versatile because it’s sturdy enough for decoration but smooth enough for mixing.
Beyond just slapping it on standard vanilla cupcakes—which it’s amazing on, by the way—here are a few specific ways I recommend using this frosting:
- Filling for Layer Cakes: Because you whipped it for so long, it’s light enough to act as a filling, but it won’t squish out when you cut into your cake. It’s heaven layered between slices of lemon cake or chocolate cake!
- Brownie Topper: Seriously, forget the fudgy ganache sometimes. Spread a thick layer on your cooled sheet brownies. When slightly chilled, it sets just enough to give you that incredible, creamy textural contrast.
- Sandwich Cookies: Use two crisp shortbread cookies and pipe a generous ring of this frosting between them. It’s the perfect amount of sweet to balance the buttery cookie, and it holds its piped shape perfectly during storage. For more great ideas on using buttercream in different ways, check out the foundational recipes at Moist Recipes!
I always save a little bit just to dollop onto warm brownies because, well, just because! You can find a ton of inspiration for pairing this perfect flavor base over at Bake My Meal.
Print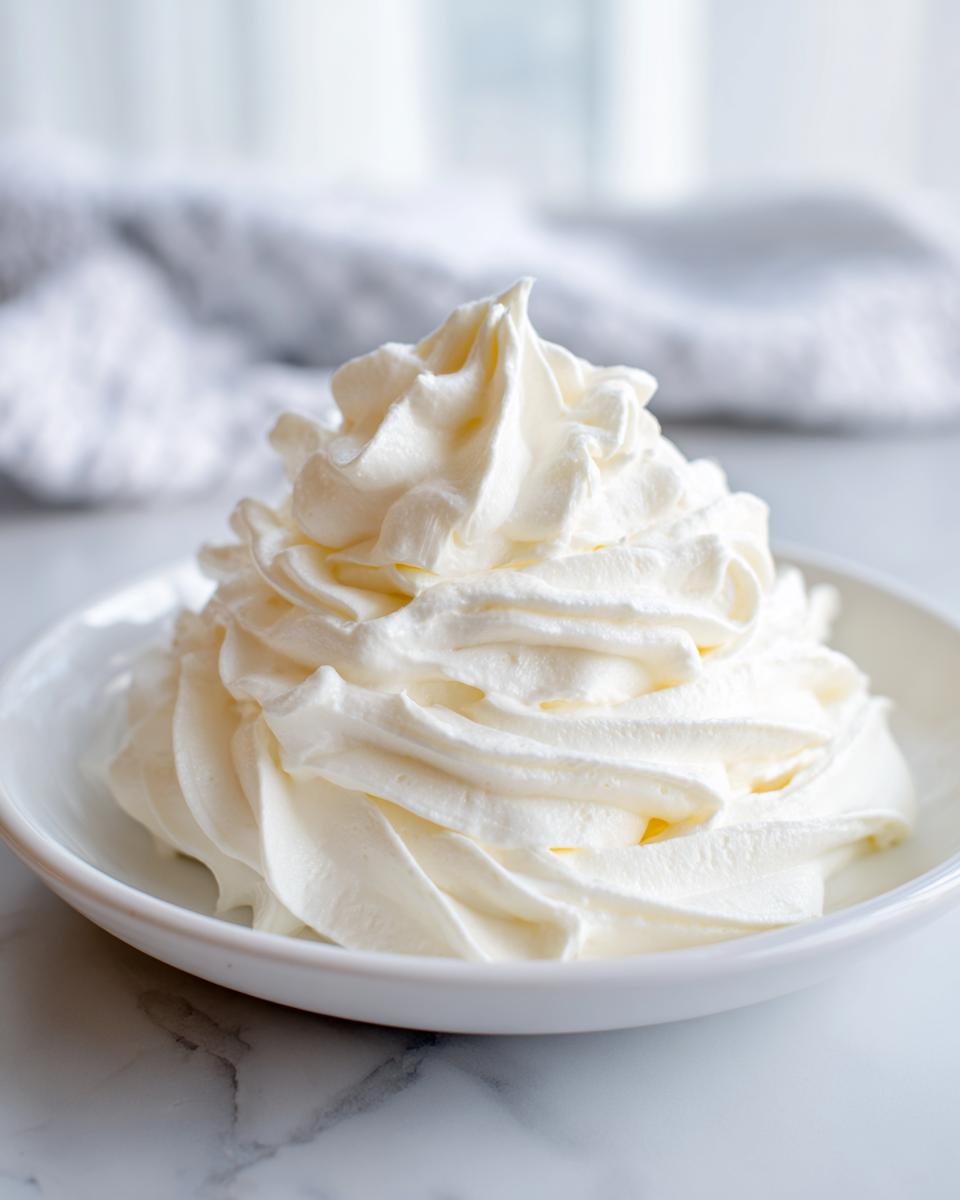
Ultimate Fluffy & Stable Vanilla American Buttercream Frosting
Create the best homemade vanilla buttercream frosting that is rich, fluffy, and smooth. This reliable American buttercream recipe holds its shape perfectly for piping and decorating cakes and cupcakes.
- Prep Time: 10 min
- Cook Time: 0 min
- Total Time: 10 min
- Yield: About 5 cups 1x
- Category: Dessert Topping
- Method: Mixing
- Cuisine: American
- Diet: Vegetarian
Ingredients
- 1 cup (226g) unsalted butter, softened to room temperature
- 4 cups (480g) powdered sugar, sifted
- 1 teaspoon pure vanilla extract
- 1/4 teaspoon salt
- 2 to 4 tablespoons heavy cream or milk
Instructions
- Place the softened butter in the bowl of a stand mixer fitted with the paddle attachment. Beat the butter on medium speed until it is completely smooth and creamy, about 3 minutes. Scrape down the sides of the bowl.
- Gradually add the sifted powdered sugar, one cup at a time, mixing on low speed until just combined after each addition.
- Add the vanilla extract and salt. Increase the mixer speed to medium-high and beat for 3 to 5 minutes until the frosting is light and fluffy. This whipping time is key for achieving a smooth texture.
- If the frosting seems too stiff for spreading, add the heavy cream or milk, one tablespoon at a time, beating well after each addition until you reach your desired consistency for spreading or piping.
- If the frosting is too soft for piping, chill it for 10 to 15 minutes before using.
Notes
- For the smoothest frosting, ensure your butter is truly at room temperature, not melted.
- Sifting the powdered sugar prevents lumps in your final creamy vanilla frosting.
- If you need a stiffer frosting for intricate piping designs, reduce the amount of liquid or add a tablespoon more powdered sugar.
- This recipe makes enough bakery style vanilla frosting to generously frost one 9-inch layer cake or about 18 cupcakes.
Nutrition
- Serving Size: 1/4 cup
- Calories: 310
- Sugar: 40g
- Sodium: 55mg
- Fat: 16g
- Saturated Fat: 10g
- Unsaturated Fat: 6g
- Trans Fat: 0.5g
- Carbohydrates: 42g
- Fiber: 0g
- Protein: 0.5g
- Cholesterol: 45mg