
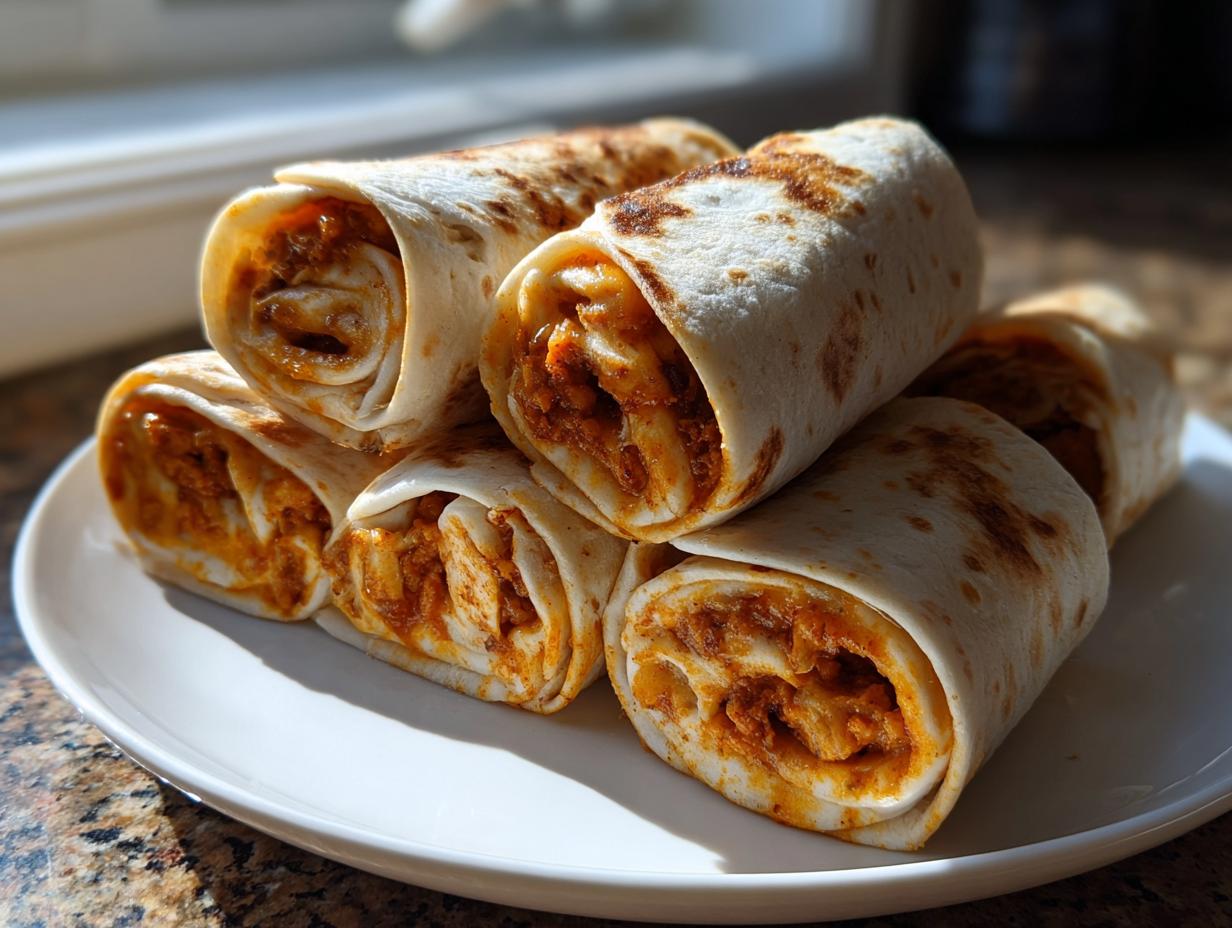
If you’ve ever stared down a recipe for party appetizers and groaned because it looks like it requires a culinary degree and three days of prep time, I get it. My goal here at Alchemy Chef is to prove that extraordinary flavor doesn’t need complicated science or hours over the stove! That’s why I’m thrilled to bring you what is truly the ultimate easy make-ahead solution: our Ultimate Easy Make-Ahead Cheesy Taco Pinwheels. These colorful, flavor-packed taco pinwheels are guaranteed to disappear fast at any gathering. My background, blending my mom’s flavorful traditions with my formal food science training, means I rigorously test everything so you get reliable, crowd-pleasing snacks every single time, just like Juliana Cruz promises.
- Why Our Ultimate Easy Make-Ahead Cheesy Taco Pinwheels Shine (Crowd Pleasing Appetizer)
- Essential Ingredients for Perfect Taco Pinwheels Recipe
- How to Prepare Quick Pinwheel Recipe: Step-by-Step Instructions
- Tips for Success Making Your Taco Pinwheels
- Variations for Fiesta Roll Ups and Taco Tuesday Ideas
- Serving Suggestions for Bite Sized Appetizers
- Storage and Reheating Instructions for Make Ahead Appetizers
- Frequently Asked Questions About Taco Pinwheels
- Nutritional Estimate for Cheesy Tortilla Roll Ups
- Share Your Taco Pinwheels Creations
Why Our Ultimate Easy Make-Ahead Cheesy Taco Pinwheels Shine (Crowd Pleasing Appetizer)
Honestly, when I first developed this recipe, I was trying to solve my own party-planning headache. Who has time to fry and assemble fancy appetizers the day of a big game or holiday party? That’s where the alchemy comes in—making something look and taste amazing with minimal effort. These gorgeous taco pinwheels are the answer, living up to their “Crowd Pleasing Appetizer” billing every single time.
You’ll want to bookmark this one because they tick every box a busy host or lunch-packer needs:
- Zero Cooking Required: Seriously, no oven needed! We mix the filling, roll, chill, and slice. Perfection without the heat.
- Incredible Make Ahead Appetizers: You can wrap and chill these logs up to 24 hours ahead. The chilling step actually *improves* the flavor and structure!
- Maximum Cheese Factor: We use a blend, so you get that gooey texture that just sings with taco seasoning.
- Portion Control Bliss: As they are already sliced, they are the perfect bite sized appetizers; just grab one or three (I won’t tell!).
If you are looking for inspiration on how others are loving this style of snack, you can always check out some of the buzz around quick tortilla roll ups, but trust me, once you try the creamy filling in this version, you won’t look back!
Essential Ingredients for Perfect Taco Pinwheels Recipe
Getting these Taco Pinwheels Recipe components right sets the stage for absolute success later. Since this is primarily a no-bake appetizer, the quality and condition of your ingredients are everything! We aren’t relying on oven heat to bake the flavor in; we rely on everything being perfectly mixed and chilled. I’ve learned from years of recipe development that simple ingredients, when treated correctly, yield the best results. Trust me on the room temperature requirement for that cream cheese—it’s crucial.
Building the Creamy Taco Filling
The heart of these snacks is that deeply savory, creamy taco filling. You need that 8-ounce block of cream cheese, folks, and it absolutely must be softened so it spreads like warm butter, not chunked like cottage cheese! We stir in the sharp Mexican cheese blend—I love the Monterey Jack meltiness—along with your pre-cooked ground beef or some finely shredded chicken. Don’t be shy with that taco seasoning packet; that’s where our Tex Mex flavor explosion comes from. A little dollop of sour cream keeps it rich, and I always sneak in a spoonful of my favorite salsa for an extra little zing of moisture. Make sure everything is thoroughly combined before you even think about moving on to the tortillas.
Selecting the Tortillas for Tortilla Roll Ups
When it comes to the wrapping for these magnificent Tortilla Roll Ups, size matters! You absolutely must use the largest flour tortillas you can reasonably find—we’re talking the burrito size, ideally 10 or 12 inches across. Smaller ones just won’t give you enough surface area to create those satisfying, tight spirals we want. If your tortillas feel stiff right out of the package, I quickly warm them for just 5 or 10 seconds in the microwave. That little bit of warmth makes them incredibly pliable, preventing them from cracking when you roll them up nice and snug.
How to Prepare Quick Pinwheel Recipe: Step-by-Step Instructions
Alright class, this is where the magic really happens! Even though this is a Quick Pinwheel Recipe, the secret sauce to professional-looking, easy-to-serve appetizers is patience during the rolling and chilling phases. Follow these steps closely, and you’ll have the prettiest platter of Cheesy Tortilla Roll Ups ready for your guests. We are aiming for structural perfection here, so pay attention to the chilling!
Mixing the Creamy Taco Filling
First things first: the filling needs to be seamless. Grab your medium mixing bowl. You’re going to start by beating that softened cream cheese until it’s lightened up and absolutely smooth—no excuses on temperature here! If you still see lumps of cream cheese, everything that follows will be gritty, and we want that luxurious, mouth-coating texture, right? Once that foundation is perfect, gently fold in your shredded cheese blend, the taco seasoning, sour cream, and optional salsa you chose. Then, carefully mix in your pre-cooked meat—whether that’s ground beef or chicken. Mix it only until everything is uniform. I learned this trick when developing cheesy bites; stop mixing as soon as you can no longer see any streaks of white or piles of seasoning so you don’t overwork the base.
Rolling and Chilling the Taco Pinwheels Logs
Now we get to the assembly line! Lay out one of those large, soft tortillas on your clean surface. Take about 1/8th of your filling—use a small offset spatula or the back of a spoon—and spread it evenly over the entire surface of that tortilla. You need to cover it almost all the way to the edges! This edge allowance is key for a good seal later. Then, starting from the bottom edge, roll that tortilla up as tightly as you can manage without tearing it. Think of it like rolling a very sturdy, cheesy cigar. Wrap that log up tightly in plastic wrap—I mean tightly, making sure the ends are pressed inward to keep that cylinder shape neat. Repeat this until all your filling is used up. Don’t even think about slicing them yet! These logs need structure. Pop them into the fridge for a minimum of two hours, but if you’re prepping for a huge bash, wrap them up the night before following the excellent advice you’d find for easy taco pinwheels! The long chill time is non-negotiable; it makes slicing incredibly clean. When ready to serve, unwrap the chilled logs and use a very sharp knife to cut them into the perfect one-inch slices for your taco party snacks.
Tips for Success Making Your Taco Pinwheels
We’ve covered the assembly, but there are a few small things I’ve learned in my test kitchen over the years—tips folks often only pick up after a few batches—that turn these good taco pinwheels into absolute showstoppers. These little adjustments are what elevate any recipe, turning it from just good to truly reliable, which is the whole philosophy here at Alchemy Chef. You want these to be among your go-to Simple Snack Recipes, right?
Here are my must-do tips:
- Don’t Skip the Meat Prep: If you are using ground beef, make sure it is fully cooked and, crucially, completely cooled down before mixing it into the cheese base. Hot meat will immediately melt your cream cheese, turning your firm filling into a sloppy mess that won’t roll properly.
- Seasoning Check: Taco seasonings vary wildly between brands. After mixing the cream cheese, seasoning, and sour cream, take a tiny taste. This is critical! If it tastes a little bland to you, add just a tiny pinch more salt or a dash more seasoning. Flavor should be bold here because the tortilla dough mutes it a bit once chilled.
- The Cilantro Debate: I love cilantro, obviously, given my background! If you are adding it *into* the filling rather than just using it as a garnish, chop it incredibly fine—almost minced. Large leafy bits can sometimes create weak spots in the roll, leading to cracks when you slice them later.
When I make these for big crowds, especially when using chicken like they discuss over at chicken versions, I always ensure the meat is shredded so finely it almost disappears into the cream cheese base. That way, every single bite gets that savory richness!
Variations for Fiesta Roll Ups and Taco Tuesday Ideas
While the classic beef and cheese combination in our primary taco pinwheels recipe is legendary, these Fiesta Roll Ups are wonderfully adaptable! This is where you can really make the recipe your own depending on what you have around for Taco Tuesday Ideas or any gathering. I never want you to feel boxed in by ingredients; cooking should be flexible, right?
Feel free to swap things around! If you’re looking for a meatless option, swapping the beef (or chicken) for about a cup of seasoned, mashed black beans or refried beans works like an absolute charm. Make sure those beans are quite dry before mixing, though, so you don’t upset that cream cheese balance.
For texture and flavor upgrades, try swapping out the Mexican cheese blend for Pepper Jack if you like a little heat woven throughout the filling. Another fantastic addition is finely diced roasted red peppers—they bring a sweetness that complements the taco seasoning beautifully. Or, if you want an extra punch, add a teaspoon of finely diced pickled jalapeños right into that creamy mix! These little tweaks ensure that even if you make these every week, they stay exciting.
If you’ve seen the fun presentation of fiesta roll ups and want that extra vibrant color, try incorporating finely diced green onions or a spoonful of finely chopped, drained fire-roasted corn kernels.
Serving Suggestions for Bite Sized Appetizers
These taco pinwheels are honestly perfect just as they are—they are little flavor bombs ready to go! But if you are setting them out for a big party or Game Day spread, you absolutely need some dips alongside them to complete the experience. Presentation makes all the difference when you are serving up bite sized appetizers; a little bowl of color next to the platter just makes people grab them faster!
My go-to pairing is always creamy guacamole, obviously. It adds a cooling, fresh element that cuts right through that savory taco seasoning. If you want something warm, a small crock of quality queso is always a winner. For those who like it zesty, you can’t go wrong with a vibrant salsa—maybe a chunky pico de gallo or even a smoky chipotle salsa. If you look up some of the gorgeous displays over at creamy taco pinwheels, you’ll see exactly what I mean about setting out three contrasting dips!
Storage and Reheating Instructions for Make Ahead Appetizers
One of the biggest reasons I champion these taco pinwheels is how fantastic they are as Make Ahead Appetizers! You put in the rolling work once, and you have party food ready to go the next day. Now, how you store them depends on when you plan to serve them.
If you’re making them the day before, please, please, please leave them wrapped tightly in their plastic logs! They firm up beautifully in the fridge, which is essential for getting those clean, professional-looking slices later. They are perfectly safe stored this way for up to 24 hours. Store the sliced ones the same way—wrapped tightly in plastic or placed in an airtight container.
Now, should you reheat these? For the best experience, you shouldn’t. These are designed to be served fresh, cool from the fridge, making them wonderful Cold Appetizers. That creamy filling stiffens up just right when chilled. If you absolutely must serve them warm (maybe it’s a chilly game day?), avoid the microwave, which will turn the tortilla rubbery and melt the cheese into an oily pool. Instead, lay the slices out on a microwave-safe plate and zap them for just 5-second intervals, checking constantly. Honestly though, I think they are superior after resting on the counter for about 15 minutes after slicing to take the deep chill off. If you want texture and flavor consistency, always serve them cool, just like they recommend for chicken versions over at Melissa’s Southern Style Kitchen!
Frequently Asked Questions About Taco Pinwheels
I know when I’m trying a brand new recipe, I always have a few lingering little questions buzzing around in my head that the instructions just didn’t cover. That’s totally fair! Whether you’re planning a huge spread or just need a quick Taco Tuesday Idea, getting the details right makes all the difference. Here are the things I get asked the most about getting these taco pinwheels absolutely perfect.
Can I freeze these taco pinwheels for later?
Oh, that’s a smart question! Yes, absolutely you can freeze them, but there’s a trick if you want them to be perfect party snacks when you defrost them. You must freeze them *before* you slice them. Wrap those tight logs of rolled tortillas tightly in plastic wrap, then toss them in a freezer bag. They freeze beautifully for up to three months! When you’re ready to serve them later, just take them out, let them thaw in the fridge overnight, and then slice and serve chilled. Trying to freeze the already sliced pinwheels usually results in jagged edges and a slightly drier tortilla once they thaw.
What is the best meat to use for the filling?
When I’m making these as a primary Game Day Food platter, I usually default to seasoned ground beef because it offers that classic, authentic taco flavor that everyone expects. However, shredded rotisserie chicken—pulled really fine—works just as well and sometimes saves you a step! Since the filling is rich with cream cheese, either choice ends up tasting fantastic and savory. If you check out some of the tips on other recipe sites, they often emphasize using thoroughly drained meat. That’s my biggest tip: no matter which protein you select, make sure it’s cooled and it doesn’t have excess grease or liquid pooling at the bottom of your bowl before you mix it in!
Can I make these without meat? I need a vegetarian option.
Of course! Since you asked about variations for these Tex Mex Appetizers, I want to assure you that they are amazing without beef or chicken. For a vegetarian version, you can replace the meat entirely with about a cup of pureed, well-seasoned black beans, or even use finely crumbled, high-quality firm tofu that you’ve sautéed with extra taco seasoning. Another trick is doubling up on the veggies—think finely minced bell peppers and mushrooms that you’ve sautéed until very soft. If you use beans or tofu, however, make sure you drain them exceptionally well, because excess moisture is the enemy of a tight roll, as Chloe details over at Chloe’s blog.
Why do my tortilla roll ups keep unrolling after I slice them?
That, my friend, is almost always a chilling issue! If they unroll or crumble when you slice them, it means the filling wasn’t firm enough to hold the spiral structure. It’s one of those non-negotiable steps for these No Bake Pinwheels. You need that minimum two-hour chill time for the cream cheese base to seize up and lock everything in place. If you rush the chilling, you invite disaster! If you’re in a real pinch, you can try wrapping the logs and sticking them into the freezer for about 45 minutes instead of the fridge, but make sure not to freeze them solid. We want them firm like ice cream, not rock hard!
How long do these last once sliced?
Once you slice them, these Cheesy Tortilla Roll Ups are best eaten the same day, ideally within 4–6 hours. They are fabulous as Cold Appetizers straight from the fridge or after sitting out for an hour at room temperature. If you have leftovers, store them in an airtight container in the fridge. They usually hold up okay for about two days, but the ends of the tortillas might start to get a little dry or chewy versus the perfectly soft texture you get right after slicing. You can see a few tips on keeping snacks fresh over at Dish Serene, too!
Nutritional Estimate for Cheesy Tortilla Roll Ups
I always feel it’s only fair to give you an idea of what you’re diving into when you whip up these wonderful Cheesy Tortilla Roll Ups. Remember, these numbers are just estimates based on using lean ground beef and standard full-fat ingredients as listed in my recipe. I’ve used my food science background to calculate this based on a yield of about 40 pinwheels in total, so the serving size below is for two of those perfectly neat, 1-inch slices.
When you think about it, for a super satisfying party snack that requires zero cooking, these are pretty darn reasonable! They hit that savory, creamy spot that satisfies a big craving without dragging you down.
Here is the general breakdown per serving size (2 pinwheels):
- Serving Size: 2 pinwheels
- Calories: About 180—a great number for party food!
- Total Fat: Approximately 10g
- Saturated Fat: Around 5g
- Protein: 7g, thanks to the cheese and meat base.
- Carbohydrates: 16g
- Sugar: Very low, just about 1g naturally occurring.
- Sodium: This will vary based heavily on your taco seasoning packet, but expect about 350mg.
If you’re cutting back on sodium or just curious about how different ingredients change the profile, it’s always fun to see how tweaking the cheese or using homemade seasoning (like they suggest over at Cooking Heavenly) can make a difference. But as a standard, reliable recipe, these taco pinwheels deliver big on flavor for a moderate nutritional impact.
Share Your Taco Pinwheels Creations
Honestly, seeing you all bring these recipes to life in your own homes is the best part of my job here. It’s one thing to follow the science and develop a perfect recipe, but it’s another thing entirely to see the joy these taco pinwheels bring to your actual gatherings—that’s the real alchemy!
When you make a batch of these Cheesy Tortilla Roll Ups, I truly want to hear about it. Did you use chicken or lean beef? Did you sneak in those pickled jalapeños I mentioned, or did you play it classic? Don’t be shy! Head down to the comments right now and leave me a rating. Five stars is always wonderful, of course, but tell me *why* you loved them, or what tweaks you made. Those little details help build trust not just for me, but for other home cooks looking to try this fantastic party food for the first time.
And please, please send me photos! Snap a picture of them sitting out on your serving platter next to those dips, or maybe even packed up neatly for easy lunch ideas later in the week. Tag me on social media when you do. I absolutely love seeing how you present your rolls. Whether you’re making them for a huge Super Bowl party viewing, or just for a fun, quick family dinner, sharing your experience helps us all cook with a little more confidence. Just like Melissa shares fantastic presentation ideas over at her site, seeing your successful platters really inspires me to keep creating reliable, delicious recipes for you!
PrintUltimate Easy Make-Ahead Cheesy Taco Pinwheels

Make these simple, flavorful taco pinwheels for a crowd-pleasing appetizer or quick lunch. They feature a creamy, seasoned filling rolled tightly in tortillas, perfect for parties or game day.
- Prep Time: 20 min
- Cook Time: 0 min
- Total Time: 2 hours 20 min
- Yield: 40 pinwheels 1x
- Category: Appetizer
- Method: Chilling/No Bake
- Cuisine: Tex-Mex
- Diet: Vegetarian
Ingredients
- 1 (8 ounce) package cream cheese, softened
- 1 cup shredded Mexican cheese blend
- 1 cup cooked ground beef or shredded chicken
- 1 packet (1 ounce) taco seasoning mix
- 1/4 cup sour cream
- 1/4 cup salsa (optional, for extra moisture)
- 10 large flour tortillas (burrito size)
- 1/4 cup chopped fresh cilantro (optional garnish)
Instructions
- In a medium bowl, combine the softened cream cheese, Mexican cheese blend, cooked meat (beef or chicken), taco seasoning, sour cream, and salsa if you are using it. Mix until all ingredients are fully incorporated and the filling is uniform.
- Lay one large flour tortilla flat on a clean surface. Spread about 1/8th of the creamy taco filling evenly over the entire surface of the tortilla, leaving a small border around the edges.
- Starting from one edge, roll the tortilla up tightly into a compact log.
- Wrap the rolled tortilla tightly in plastic wrap. Repeat this process with the remaining filling and tortillas.
- Refrigerate the wrapped logs for at least 2 hours, or up to 24 hours, to allow them to firm up. This step is key for clean slicing.
- When ready to serve, unwrap the chilled logs. Use a sharp knife to slice each log into 1-inch thick pinwheels.
- Arrange the **Cheesy Tortilla Roll Ups** on a serving platter. Garnish with fresh cilantro if desired. Serve these **Cold Appetizers** immediately.
Notes
- For a richer flavor, use pre-cooked, seasoned ground beef. If using chicken, shred it finely before mixing into the filling.
- If you need **No Bake Pinwheels** that are firmer, chill them longer.
- These are excellent **Make Ahead Appetizers**; prepare them the day before your event.
- Serve with extra salsa or guacamole for dipping.
Nutrition
- Serving Size: 2 pinwheels
- Calories: 180
- Sugar: 1
- Sodium: 350
- Fat: 10
- Saturated Fat: 5
- Unsaturated Fat: 5
- Trans Fat: 0
- Carbohydrates: 16
- Fiber: 1
- Protein: 7
- Cholesterol: 25