
There’s a genuine, almost unbelievable magic that happens when you walk into a house where good bread is baking. It just smells like home, doesn’t it? I’m Juliana, and here at Alchemy Chef, we take that magic and make it unbelievably easy, even when you’re using a machine! Forget measuring flour a dozen times; this recipe for Italian herb and cheese bread is totally foolproof because it does all the hard work for you right inside the bread pan.
I spent years studying the science behind why bread rises the way it does, but honestly, the best recipes are the ones that blend that precision with absolute simplicity. This cheesy loaf is the perfect example—it’s reliable, packed with parmesan, and ready for sandwiches or dinner without any kneading fuss. You’re going to love how this cheesy dinner bread transforms your weeknights!
- The Alchemy Behind Perfect Italian Herb and Cheese Bread Machine Loaf
- Ingredients for Your Italian Herb and Cheese Bread
- Step-by-Step Instructions for Your Bread Machine Herb Bread
- Tips for Success with this Beginner Bread Machine Recipe
- Variations on Your Rosemary Oregano Bread Flavor Profile
- Serving Suggestions for Cheesy Dinner Bread
- Storage and Reheating Instructions for Your Italian Herb and Cheese Bread
- Frequently Asked Questions About This Garlic Herb Bread
- Nutritional Estimates for This Flavorful Loaf
The Alchemy Behind Perfect Italian Herb and Cheese Bread Machine Loaf
See, the beauty of making your Italian herb and cheese bread in a machine isn’t just about convenience; it’s about consistent results. When I was developing recipes professionally, I relied heavily on controlling the variables—and the bread machine controls the environment perfectly!
For a sturdy, sliceable sandwich loaf like this, we need that high-protein bread flour. It gives the gluten structure enough backbone to hold up all that savory cheese and the moisture from the olive oil without collapsing into a sad puddle. Trust me, substituting all-purpose flour here just won’t deliver the same towering, beautiful result.
We also need to nail that water temperature, which is where a little bit of science comes into play with the yeast activation. Getting that sweet spot (105°F to 115°F) ensures the yeast wakes up happy and does its job creating those necessary gases for a perfect rise. You can read more about why precise temperature matters so much in our deep dive on baking science. It’s all about letting the machine handle the hard parts so you can just enjoy the glorious aroma!
Ingredients for Your Italian Herb and Cheese Bread
You don’t need a pantry full of specialty items for this recipe, which is what makes it such a winner for those busy weeknights! Everything needed for fantastic parmesan herb bread goes right into the pan in one go (well, almost one go!). I keep the ingredient list straightforward so you have zero excuses not to try this.
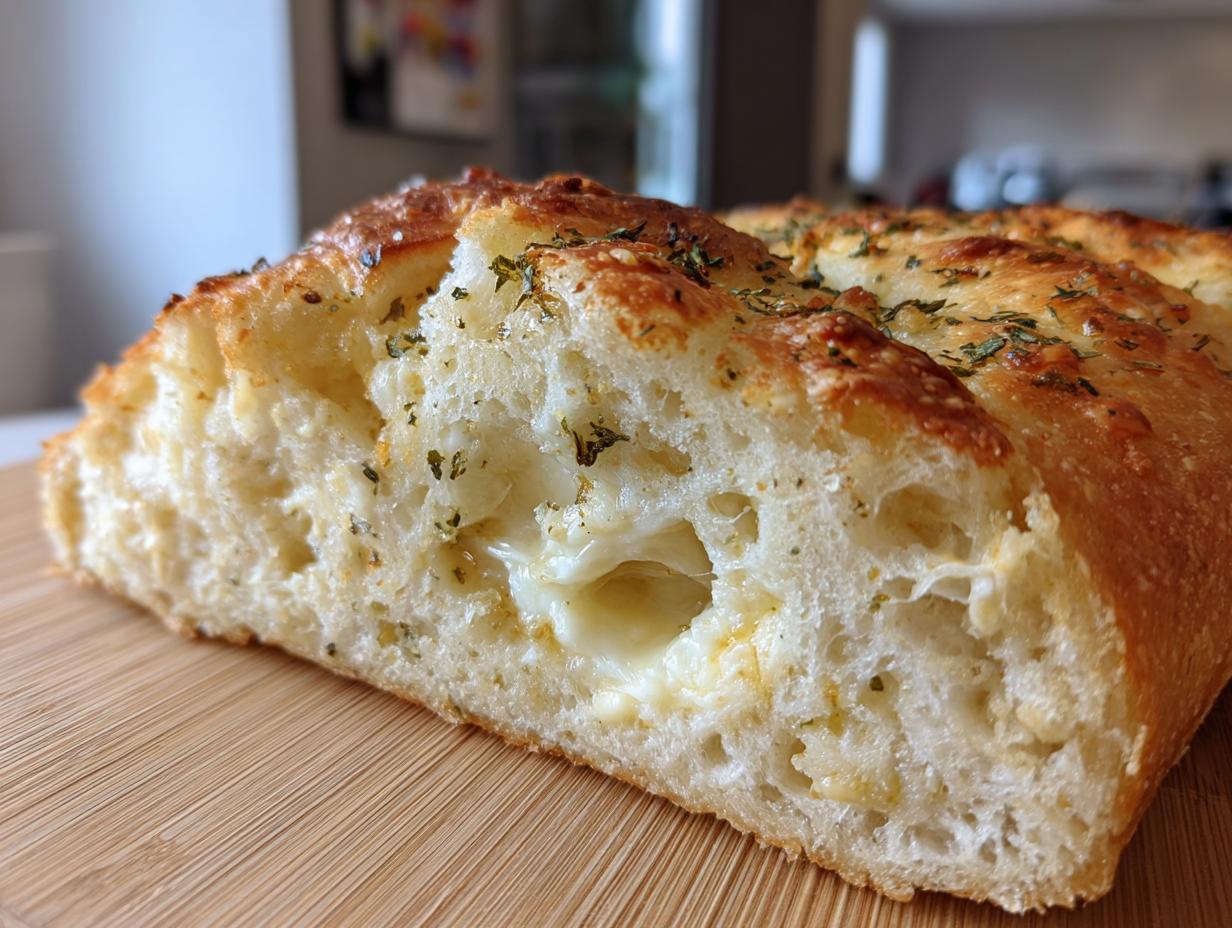
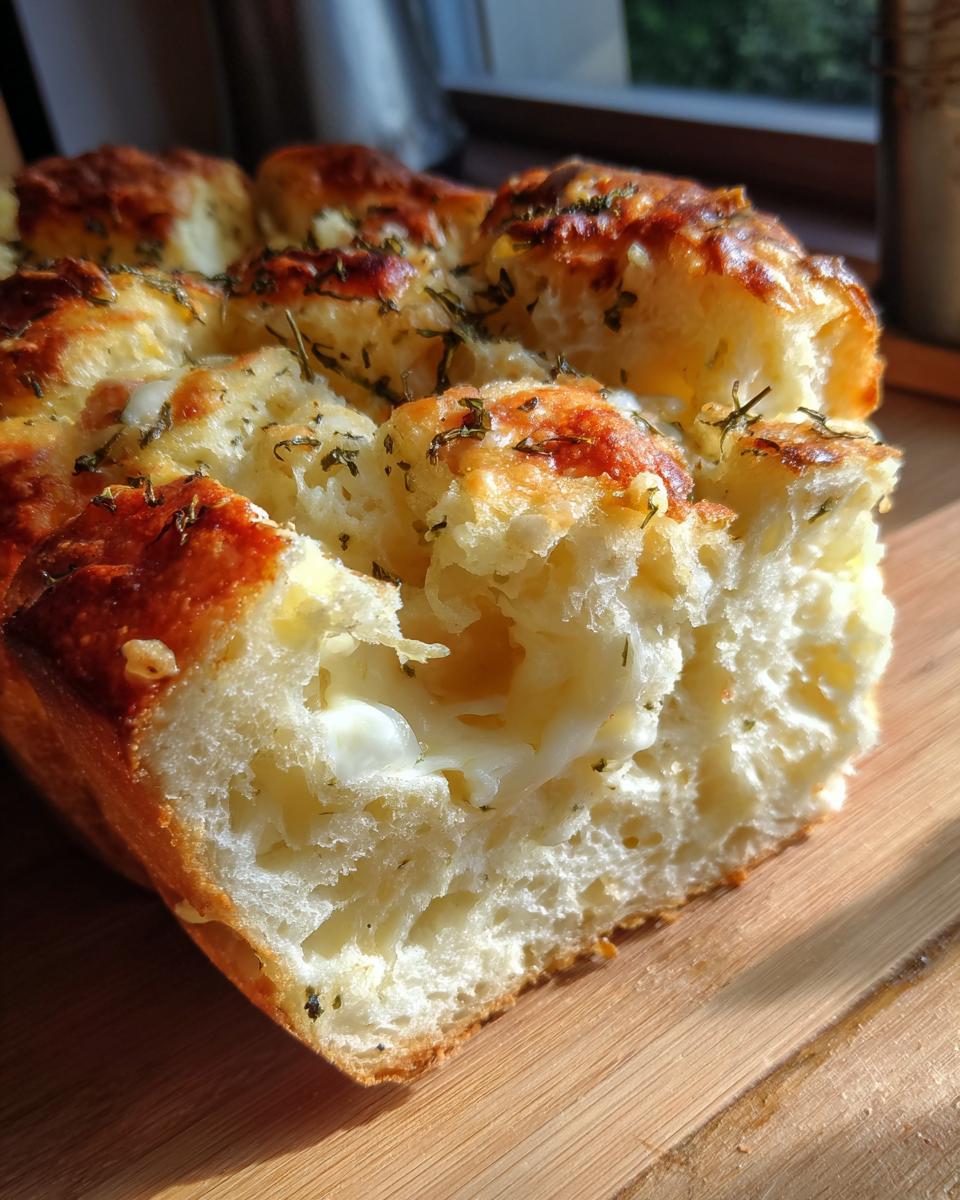
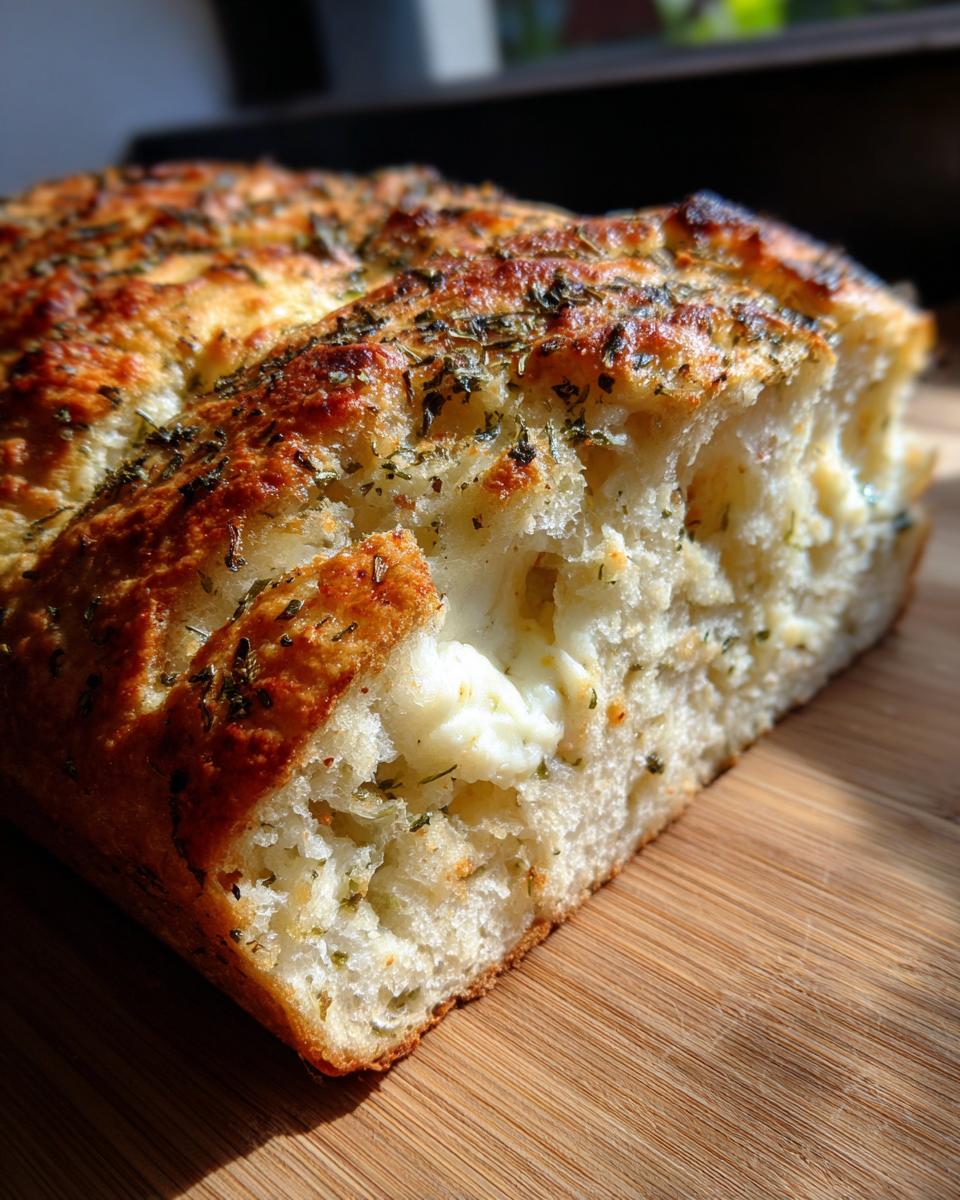
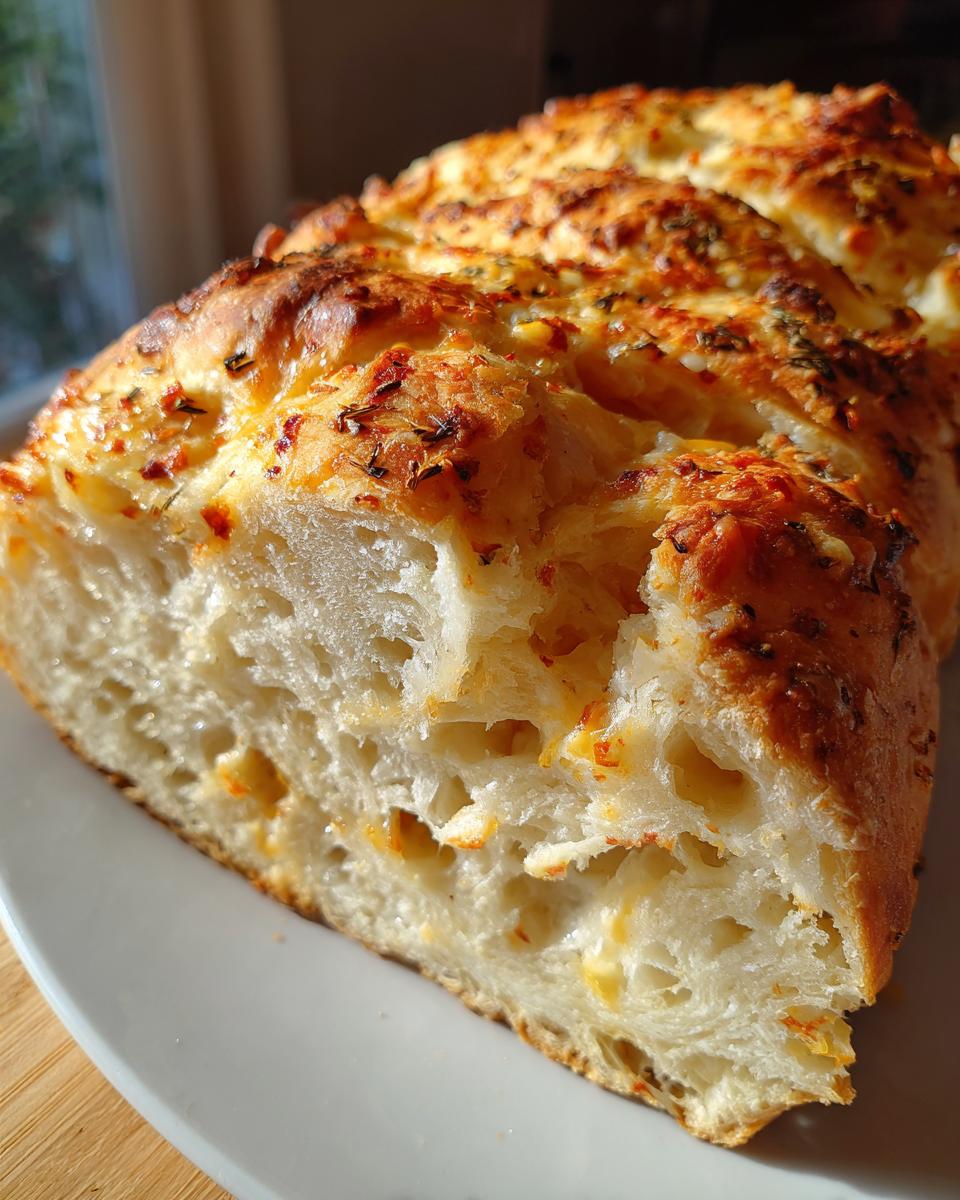
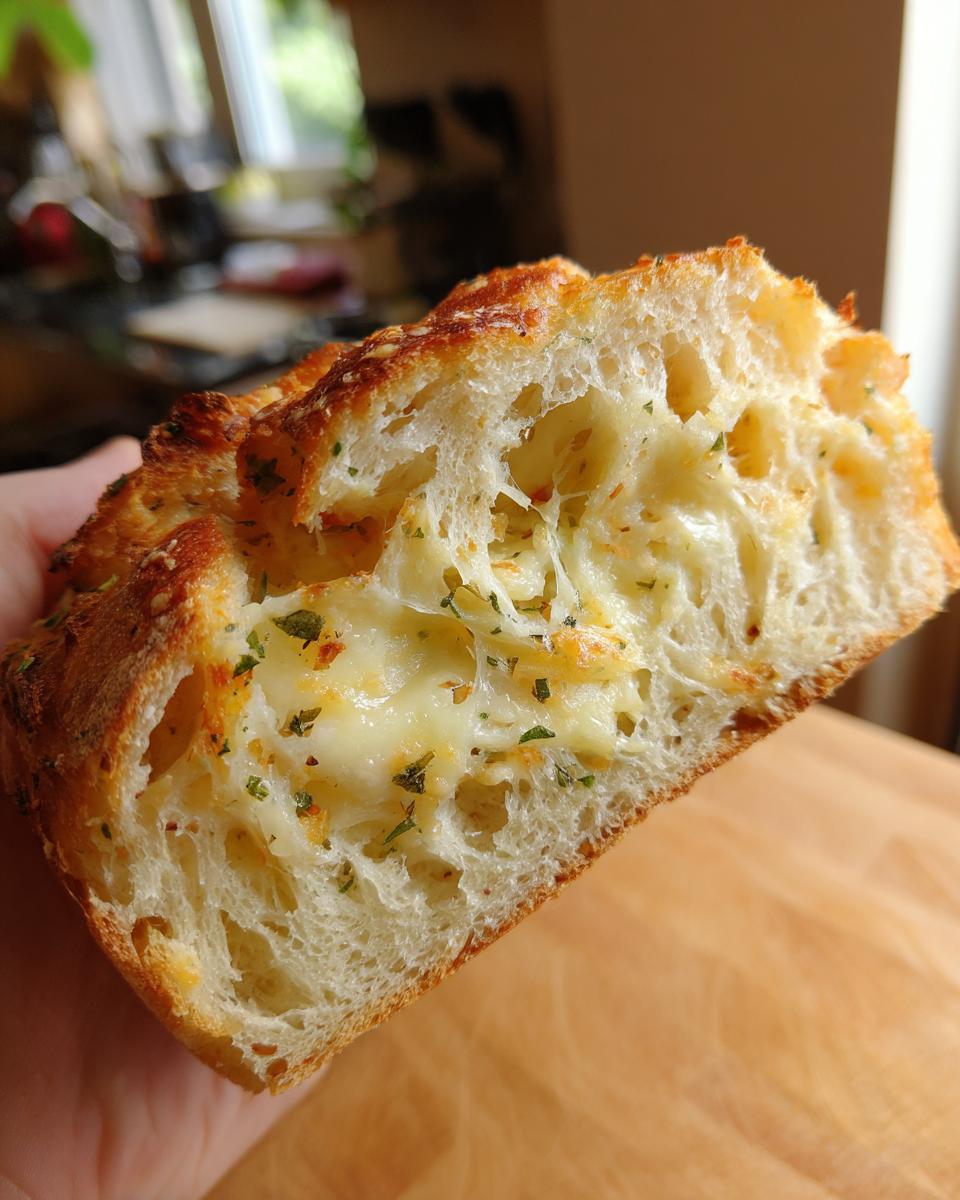
We use bread flour because it’s the backbone of a good loaf—it handles the moisture of the cheese beautifully. And those cheeses? They melt just perfectly when added later in the cycle to create those amazing, slightly chewy pockets of flavor.
- 1 cup water, warm (105-115°F)
- 2 tablespoons olive oil
- 3 cups bread flour
- 1 tablespoon granulated sugar
- 1 teaspoon salt
- 1 1/2 teaspoons active dry yeast
- 1 tablespoon dried Italian seasoning blend
- 1 teaspoon garlic powder
- 1/2 cup shredded Parmesan cheese
- 1/2 cup shredded mozzarella cheese
Step-by-Step Instructions for Your Bread Machine Herb Bread
Okay, this is the part where we let the machine do the actual work, but the order matters! If you’re new to this, check out your manual’s basic guide just to be sure, but generally, we follow a strict layering system to make sure our bread machine herb bread succeeds every single time.
The instructions are super clear because we don’t want the yeast getting a head start or a taste of the salt too early. Follow these steps closely, and you’ll have the most amazing aroma filling your kitchen!
Loading the Pan: Liquids First for Easy Bread Machine Herb Bread
First things first: liquids go in! Pour in your warm water and the olive oil. Then, pile up all your dry ingredients—the flour, sugar, and salt. Finally, gently make a tiny little divot right in the center of that flour mountain and drop the yeast in there. Don’t let it touch the liquid or salt yet! This keeps our yeast happy and ready for action when the machine starts mixing.
Timing the Herb and Cheese Additions for Optimal Italian Cheese Bread
This is where the flavor magic happens, and you have to listen for the machine’s rhythm. Set it to the Basic or White cycle. When the machine beeps—that’s your signal for the first additions! That’s when you sprinkle in your Italian seasoning and that lovely garlic powder. Then, wait for the *second* signal. That final beep means it’s time for the main event: toss in your Parmesan and mozzarella. Putting the cheese in late protects it from getting shredded into nothing during the intense initial knead, keeping those nice melty pockets in your Italian cheese bread.
Let the cycle finish completely, and remember—don’t peek until it’s done baking! Patience equals perfection here.
Tips for Success with this Beginner Bread Machine Recipe
Even though I call this an easy bread machine recipe, machines can sometimes be tricky, especially when cheese is involved! My biggest piece of advice is to *never* skip those two beeps. Seriously, don’t.
I learned this the hard way once when I got distracted and added the mozzarella right at the beginning with the flour. Oh, honey, what a disaster! By the time the machine finished kneading, it was just a greasy glue mixed into the dough. That’s why we wait for that second signal—it ensures the cheese is added right before the final proof, so it mostly stays intact.
Also, please make sure your water thermometer is accurate. If the water is too hot, you’ll kill your yeast faster than you can say *parmesan herb bread*, and your loaf won’t rise. If it’s too cold, the yeast just sleeps! Stick to that 105 to 115°F range, and this recipe will be flawless almost every single time you press Start.
Variations on Your Rosemary Oregano Bread Flavor Profile
Half the fun of baking is making something your very own, right? While this recipe shines as a classic Italian herb and cheese bread, it’s practically begging you to play around with the spice blend inside. If you’re big on that sharper, piney flavor, go ahead and skip the general Italian seasoning blend!
Instead, use a distinct mix where you feature dried rosemary and oregano heavily. I like a two-to-one ratio—heavy on the rosemary. That creates a beautiful, rustic rosemary oregano bread that tastes incredible!
Another great transformation uses ingredients you might already have canned or jarred. Try cutting up about a quarter cup of oil-packed sun-dried tomatoes (drain them really well first!) and adding them in with the herbs. The slight tanginess of the tomatoes combined with the salty Parmesan makes for a super rich, gourmet-tasting loaf. It’s all about small swaps for big flavor payoffs!
Serving Suggestions for Cheesy Dinner Bread
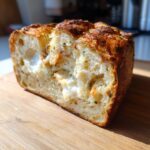
Now that you’ve created this gorgeous, fragrant loaf of cheesy dinner bread, what on earth do you do with it? Well, first off, it needs to cool completely so it slices without squishing, but once it’s ready, the possibilities are endless!
Since this is such a sturdy sandwich loaf, it’s the best base for grilled cheese—seriously, melt cheddar or provolone between two slices of this, and you’ve elevated your lunch game tenfold. If you’re serving it alongside dinner, it’s practically mandatory to dip it.
It soaks up rich tomato sauce like a dream, so pair it with your favorite hearty pasta dish. And if you’re looking for cozy comfort, grab bowls of creamy tomato or butternut squash soup; you can find some of my favorite warming recipes right here. That savory crust and soft, cheesy interior are just begging to be dunked!
Storage and Reheating Instructions for Your Italian Herb and Cheese Bread
You’ve waited probably three hours for this loaf, so let’s make sure we keep it tasting amazing for days! Once your Italian herb and cheese bread is completely cool—and I mean *completely* cool—wrap it up securely in plastic wrap, and then tuck that into an airtight container. This prevents that lovely crumb from drying out.
It should stay perfectly fresh on the counter for about three days. If you want to revive that cheesy warmth, slice off what you need and give it about five minutes in a 350°F oven. That quick reheat melts the cheese just enough without making the crust too hard!
Frequently Asked Questions About This Garlic Herb Bread
It’s totally normal to have questions when you’re trying out a new appliance recipe! As a developer, I’ve fielded a ton of queries about bread machines, so I want to tackle the most common ones right here to make sure your garlic herb bread turns out perfect.
Can I use instant yeast instead of active dry yeast in this bread machine herb bread?
Oh yes, you absolutely can! That’s one of the greatest parts of this bread machine herb bread—it’s very forgiving. Instant yeast doesn’t need that warm water activation step like active dry yeast does. You can actually just toss the instant yeast right in on top of the dry ingredients with the salt and sugar. Just make sure it’s still in the little well you create in the flour so it doesn’t start activating prematurely when it touches the liquid!
My loaf is dense; how do I ensure a lighter sandwich loaf next time?
A dense loaf usually means one of two things in the machine: either the yeast didn’t get enough energy, or we accidentally knocked the air out of the batter. Double-check that your water temperature was definitely between 105°F and 115°F; slightly too cold is the main culprit for a non-rising dough. Also, when you add the final cheese mixture, try to drop it gently right on top rather than dumping it hard, which can deflate the carefully built air in your dough. A lighter sandwich loaf comes down to happy yeast!
What if I want to add fresh herbs instead of dried to my Italian herb and cheese bread?
Fresh herbs are amazing, but they have a lot more moisture, so we have to adjust their volume. If the recipe calls for one tablespoon of dried Italian seasoning, you’ll want to use closer to three tablespoons of fresh, finely chopped herbs for your Italian herb and cheese bread. Because fresh herbs can sometimes be a little gentler on the yeast, I recommend adding your fresh chopped ingredients in during that first mix-in signal, right alongside that garlic powder, instead of waiting till the second addition.
Nutritional Estimates for This Flavorful Loaf
Now, I always tell people that baking is about joy, not tracking macros, but it’s fun to know what’s in this gorgeous creation! Since every bread machine model and brand of cheese acts a little differently, consider these numbers as a very reliable starting estimate based on the standard ingredients we used.
This information is calculated based on dividing the entire recipe yield into 16 slices, which gives you a perfect, hearty slice size for a sandwich or a side! For the deepest dive into the nutritional profile of enriched flours and cheeses, you can always check out reliable databases, but for us home bakers, this gives us a good ballpark figure.
Here’s what we’re looking at per slice:
- Serving Size: 1 slice
- Calories: 180
- Fat: 6g
- Saturated Fat: 3g
- Carbohydrates: 28g
- Protein: 6g
- Sugar: 2g
See? Not bad at all for homemade Italian herb and cheese bread! We get a nice little protein punch from all that Parmesan and mozzarella. If you want to cross-reference these values or check alternatives, you can feel free to look up ingredient breakdowns at this external nutrition reference. Enjoy every beautiful bite!
PrintItalian Herb and Cheese Bread Machine Loaf
Make a flavorful Italian herb and cheese bread using your bread machine. This recipe yields a loaf perfect for sandwiches or serving with dinner.
- Prep Time: 10 min
- Cook Time: 3 hr 30 min (machine cycle time)
- Total Time: 3 hr 40 min
- Yield: 1 loaf 1x
- Category: Baking
- Method: Bread Machine
- Cuisine: Italian
- Diet: Vegetarian
Ingredients
- 1 cup water, warm (105-115°F)
- 2 tablespoons olive oil
- 3 cups bread flour
- 1 tablespoon granulated sugar
- 1 teaspoon salt
- 1 1/2 teaspoons active dry yeast
- 1 tablespoon dried Italian seasoning blend
- 1 teaspoon garlic powder
- 1/2 cup shredded Parmesan cheese
- 1/2 cup shredded mozzarella cheese
Instructions
- Add the warm water and olive oil to the bread machine pan in the order recommended by your machine’s manual.
- Add the bread flour, sugar, and salt on top of the liquids. Create a small well in the center of the flour.
- Add the yeast to the well. Do not let the yeast touch the salt or liquid yet.
- Select the Basic or White Bread cycle on your machine.
- When the machine signals for mix-ins (usually after the initial kneading phase), add the Italian seasoning blend and garlic powder.
- When the machine signals for the final additions (usually just before the final rise), add the Parmesan cheese and mozzarella cheese.
- Allow the bread machine to complete the full cycle, including baking.
- Once the cycle finishes, carefully remove the bread from the pan and place it on a wire rack to cool completely before slicing.
Notes
- For best results in your bread machine, always add liquids first, followed by dry ingredients, and place the yeast last.
- This cheesy dinner bread slices well once fully cooled, making it ideal for sandwiches.
- Store leftover bread in an airtight container at room temperature for up to three days.
Nutrition
- Serving Size: 1 slice
- Calories: 180
- Sugar: 2
- Sodium: 320
- Fat: 6
- Saturated Fat: 3
- Unsaturated Fat: 3
- Trans Fat: 0
- Carbohydrates: 28
- Fiber: 1
- Protein: 6
- Cholesterol: 10