
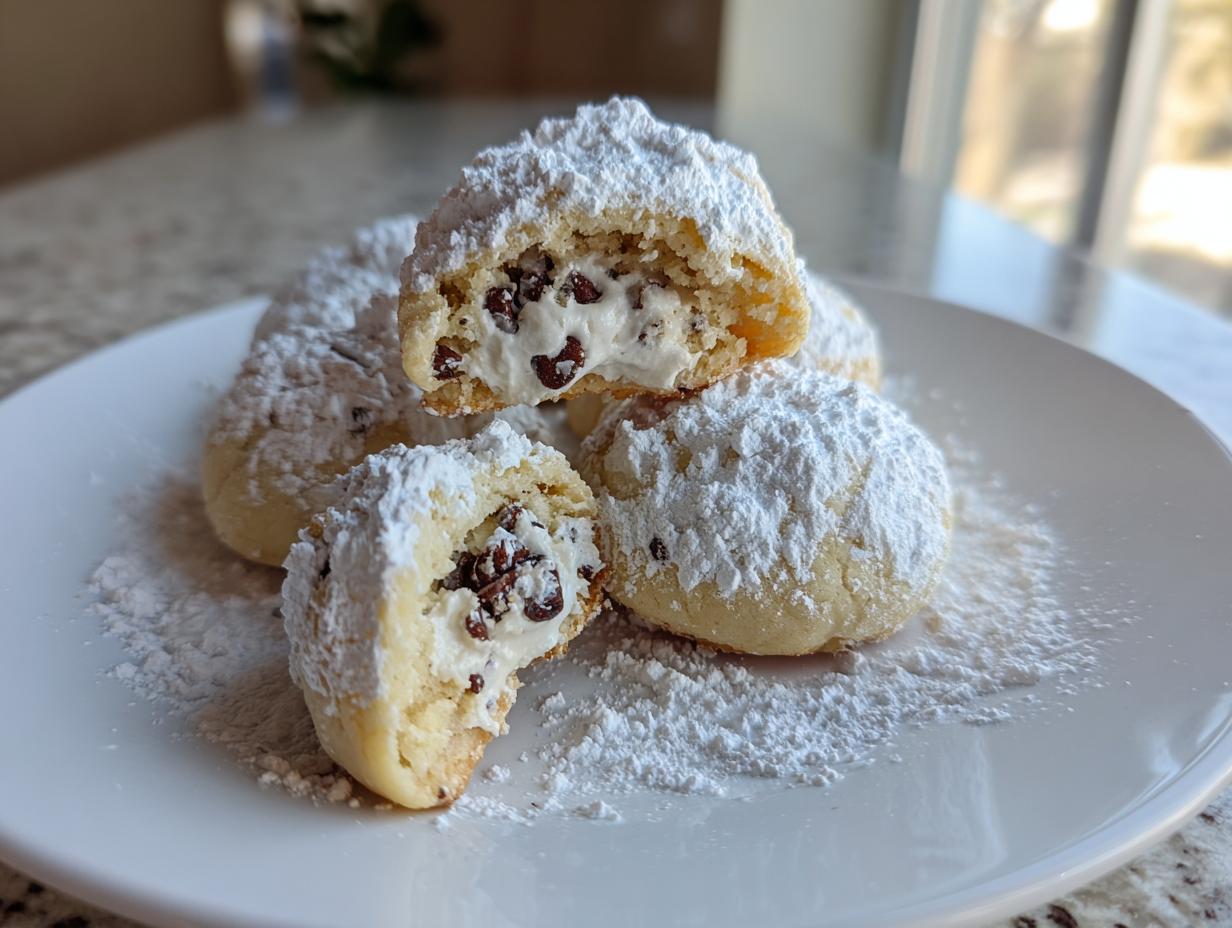
Oh, don’t you just get those intense moments when only something creamy, sweet, and authentically Italian will do? Forget hauling out the deep fryer! I’ve got the absolute best, most reliable way for you to get that decadent flavor—we’re talking about spectacular cannoli cookies. These bake up soft and full of that signature ricotta flavor, zero hassle involved. As the founder of Alchemy Chef, someone who loves diving deep into the food science behind why things work, I can promise you: this recipe is tested, true, and foolproof. Trust me, you are getting the best of that Sicilian dessert charm in chewy, easy cookie form!
- Why You Will Love These Cannoli Cookies (No Frying Required)
- The Essential Ingredients for Perfect Cannoli Cookies
- Expert Tips for Preparing Your Cannoli Cookies Dough
- Step-by-Step Instructions for Baking Your Cannoli Cookies
- Variations on Classic Cannoli Cookies
- Serving Suggestions for Your Homemade Cannoli Cookies
- Storage and Reheating: Keeping Cannoli Cookies Fresh
- Frequently Asked Questions About Cannoli Cookies
- Nutritional Estimates for These Cannoli Cookies
Why You Will Love These Cannoli Cookies (No Frying Required)
Listen, I adore traditional cannoli, but who has time to mess with rolling tiny shells and deep frying them without blowing a smoke alarm? That’s why these cannoli cookies are my go-to when that Italian dessert craving hits! They give you 100% of the flavor with maybe 10% of the fuss. Because I developed this recipe using my food science background, I focused on making this an incredible Easy Dessert Recipe that always works.
Here is why you need these today:
- They bake in minutes! This is the ultimate No Fry Cannoli Alternative, offering safety and speed.
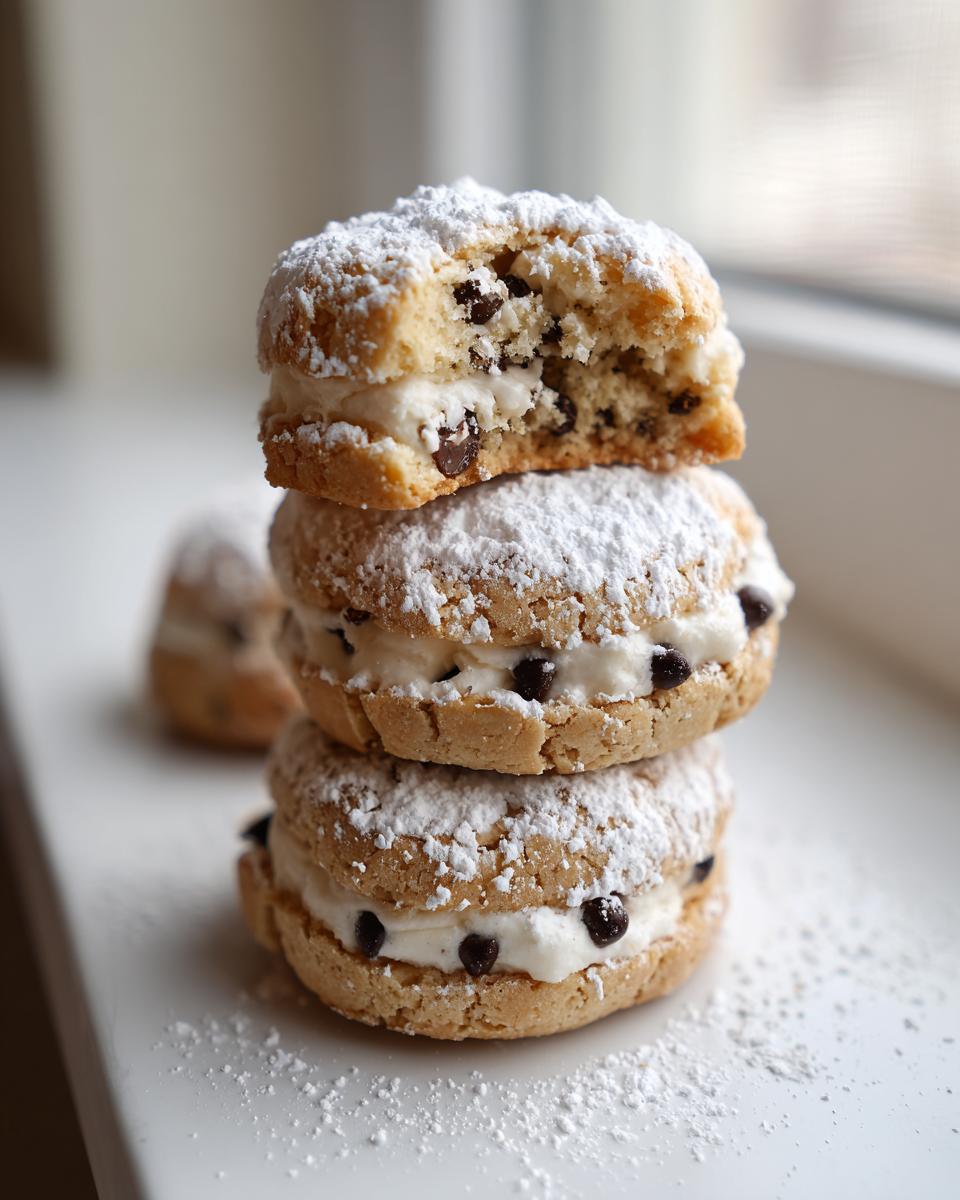
- The texture is divine—soft, cake-like, and beautifully tender thanks to the ricotta.
- You get that unmistakable creamy filling flavor infused right into the cookie base.
- They are freezer-friendly and perfect for sharing at last-minute parties!
The Essential Ingredients for Perfect Cannoli Cookies
Okay, when you’re making something as special as cannoli cookies, you absolutely need the right supporting cast. No cheap substitutes here if you want that classic Sicilian taste! Since I spent years as a recipe developer, I know the importance of precise ingredients, especially when working with cheese. Every item here plays a huge role in achieving that perfect soft, chewy cookie base that mimics the interior flavor of a traditional pastry.
Here is the lineup you’ll need for about three dozen spectacular cookies. Don’t even think about skipping the draining step for the cheese—that’s my biggest E-E-A-T note for you right there!
- 2 ½ cups all-purpose flour
- 1 ½ teaspoons baking powder
- ½ teaspoon salt
- ½ cup unsalted butter, softened
- 1 cup granulated sugar
- 2 large eggs
- 1 cup full-fat ricotta cheese, well drained (seriously, this is crucial!)
- 2 teaspoons pure vanilla extract
- ¾ cup mini chocolate chips
- 1 teaspoon orange zest (optional, but I always use it!)
- ⅓ cup pistachios, roughly chopped (optional, for topping)
- Powdered sugar, for dusting
If you grab these exact, quality items, you are already halfway to victory. Check out some fantastic tips over at Brynlee’s site if you’re looking for more easy Italian Cookie Recipes!
Expert Tips for Preparing Your Cannoli Cookies Dough
Look, while these are called cannoli cookies, they aren’t just a quick scoop-and-bake situation. If you want that perfect, soft, chewy texture—not a flat pancake—you have to follow the rules of dairy and temperature! This is where the ‘science’ part of Alchemy Chef comes into play. Getting these foundational steps right is why my Ricotta Cookies always come out looking like the bakery version.
Mastering the Ricotta Drain
This is probably the most important thing you’ll do for these Chocolate Chip Ricotta Cookies. Ricotta cheese, even the good stuff, holds a ton of water. If you dump it straight from the container into the batter, your dough will become a total mess—it’ll spread out in the oven like lava. Seriously, don’t skip this! I always line a fine-mesh sieve with a layer or two of cheesecloth, scoop the ricotta in, and let it drain over a bowl in the fridge for at least an hour, sometimes two. You want the thickest curd possible.
Achieving the Right Cannoli Cookies Consistency
Once you’ve creamed your butter and sugar until it’s light and fluffy (that’s rule number one for air incorporation!), you need to be gentle. When you add the flour mixture, mix on the lowest speed your mixer has, or just use a spatula. The second you see the flour streaks disappear, STOP! Overmixing develops gluten, and gluten makes cookies tough, not tender, chewy beauties. We are going for thick dough that holds its shape when scooped, not something runny.
Step-by-Step Instructions for Baking Your Cannoli Cookies
Alright, the science is set, the ingredients are ready, and your ricotta is perfectly drained—now for the fun part! Since these are cannoli cookies, we want that soft, cakey texture, so we treat the dough nicely. Remember what I said about overmixing? Keep that in mind as we move through these final steps. These instructions are designed to give you those fantastic results you saw online, like the ones over at Typical Recipe!
First things first: turn your oven up to 350°F (175°C). Get those baking sheets lined with parchment paper. This step is non-negotiable if you want clean pickup later! You’ll mix your dry stuff—the flour, baking powder, and salt—in one bowl, and then you’ll use your stand mixer or hand mixer for the wet base to get it nice and creamy.
Once the butter and sugar are fluffy, knock in those eggs one by one. Then, gently beat in that glorious, thick ricotta, vanilla, and that tiny bit of orange zest if you’re using it. When you finally start adding the flour mix, keep the speed low; just mix until you don’t see any more white streaks. Fold in those mini chocolate chips by hand—seriously, do it gently!
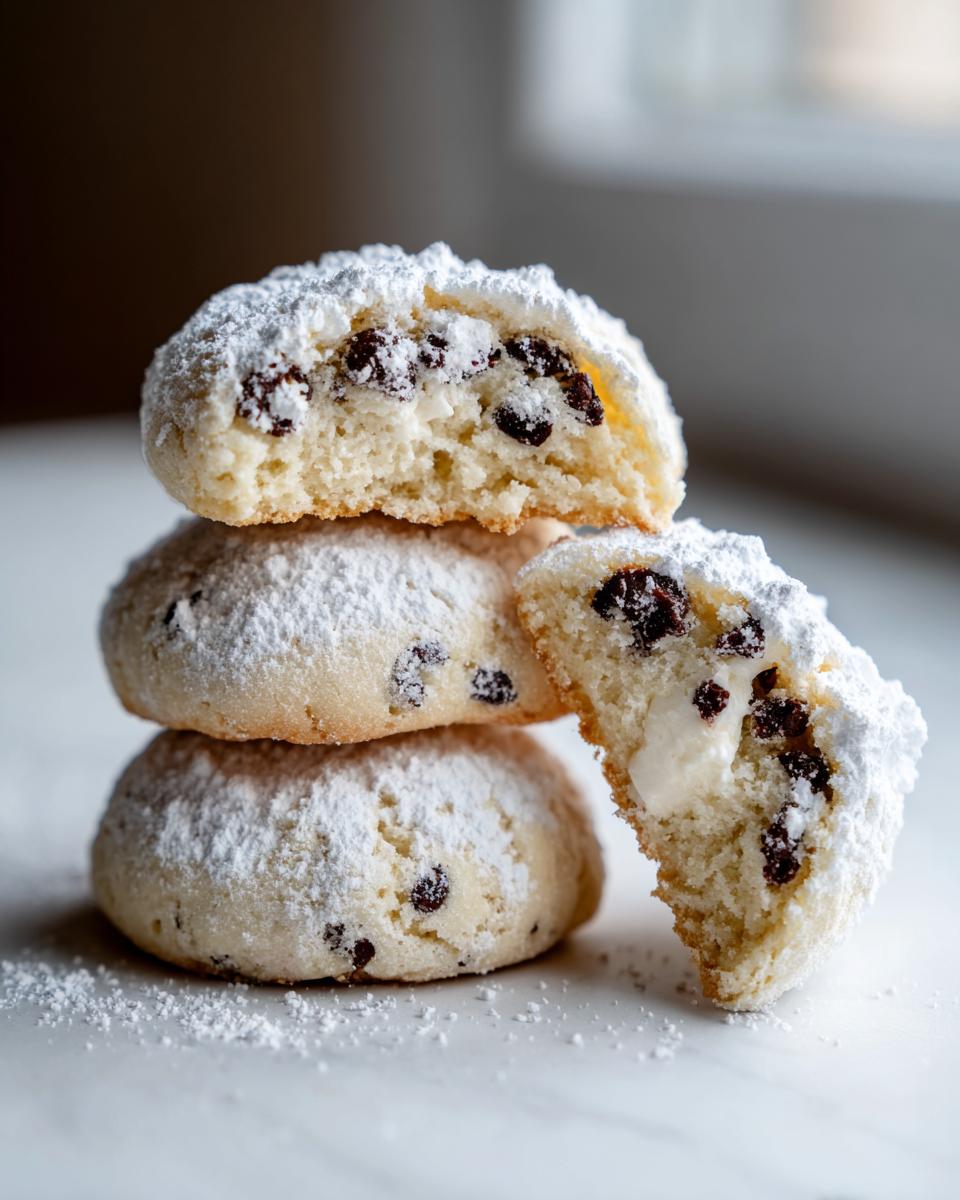
Scoop out rounded tablespoons of dough onto your prepared sheets. You need space here; give them about 2 inches between each dollop, or they’ll become one giant cookie! Bake them for exactly 10 to 12 minutes. You want the edges to turn barely golden, but the center? It should look super soft. Let them hang out on the hot pan for five minutes before moving them to a cooling rack completely. They firm up as they cool down. And for the grand finale? A sweet, generous dusting of powdered sugar!
Variations on Classic Cannoli Cookies
Now that you’ve mastered the base recipe for these glorious cannoli cookies, you might be wondering how else we can play with this beautiful flavor profile. I love experimenting, especially when it comes to taking a classic like this and tweaking it just a little bit to make it uniquely mine. This recipe is so versatile; it truly works for any gathering, whether you’re aiming for traditional Italian Bakery Cookies or something a little more unexpected.
If you are looking to try a different spin, check out the fantastic tips on adapting flavors over at Amelia’s blog—she has some wonderfully creative ideas for Italian Cannoli Cookies!
Here are a few of my favorite ways to switch things up without losing that essential Italian heart:
- Swap Your Zest: I adore orange zest because it screams ‘cannoli’ to me, but sometimes I switch it up! If you aren’t a huge citrus fan, swap that 1 teaspoon of orange zest for ½ teaspoon of ground cinnamon or Cardamom. It leans into that cozy holiday feel and pairs beautifully with the chocolate chips.
- Almond Power: Instead of vanilla extract, try using almond extract! Just a teaspoon of almond extract bumps up that nutty, marzipan-like background flavor that makes so many Italian desserts sing. These become fantastic Citrus Zest Cookies when you combine the almond extract with a little bit of lemon zest instead of orange.
- Topping Swap: The powdered sugar dust is classic, but for a real showstopper on a dessert platter, try dipping half of the cooled cookie edge into melted dark chocolate. While the chocolate is still wet, immediately sprinkle on those chopped pistachios or even a dash of finely chopped dried cherries. They look so professional!
- A Touch of Spice: For a bolder taste, try adding a tiny pinch of freshly grated nutmeg to the dry ingredients. It doesn’t change the structure, but it adds incredible depth alongside the sweetness of the sugar and ricotta.
Serving Suggestions for Your Homemade Cannoli Cookies
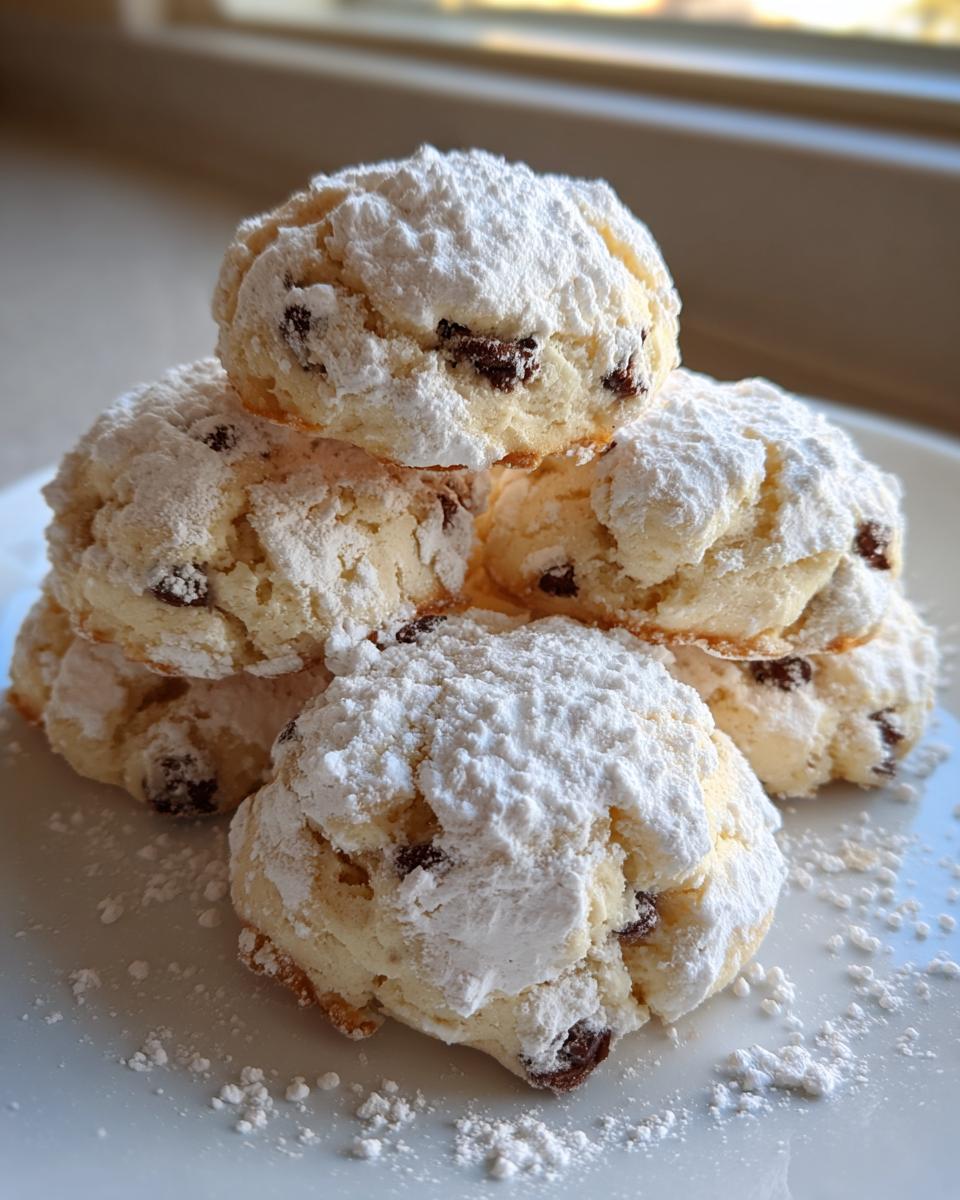
I’m telling you, once these cannoli cookies are cool and dusted with that snowy powdered sugar, they look absolutely gorgeous sitting on a platter. They are genuinely perfect for almost any gathering, which is why they’ve become one of my absolute favorite Holiday Cookie Baking necessities. They look elegant but taste like pure, creamy comfort!
Since these cookies are rich with that lovely ricotta base and sweet chocolate, they pair up so well with something warm and slightly bitter. Don’t just serve them alone; pair them up for the ultimate dessert experience!
- The Perfect Coffee Companion: These are practically mandatory alongside a strong espresso or a rich, dark roast coffee. That slight bitterness cuts right through the sweetness of the cheese filling flavor, making every bite taste brighter. If you’re serving them at a party, set out a little coffee station!
- For Holiday Cookie Trays: Because they are so unique—looking like a soft cookie but tasting like a pastry—they always stand out on a big platter. I usually alternate them with something plain, like a simple shortbread, so their citrus aroma and creamy interior really pop next to other Italian Bakery Cookies.
- Dessert for Parties Showcase: If you’re using them as a true Dessert for Parties centerpiece, make sure to garnish the platter with chopped pistachios around the edges. The bright green adds such a beautiful, authentic Italian color contrast. They are always the first cookie gone!
- The Afternoon Treat: Honestly, sometimes the best way to enjoy them is by crumbling one over a scoop of vanilla bean ice cream. It’s messy, but that soft, slightly cakey cookie mixing with cold cream? Pure alchemy right there.

You’ll find that these cannoli cookies disappear quickly, so I always recommend doubling the batch if you are serving a crowd. They are just too dangerously delicious!
Storage and Reheating: Keeping Cannoli Cookies Fresh
This is where our science background really pays off! Because these cannoli cookies have that rich, creamy ricotta right in the base, we have to be smart about storing them so they stay soft and don’t get sticky. You want that perfect texture we worked so hard to achieve, right? The good news is these are incredibly sturdy, as long as you treat them right.
My absolute top rule for these cookies: keep the powdered sugar separate until serving time if you plan on keeping them more than a day. The moisture from the sugar and the ambient humidity can turn that pretty white dusting into a wet, sticky glaze way too fast. If you look at my favorite resources for long-lasting bakes, like the tips over at Recipes Threads, they all stress airtight storage!
Here’s my foolproof method for keeping these amazing Italian treats tasting bakery-fresh:
- Room Temperature is Best: These cookies do not need to go into the fridge! Keeping them cold can actually stiffen the butter content and make the cookie harder than we want. Store them in a truly airtight container on your counter, away from direct sun or heat.
- The Single Layer Trick: If you are stacking them (and try not to!), place a small piece of parchment or wax paper between the layers. This prevents any surface moisture from melding the cookie tops to the bottoms. They are sturdy, but we don’t want friction to pull off that tender edge.
- Shelf Life: Honestly, they are at their peak perfection on Day 1, but they hold up wonderfully for 3 to 4 days. After that, they are still perfectly fine, but the texture might start getting a little firmer.
- Reheating for that ‘Just Baked’ Feel: If they have been sitting for a couple of days and feel a touch dense, don’t worry at all! Pop just a couple of cookies onto a microwave-safe plate and zap them for just 8 to 10 seconds. It warms the chocolate chips up just enough and softens the ricotta base right back to that cake-like tenderness. After warming, that’s when you dust them heavily with powdered sugar!
If you decide to make a massive batch for a party, skip the dusting entirely and store them plain. Then, right before serving, dust them all at once. Easy peasy!
Frequently Asked Questions About Cannoli Cookies
Since these cannoli cookies are a little different from your standard chocolate chip drop cookie, I know folks have questions about getting that authentic texture. It’s all about managing moisture, and trust me, once you understand the dairy science, you’ll nail it every time. I’ve pulled together the most common things I hear when people try this recipe for the first time. I hope these tips, inspired by some great bakers like the crew over at Cecily’s Recipes, help you feel totally confident!
Can I use regular (not full-fat) ricotta cheese in these cannoli cookies?
Oh, you definitely can, but I really have to advise against it unless you are prepared to work extra hard! Remember how I stressed draining the full-fat ricotta? Well, lower-fat or part-skim ricotta is much wetter. It holds onto way more water. If you use that, your cookie dough will likely spread way too much during baking, leading to thin, almost flat Ricotta Cookies instead of the soft, puffy domes we want. If you must use it, drain it for twice as long—maybe even bring a cup of it to a pound in a cheesecloth for four hours! Better yet, splurge on the full-fat because it has the necessary fat content to hold up beautifully in the dough.
What is the best way to store these Italian Cookie Recipes to maintain softness?
This is directly related to the powdered sugar question we talked about earlier. If you want these Italian Cookie Recipes to stay soft, you have two basic rules: airtight container and no refrigeration. Keep them on the counter at room temperature. The main thing to prevent is that sticky mess of dissolving sugar. I store the completely cooled, un-dusted cookies in one container. Then, I keep the powdered sugar in a separate container next to it. You only dust them the day you plan to eat them. That way, they stay soft underneath and beautifully snowy on top!
How do I make these cookies crispier instead of soft and chewy?
That’s a fun challenge! If you prefer a slightly firmer, more shortbread-like bite—maybe closer to what you’d find in a more traditional Italian Bakery Cookie—you can tweak the baking just a tiny bit. Instead of pulling them out when the center looks soft (at 10-12 minutes), let them bake for another 2 to 3 minutes until the edges look deeply golden brown all the way around. You can also try slightly lessening the amount of ricotta by just a quarter cup. This subtle shift in the fat/dairy ratio will dry them out just enough while baking to give you a firmer exterior while keeping the flavor profile perfect.
Nutritional Estimates for These Cannoli Cookies
Now, I know we bake these amazing cannoli cookies for the joy of it, not for a science report, but because I love giving you the full picture of what you’re creating in your beautiful kitchen, here are the estimated nutritional facts. This recipe yields about three dozen cookies, so these numbers are figured out based on one delightful cookie serving.
Remember, since we use real butter, full-fat dairy, and sugar—because that’s how we get that amazing Sicilian flavor!—these are a delicious treat, not a low-calorie snack. Like any homemade recipe where ingredients can vary slightly (did you use a big egg or a medium one? How much sugar sticks to your spoon?), these numbers are just a guideline. Think of this as our little ‘Alchemy Chef’ estimate!
- Serving Size: 1 cookie
- Calories: 180
- Sugar: 15g (Mostly from the batter and the final dust!)
- Fat: 9g
- Saturated Fat: 5g
- Carbohydrates: 23g
- Protein: 3g
- Sodium: 95mg
Enjoy every single bite! Knowing the details just makes the alchemy taste that much better when you are sharing these incredible homemade treats.
PrintEasy Soft Cannoli Cookies with Creamy Ricotta Filling

Make these soft and chewy cannoli cookies that capture the authentic Italian flavor of traditional cannoli filling without the work of frying shells. They feature a creamy ricotta base, mini chocolate chips, and a hint of citrus zest.
- Prep Time: 20 min
- Cook Time: 12 min
- Total Time: 32 min
- Yield: About 3 dozen cookies 1x
- Category: Dessert
- Method: Baking
- Cuisine: Italian
- Diet: Vegetarian
Ingredients
- 2 ½ cups all-purpose flour
- 1 ½ teaspoons baking powder
- ½ teaspoon salt
- ½ cup unsalted butter, softened
- 1 cup granulated sugar
- 2 large eggs
- 1 cup full-fat ricotta cheese, well drained
- 2 teaspoons pure vanilla extract
- ¾ cup mini chocolate chips
- 1 teaspoon orange zest (optional)
- ⅓ cup pistachios, roughly chopped (optional, for topping)
- Powdered sugar, for dusting
Instructions
- Preheat your oven to 350°F (175°C). Line baking sheets with parchment paper.
- In a medium bowl, whisk together the flour, baking powder, and salt. Set this dry mixture aside.
- In a large bowl, cream the softened butter and granulated sugar together until the mixture is light and fluffy.
- Beat in the eggs one at a time, mixing well after each addition.
- Mix in the well-drained ricotta cheese, vanilla extract, and orange zest until just combined.
- Gradually add the dry ingredient mixture to the wet ingredients, mixing on low speed until a soft cookie dough forms. Be careful not to overmix.
- Fold in the mini chocolate chips.
- Drop rounded tablespoons of dough onto the prepared baking sheets, leaving about 2 inches between each cookie.
- Bake for 10 to 12 minutes, or until the edges are lightly golden. The centers should remain soft.
- Let the cookies cool on the baking sheets for 5 minutes before transferring them to a wire rack to cool completely.
- Once cool, dust generously with powdered sugar before serving. Add chopped pistachios if desired.
Notes
- You must drain the ricotta cheese well; excess liquid will make your cookie dough too wet to handle. Press it in a fine-mesh sieve lined with cheesecloth for at least one hour.
- For a firmer cookie texture, chill the dough for 30 minutes before scooping.
- If you skip the orange zest, add a small amount of almond extract for a different classic Italian flavor note.
Nutrition
- Serving Size: 1 cookie
- Calories: 180
- Sugar: 15g
- Sodium: 95mg
- Fat: 9g
- Saturated Fat: 5g
- Unsaturated Fat: 4g
- Trans Fat: 0g
- Carbohydrates: 23g
- Fiber: 1g
- Protein: 3g
- Cholesterol: 40mg