
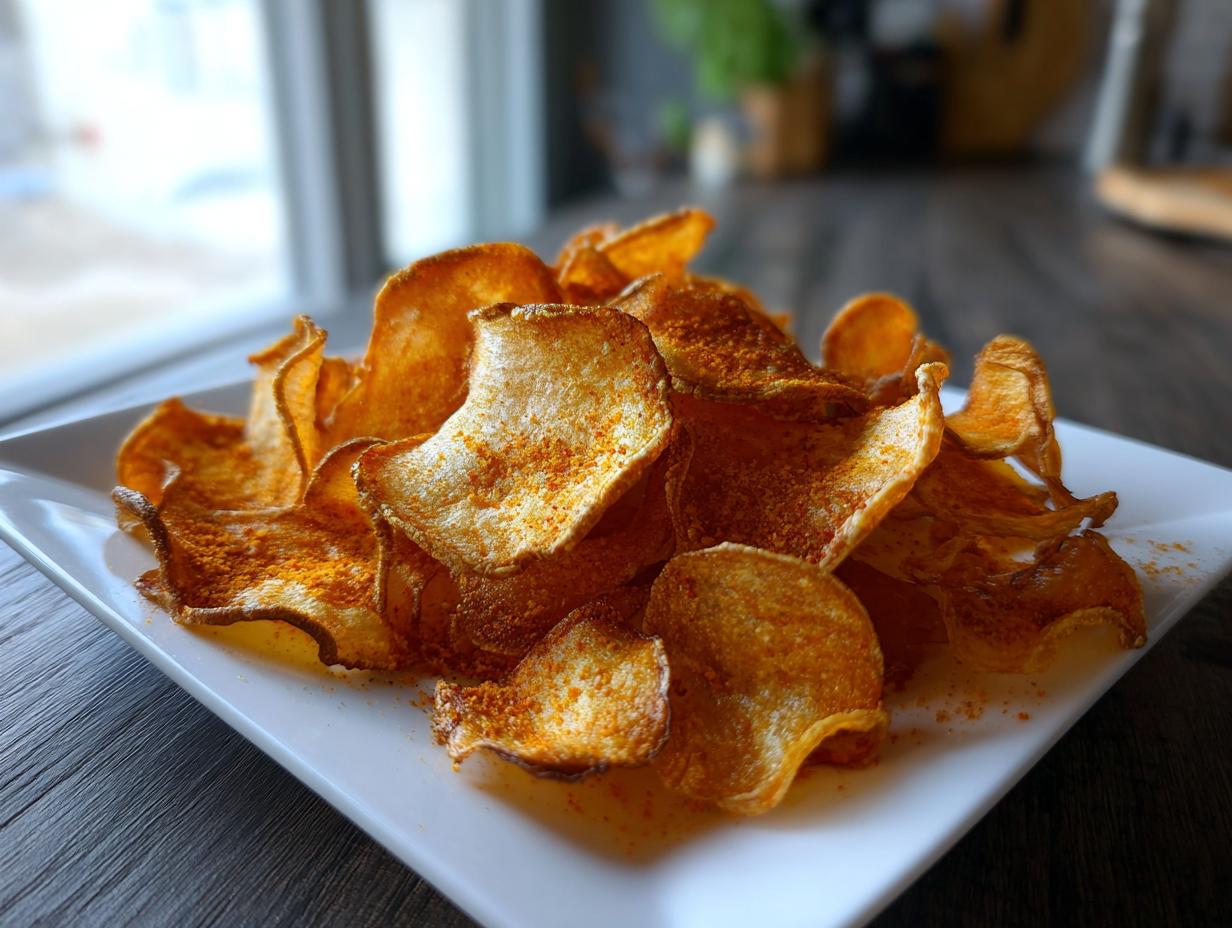
That moment hits you, right? That sudden, undeniable craving for something salty, crunchy, and just begging to be dipped. For me, it’s always been about that perfect, shatteringly crisp texture. But let’s be honest, grabbing a bag of store-bought potato chips often means accepting a long list of ingredients I don’t recognize or too much oil. That’s why I brought the science I learned, combined with the comfort cooking my parents taught me, to create the ultimate homemade snack. I’m Juliana Cruz, and here at Alchemy Chef, we turn the ordinary into something magical. Forget frying! We achieve that irresistible crunch using simple baking or air frying techniques. You deserve that salty satisfaction without any guilt.
- Why You Will Love These Crispy Homemade Potato Chips
- Essential Ingredients for Perfect Potato Chips
- The Technique: How to Make Crispy Baked Potato Chips
- Oven Baked Versus Air Fryer Chips: A Comparison
- Flavor Variations for Your Homemade Potato Chips
- Making Crunchy Snack Ideas Ahead of Time
- Troubleshooting Common Potato Chip Issues
- Frequently Asked Questions About Homemade Potato Chips
- Nutritional Snapshot of These Guilt-Free Potato Chips
Why You Will Love These Crispy Homemade Potato Chips
Making these at home is superior to grabbing a bag off the shelf, trust me. If you’re looking for the best crunchy snack ideas that don’t wreck your diet, you’ve landed in the right place. These are the ultimate homemade potato chips because they tick every box:
- They are incredibly quick! You get a satisfying snack in under 30 minutes.
- They are genuinely guilt free snacks since you control every molecule of oil and salt.
- They taste better than store-bought; seriously, the fresh flavor is unbeatable.
Achieving the Best Crunch Every Time
The secret to that fantastic, irresistible crunch isn’t frying—it’s about preparation! We gently treat the slices to remove excess starch. When you cut the potatoes super thin—that’s the key—it allows the edges to dry out perfectly in the oven, locking in maximum crispness. It’s really just simple food science making these easy potato chips work!
Essential Ingredients for Perfect Potato Chips
To make stellar, crispy chips, you need to start with the very best base ingredients. We aren’t making anything fancy here, just honest food done right, which is why nailing the components is step one. You’ll need just a handful of things to transform these roots into snack heaven.
- 3 large Russet potatoes, thinly sliced
- 1 tablespoon olive oil (just that little bit!)
- 1 teaspoon fine sea salt
- 1/2 teaspoon garlic powder
- 1/4 teaspoon paprika
Ingredient Notes and Substitutions
My advice? Stick to Russet potatoes here. They have that perfect starchy center that fries or bakes up beautifully, giving you that classic texture. If you see me using less than a tablespoon of oil for three large potatoes, don’t worry! We are aiming for a light coating, not a soggy mess. Now, here is where the real magic starts: Before you even touch the oil, you absolutely must wash and then soak those thin slices in cold water for about 30 minutes. This simple step pulls out excess starch, which is exactly what stops your chips from sticking together and ensures that amazing crunch you’re after. Trust me on this technique; it’s crucial for perfect homemade potato chips.
The Technique: How to Make Crispy Baked Potato Chips
Okay, now that your potatoes are soaking and rinsing like little clouds, it’s time for the hands-on part. This process is where precision meets patience, but stick with me, and you’ll have the crispest potato chips you’ve ever made at home. We are aiming for maximum surface area exposure to the heat, which means slicing thin and spacing them out!
Preparation Steps for Uniformly Thin Potato Chips
First things first: you have to dry those slices; I mean bone dry! Any lingering water turns to steam and makes your chips soft instead of crispy. If you’ve got one, pull out that mandoline slicer! Seriously, it’s the best way to get uniform slices about 1/16 of an inch thick. Uniformity is everything for getting that perfect, even crunch. If you don’t have one, use your sharpest knife and try to keep your fingers safe! Just ensure every slice is nearly see-through. If they aren’t dry, they won’t crisp up the way they should.
Seasoning and Layering for Maximum Crispness
Once they are bone dry, toss those thinly sliced potatoes gently with your olive oil—remember, we are barely coating them. Then, sprinkle on your salt, garlic, and paprika mix. Toss again so everything sticks just right. Now for the most important part for any great crispy potato chips recipe: you must lay them out on your parchment-lined baking sheets in a single layer. I mean wide spacing! If they overlap even a little bit, they steam instead of roast, and you’ll end up with floppy chips. Give them room to breathe and bake until you see those beautiful golden edges popping up!
Oven Baked Versus Air Fryer Chips: A Comparison
Everyone wants their snacks made differently these days, and I get it! Sometimes you don’t want to heat up the whole oven, or maybe you just love your air fryer—it’s certainly a faster way to get that crunch. We’ve built this core recipe around the oven because I can cover more surface area at once, which is great for parties, but the air fryer method is fantastic for smaller batches of potato chips.
If you’re using the air fryer, you’ll need to work in smaller batches to make sure those slices aren’t touching. Cook them at 375°F (190°C) for about 10 to 15 minutes total. Make sure you shake that basket every five minutes! That vigorous movement is what keeps them turning evenly in that high-heat environment. See all the tips for the air fryer over at Crispy, Golden Air Fryer Potato Chips.
Tips for Perfect Oven Baked Potato Chips
When you go the oven route for your baked potato chips, temperature management is everything. Preheat your oven to 400°F (200°C) and don’t rush it! A hot oven sets the starch quickly, which is the first step toward crispness. When you check on them around the 15-minute mark, look for deep golden edges. If some look lighter, quickly rotate that pan—my oven always has one hot spot I have to correct for!

But here’s the absolute veteran move: don’t touch them once they come out of the oven for the first ten minutes! They look a little pale, maybe even a bit pliable, but that cooling time on the hot pan is when they finish locking in that dry, brittle structure. Seriously, the resting phase makes them significantly crunchier. You can try out loaded variations after you master the classic, like those fun ideas found when you check out loaded baked potato chips, but nailing this crisping rule first is non-negotiable!
Flavor Variations for Your Homemade Potato Chips
Once you’ve mastered the basic technique for achieving that perfect, shatteringly crisp base, the flavor possibilities for your seasoned potato chips open up completely! Honestly, this is where the fun ramps up. Since you’re in charge, you can ditch the artificial flavors and go as bold or as subtle as you want. You can make a huge batch of plain, perfectly salted chips first, and then divide them into smaller bowls for customizing—that’s what I usually do for movie nights!
My go-to is usually a play on the garlic and paprika we used in the base recipe, but you can get really creative. If you like a smoky, sweet kick, try mixing a little brown sugar with your smoked paprika for a quick BBQ dust. Or, for something truly special, especially if you’re serving these as a fun party snack recipe, you could try a homemade ranch seasoning mix.
If you are craving that familiar, addictive sweet-and-tangy profile without deep frying, you absolutely have to try a Honey BBQ coating. I’ve got a great low-calorie spin on that flavor profile that keeps these savory treats light enough for any day. You can find the exact ratios I use for that sweet, smoky dust right over here Flavorful & Light: DIY Low-Calorie Honey BBQ Potato Chips Recipe! It proves you never have to choose between amazing flavor and healthy chip recipes!
Making Crunchy Snack Ideas Ahead of Time
So, you made a massive batch of these incredible homemade potato chips (because, let’s face it, they disappear fast!), and now you’re wondering how to keep that glorious crunch alive for tomorrow. This is where we switch from cooking mode to storage science! These amazing potato chips are best enjoyed immediately, of course, but they totally manage well for a day or two if you treat them right. Remember, moisture is the enemy of crunch, so we have to seal them off from the kitchen air.
The biggest mistake people make is shoving them back into the original bag. That thin plastic offers zero protection! You need an airtight container—a sturdy glass jar with a rubber seal is my absolute favorite container for this. If you don’t have a big jar, use a Ziploc bag and squeeze every single puff of air out before sealing it shut. Seriously, vacuum seal it if you can!
I find they stay perfectly crisp for about 24 hours stored this way on the counter. If it’s humid outside, maybe only 18 hours. If you wake up the next day and they seem just a tiny bit soft? Don’t stress! They are salvageable. Pop them back into that 400°F oven—no oil needed, of course—for just about 3 to 5 minutes. Keep your eye on them because they go from soft to burnt in seconds! That little blast of heat dries them right back out, and boom—you have perfectly crunchy snacks again, ready for your midday craving.
Troubleshooting Common Potato Chip Issues
Even with the best intentions and the most careful slicing, sometimes our beautiful potato chips don’t come out exactly like we pictured. Don’t panic! In my experience developing recipes, these little hiccups usually point back to one or two core technique issues—usually slicing or spacing. When they go wrong, they usually go wrong in three predictable ways, and I have simple fixes for all of them.
If your chips end up less crunchy than you hoped, it almost always comes down to two things: either you didn’t dry them thoroughly enough after rinsing the starch, or you overlapped them on the baking sheet. When those slices touch, they steam themselves into softness, no matter how high the oven heat is. Next time, increase your soaking time to 45 minutes, dry them until you think you can’t dry them anymore, and then give them another swipe with a dish towel! And be ruthless about spacing them out on the pan.
What if you pulled them out, and they looked brown, but when they cooled, they were still a little chewy in the middle? That usually means the slices weren’t perfectly uniform. If you have one slice that’s 1/12 inch thick next to one that’s 1/20 of an inch thick, the thinner one is going to burn while the thicker one stays soft. That’s why I sing the praises of the mandoline so often! If you spot a few chips burning while many others are still pale, pull the dark ones off quickly and let the rest finish roasting. It’s a balancing act, but once you find your oven’s sweet spot, you’ll nail these homemade potato chips every single time.
Finally, on the flavor front, if your chips are perfectly crisp but taste bland, you didn’t season evenly. Remember, the seasoning sticks best right after the oil hits them. If you’re worried about saltiness, season lightly before baking, and then sprinkle a tiny pinch of fine sea salt over them right when they come out of the oven—it adheres beautifully to the hot surface and gives you that perfect, professional “finishing salt” flavor.
Frequently Asked Questions About Homemade Potato Chips
I always get so many questions when people try this recipe for the first time! It’s smart to check in on a few things, especially when you’re moving away from store-bought options and making these incredible potato chips completely from scratch snacks. We want to make sure your snacking experience is top-notch, whether you’re making them for a movie night or just as a quick potato side dish!
Can I use sweet potatoes for these potato chips?
Oh yes, you absolutely can! Sweet potatoes make a gorgeous, slightly sweeter chip. The only thing you need to remember is that they naturally hold a bit more moisture than Russets. Because of that, you might need to keep them in the oven for an extra two to three minutes, or you might need to use a slightly lower temperature to ensure they dry out completely without burning those beautiful sweet edges.
What is the best way to slice potatoes thinly?
Look, I know a sharp knife is great, but when we talk about getting that paper-thin consistency—about 1/16 of an inch—that’s necessary for that shatteringly crisp texture, a mandoline slicer is really the only way to go. It ensures every single slice is identical, which is crucial for even cooking. If one slice is twice as thick as its neighbor, one will burn, and the other will still be soft. You can find more tips on achieving that perfect slice over at Homemade Potato Chips Recipe.
Nutritional Snapshot of These Guilt-Free Potato Chips
We talked a lot about how these baked potato chips are a healthier alternative, and here’s the proof in the numbers! I want to be super clear: because we are using fresh ingredients and controlling exactly how much oil goes in, these estimates are based precisely on the recipe card provided above. Your exact numbers might shift slightly depending on the exact oil you use or the size of your potatoes, but this gives you a great baseline comparison against those bagged, deep-fried options. Knowing what you’re putting into your body is key when you’re aiming for healthy chip recipes!
Here is the estimated nutritional breakdown per serving size listed in the recipe:
- Serving Size: 1 serving (approx. 1 oz)
- Calories: 130
- Fat: 6g
- Saturated Fat: 1g
- Carbohydrates: 18g
- Protein: 2g
- Fiber: 2g
- Sodium: 250mg (This is why using fine sea salt, not table salt, helps you control the precise measurement!)
- Sugar: 0.5g
See? A third of the calories of standard fried chips, and you actually get fiber and protein in there! Knowing this info lets you enjoy these crunchy snacks without any second-guessing.
PrintCrispy Baked Potato Chips: The Guilt-Free Homemade Snack
Learn the technique to create perfectly thin, crispy, and golden homemade potato chips using your oven. This easy recipe delivers irresistible crunch without deep frying, making it a healthy chip recipe you can trust.
- Prep Time: 15 min
- Cook Time: 20 min
- Total Time: 35 min
- Yield: 4 servings 1x
- Category: Snack
- Method: Baking
- Cuisine: American
- Diet: Vegetarian
Ingredients
- 3 large Russet potatoes, thinly sliced
- 1 tablespoon olive oil
- 1 teaspoon fine sea salt
- 1/2 teaspoon garlic powder
- 1/4 teaspoon paprika
Instructions
- Preheat your oven to 400°F (200°C). Line two large baking sheets with parchment paper.
- Wash and dry the potatoes completely. Slice the potatoes very thinly, aiming for uniform thickness, about 1/16 inch. A mandoline slicer works best for this.
- Place the sliced potatoes in a large bowl. Drizzle with olive oil and toss gently until all slices are lightly coated.
- In a small bowl, mix the sea salt, garlic powder, and paprika. Sprinkle this seasoning mix over the potatoes and toss again to distribute evenly.
- Arrange the seasoned potato slices in a single layer on the prepared baking sheets. Do not overlap the slices; this is key for maximum crispiness.
- Bake for 15 to 20 minutes. After 15 minutes, check the chips. Rotate the pans if necessary.
- Continue baking until the edges of the chips are golden brown and they feel firm to the touch. Baking time varies based on slice thickness.
- Remove from the oven and let the chips cool completely on the baking sheets. They will crisp up further as they cool.
- Serve immediately for the best crunchy snack experience.
Notes
- For the crispiest homemade potato chips, soak the sliced potatoes in cold water for 30 minutes before drying them thoroughly. Removing starch aids crisping.
- If you prefer air fryer potato chips, cook them in a single layer in the air fryer basket at 375°F (190°C) for 10-15 minutes, shaking the basket every 5 minutes.
- Adjust seasoning to your preference. Try onion powder or a pinch of cayenne pepper for a different flavor profile.
Nutrition
- Serving Size: 1 serving (approx. 1 oz)
- Calories: 130
- Sugar: 0.5
- Sodium: 250
- Fat: 6
- Saturated Fat: 1
- Unsaturated Fat: 5
- Trans Fat: 0
- Carbohydrates: 18
- Fiber: 2
- Protein: 2
- Cholesterol: 0