
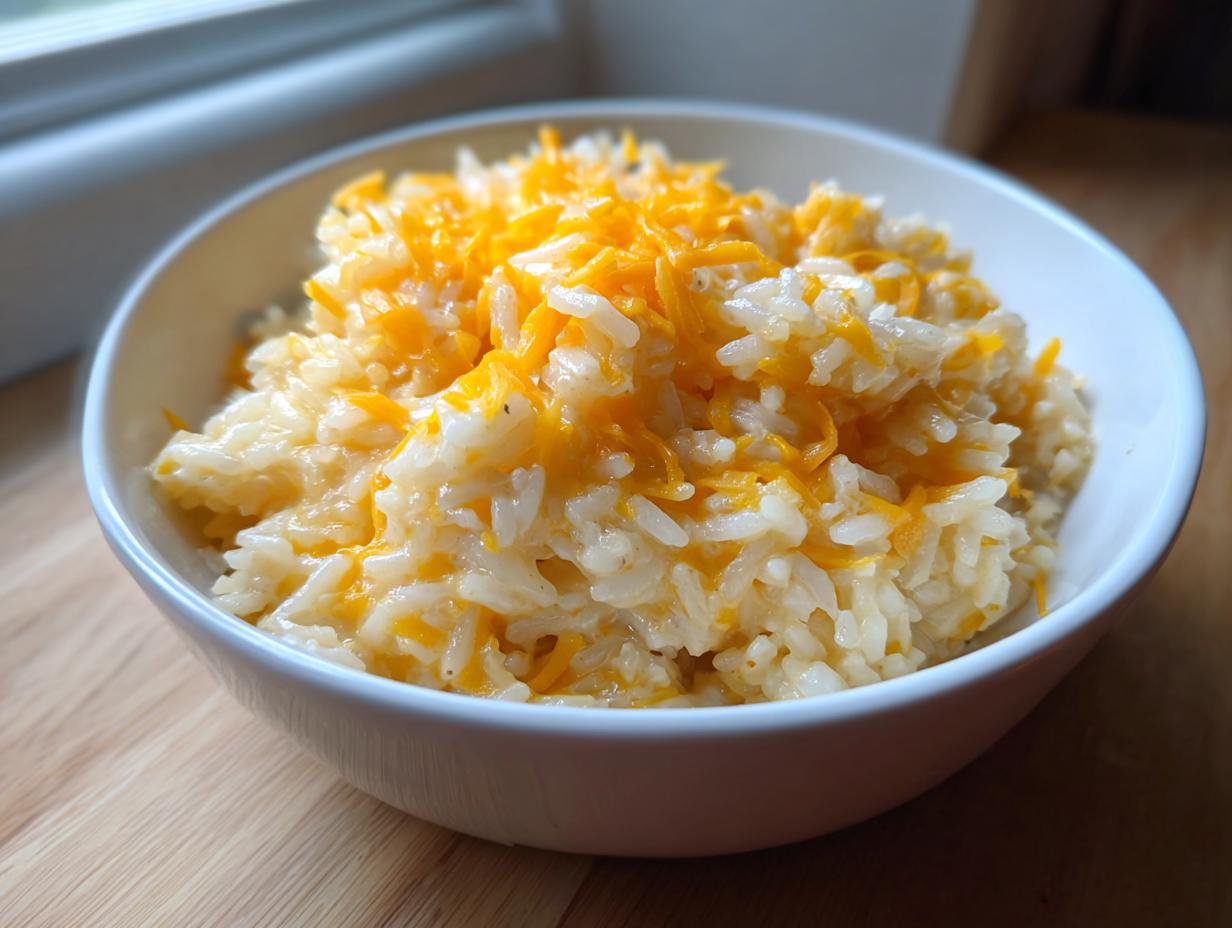
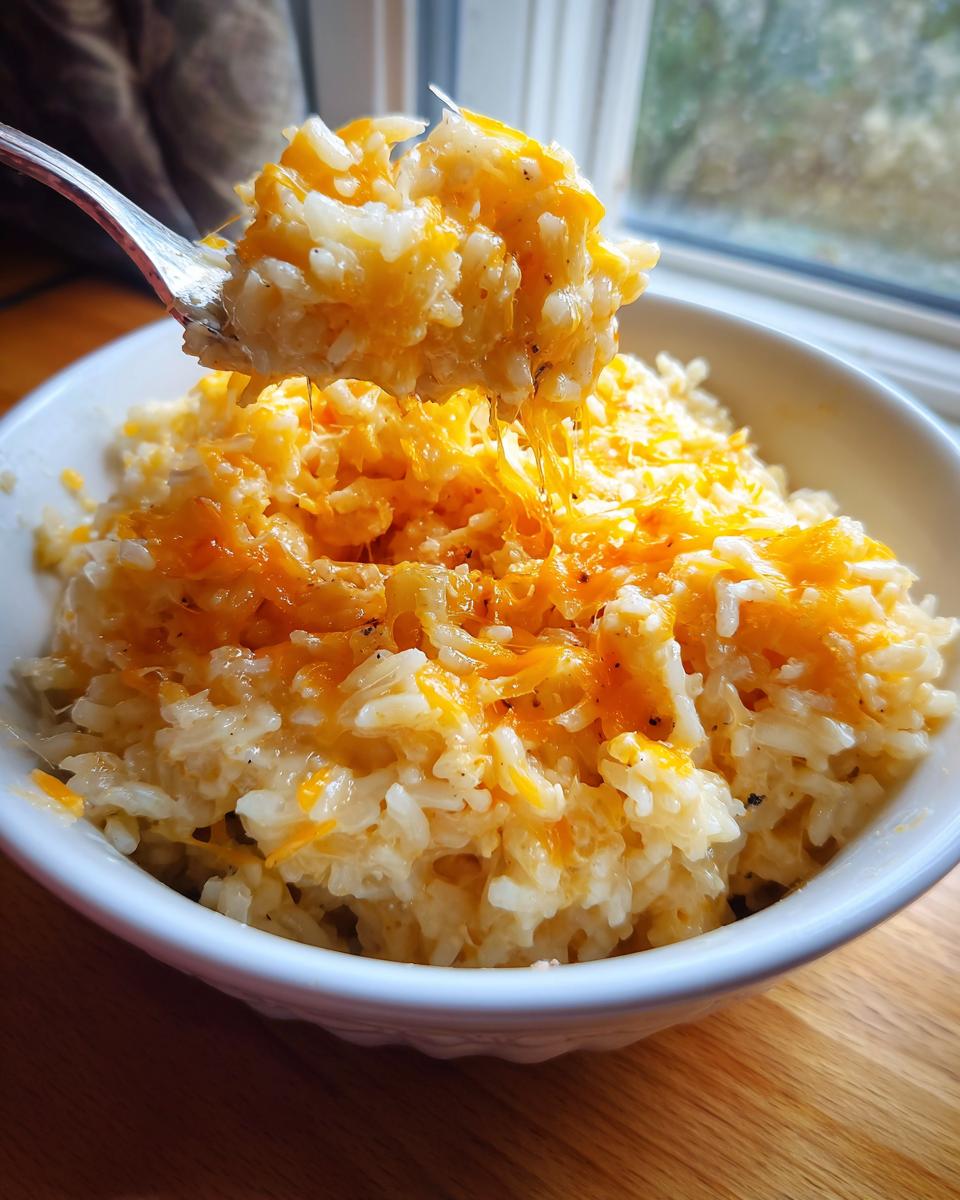
If there’s one thing I learned studying food science and watching my dad, a Navy chef, work magic, it’s that comfort food needs to be reliable. You shouldn’t need an hour or a ton of strange ingredients to get that cozy, creamy magic on your plate. That’s why I’m so excited to share what I consider the Best Cheesy Rice Recipe out there—it’s ready in under 30 minutes! This stovetop version cuts through the fuss, delivering rich cheddar flavor that makes it satisfying every single time. Making truly great, speedy cheesy rice is all about technique, and that’s what we apply here to make it foolproof.
- Why This Creamy Rice Side Dish is Your New Weeknight Staple
- Ingredients for the Best Cheesy Rice Recipe
- Stovetop Cheesy Rice Instructions: Creating Comfort Food Rice
- Tips for Success with Your Homemade Cheesy Rice
- Variations: Making Your Cheesy Rice Your Own
- Storage and Reheating Instructions for Leftover Cheesy Rice
- Frequently Asked Questions About Making Cheesy Rice
- Estimated Nutritional Profile for this Cheesy Rice
- Share Your Experience Making This Quick Cheesy Rice Dinner
Why This Creamy Rice Side Dish is Your New Weeknight Staple
When I develop recipes, I always ask myself: does this taste like something I’d actually make on a Tuesday? For this creamy rice side dish, the answer is a resounding yes. It hits that sweet spot where maximum flavor meets minimal effort. You get all the gooey, comforting satisfaction without having to commit to a long bake time. It’s the perfect addition when you need just one more amazing component to finish off dinner.
It’s truly a fantastic 30 Minute Rice Side that just doesn’t quit on flavor. We use the stovetop method, which means less cleanup and direct control over the way the liquid is absorbed.
Speed and Simplicity: The 30 Minute Cheesy Rice Promise
Forget oven thermometers and fussy layering! This recipe keeps things incredibly straightforward. Prep time is exactly five minutes—you’re just chopping garlic and measuring things out. The actual cook time sits right around 25 minutes. That’s it! You can easily manage helping the kids with homework or setting the table while this cooks away perfectly covered on the stove. It’s reliability baked right into the timing.
Achieving Perfect Cheesy Rice Texture
What sets this apart from watery rice dishes? It’s the cheese combination! We aren’t relying on just one type of cheese here. I combine sharp cheddar for that familiar tangy bite and freshly grated Parmesan for its salty depth and incredible melt quality. This dual approach ensures our cheesy rice doesn’t just taste good; it gets that velvety, cohesive texture that stops it from being soupy or clumpy. It’s a little science trick that makes a huge difference!
Ingredients for the Best Cheesy Rice Recipe
When you’re aiming for reliable results, ingredients matter, but I always preach using what you have on hand! For this recipe, we’re keeping it straightforward, but please trust me when I say: use freshly shredded sharp cheddar if you can. Pre-shredded cheese has those anti-caking powders that stop it from melting into that beautiful, smooth sauce we want. You’ll see everything needed for this Best Cheesy Rice Recipe listed below.
- 1 tablespoon unsalted butter—the real stuff, please!
- 2 cloves garlic, minced finely.
- 1 cup long-grain white rice, uncooked (no rinsing needed here!).
- 2 cups low-sodium chicken broth.
- 1/2 cup whole milk—this brings the creaminess.
- 1/2 teaspoon salt and 1/4 teaspoon black pepper.
- 1 cup sharp cheddar cheese, freshly shredded.
- 1/2 cup Parmesan cheese, grated finely.
Stovetop Cheesy Rice Instructions: Creating Comfort Food Rice
Now for the assembly! Since this is a Comfort Food Rice dish made entirely on the stove, we have wonderful control over the texture. We’re going to move through this quickly, but don’t rush the simmering part—that’s where the rice cooks perfectly. Once you see that beautiful steam escaping, you know you’re making magic. This process keeps everything contained in one pot, which is a huge win on cleanup! A little science mixed with great home flavor is what makes this cheesy rice recipe shine.
Sautéing Aromatics and Toasting the Rice
First up, get that butter melted in your medium saucepan over medium heat. Toss in your minced garlic immediately. You only want to sauté this for about 30 seconds until it smells amazing, right on the edge of fragrant. Stop right there! Trust me, browned or bitter garlic ruins the whole vibe. Next, add your uncooked rice and stir it constantly for a full minute. This toasting step, or *tostatura*, really helps the grains hold up during cooking.
Simmering the Rice for Tender Results
This is when we introduce the liquids: the chicken broth and the milk, along with your salt and pepper. Bring that whole mixture up to a boil over medium-high heat. As soon as it hits a rolling boil, you must reduce the heat down to the lowest setting possible. Cover it tightly! This is critical: you need to simmer that rice, undisturbed, for 18 to 20 minutes. Seriously, don’t peek. Lifting the lid lets out the steam that’s cooking the starch.
Melting the Cheese for Creamy Cheesy Rice
When the timer goes off, pull the saucepan completely off the heat. Let it sit there, covered, for another five minutes. This resting period is my secret to keeping the final texture from getting gummy. After resting, take the lid off and immediately stir in those gorgeous cheeses—the sharp cheddar and the Parmesan. Stir gently until everything is totally melted and your glorious homemade cheesy rice is smooth, thick, and ready to eat!
Tips for Success with Your Homemade Cheesy Rice
We’ve got a fantastic recipe, but sometimes dialing in that rich, luxurious result takes just a tiny bit of extra know-how. Since I spent years in professional recipe development, I can share the tweaks that turn good cheesy rice into great cheesy rice. Think of this less like a rigid rulebook and more like insider tips from my kitchen to yours. These small adjustments guarantee maximum comfort in every spoonful.
Ingredient Notes and Substitutions for Cheesy Rice
If you want to push this recipe into next-level richness—and believe me, you might want to—try adding two ounces of cream cheese in with the shredded cheese at the very end. It melts down beautifully and triples the velvety texture. Also, if you are completely slammed for time, you can use pre-cooked rice! If you go that route, skip steps 1 through 4 entirely. Just toss the cooked rice with the broth, milk, and seasonings on low heat until warm, then stir in the cheese. It suddenly becomes one of those lightning-fast Quick Side Dishes with Rice!
Pairing This Simple Cheesy Rice for Chicken
This dish is so adaptable! Because it’s rich but not overpowering, it acts as the perfect sturdy side for almost anything you grill or roast. It goes incredibly well alongside a simple piece of grilled chicken breast—that’s why it’s such a great Simple Cheesy Rice for Chicken accompaniment. But don’t stop there! It stands up beautifully to steak or even baked salmon if you need a creamy counterpart to something lighter. It really is the dream side dish for weeknights.
Variations: Making Your Cheesy Rice Your Own
While this recipe is perfect right off the stovetop, I always encourage home cooks to treat recipes like guidelines, not gospel! Cooking should feel creative, right? After all, my mom taught me flavor through intuition, and I love seeing how you all make this dish your own. Since this creamy rice side dish is such a fantastic starting canvas, adding mix-ins takes mere seconds before you stir in the final cheeses.
Want to sneak in some greens? Toss in a cup of small broccoli florets right along with the rice when you toast it in step two. The rice will absorb the moisture from the broth, and the broccoli will steam perfectly alongside it. No need to pre-cook anything—that’s the beauty of this one-pot method! Another fun twist I love is adding a little kick. About half a teaspoon of smoked paprika or a dash of cayenne pepper, stirred in when you add the salt and pepper, gives it a subtle warmth without making it outright spicy. It really complements that sharp cheddar flavor wonderfully. These simple swaps will keep you finding new joy in this classic comfort food.
If you want to check out some other amazing variations on this theme, I saw a few inspiring ideas over at The Toasty Kitchen. Honestly, once you trust the simmering time, you can start experimenting freely!
Storage and Reheating Instructions for Leftover Cheesy Rice
I know you’re going to love this so much you might actually have leftovers—which is rare in my house because this cheesy rice disappears so fast! But life happens, and sometimes we need to save some for lunch tomorrow. Storing it properly is crucial to maintaining that creamy texture we worked so hard to achieve.
For the best results, cool down any extra rice quickly. Don’t leave it sitting out at room temperature for more than two hours. Transfer the leftovers to an airtight container. I prefer glass containers because they reheat more evenly, but any good sealed container works great. This delicious side dish will keep well in the refrigerator for about three to four days.
Now, reheating is where people often go wrong! If you just nuke it in the microwave, the starches tighten up, and you end up with stiff, slightly dry rice. My absolute favorite way to revive it is back on the stovetop. Place the leftovers in a saucepan over medium-low heat. You’ll likely need to add a splash of liquid—about a tablespoon of milk or chicken broth per cup of rice—to loosen things up again. Stir constantly until it’s heated through and the creaminess returns. It only takes about five minutes!
If you are in a real pinch and have to use the microwave, go for it, but use short bursts of about 30 seconds at a time, stirring well in between each burst. Always add that splash of milk before heating, even in the microwave, so it steams back to life instead of just drying out.
Frequently Asked Questions About Making Cheesy Rice
I get so many questions about this recipe once people try it, which honestly just shows how much everyone loves this cheesy rice comfort food! It’s totally normal to have a few hang-ups when trying a new stovetop method. I’ve pulled together the ones I hear most often to make sure you feel super confident heading into your kitchen. We want reliable, creamy results every time, right?
Can I use brown rice instead of white rice in this Easy Cheesy Rice Recipe?
That’s a great question if you’re looking to boost the fiber! While you absolutely *can* use brown rice, you can’t swap it one-for-one in terms of time or liquid. Brown rice takes a lot longer to soften—we’re talking more like 40 to 50 minutes of simmering, not 20. You’ll also probably need to add a bit more broth or water since the grains absorb so much more. If you try it, watch the liquid closely and be prepared to let it simmer until the brown rice is perfectly tender before moving on to the cheese steps.
How do I keep my cheesy rice from getting gummy?
This is the number one texture concern, and I promise, we avoid the gummy situation entirely by following two key steps! First, you must let the rice rest, covered, for five minutes after taking the pot off the heat—don’t skip that! This allows the steam to finish cooking the rice gently. Second, and most importantly, you must remove the pot from the burner *before* stirring in the sharp cheddar and Parmesan. Adding the cheese while the pot is still heating directly causes the cheese proteins to seize up and get stringy or gummy instead of flowing beautifully into a sauce.
Is this a good Kid Friendly Cheesy Rice option?
Oh, definitely! This is hands-down a fantastic Kid Friendly Cheesy Rice option because it’s so mild and rich. If you’ve got little ones who are sensitive to spice, just skip the black pepper entirely. If you want to sneak in a vegetable without fuss, stir in three-quarters of a cup of frozen green peas right when you add the broth in Step 3. They’ll cook perfectly alongside the rice but won’t change the flavor profile noticeably. They love loading up a plate of this stuff!
Estimated Nutritional Profile for this Cheesy Rice
I always include this section because understanding what’s in our food is part of that kitchen alchemy—we want to fuel our bodies well, right? Now, please remember that these numbers are an estimate based strictly on the ingredients listed in the recipe. Once you start adding extra cream cheese, or if you swap out the chicken broth for something else, those values change slightly. This is just a good baseline for our creamy Parmesan rice!
We aimed for a side dish that delivers great satisfaction without overloading on sodium or sugar, though cheese does bring some goodness in there! Here is the breakdown per serving (that’s about one cup of the cooked mix):
- Serving Size: 1 cup cooked
- Calories: 380
- Sugar: 2 grams (Wow, that’s low!)
- Sodium: 550 mg (We used low-sodium broth, remember?)
- Fat: 16 grams
- Saturated Fat: 9 grams
- Unsaturated Fat: 7 grams
- Trans Fat: 0 grams (Yes!)
- Carbohydrates: 45 grams
- Fiber: 1 gram
- Protein: 14 grams
- Cholesterol: 45 mg
It’s a fantastic profile for a side dish—lots of protein and fat to keep you full, but naturally low in sugar, which is what I look for in savory comfort food!
Share Your Experience Making This Quick Cheesy Rice Dinner
Well, that’s it, friends! You now have the tools to make the creamiest, fastest cheesy rice of your life. I truly hope this stovetop recipe brings as much cozy comfort to your weeknights as it does to mine. Please take a moment to leave a quick rating below or tell me in the comments what you served it with! I love seeing what you all create, so tag me in your photos if you share them online—especially if you tried the cream cheese trick. Check out this similar inspiration at The Anthony Kitchen. And if you want to see another delicious side, you should definitely see what Rose is cooking up over at Cook With Rose. Happy cooking!
PrintQuick Stovetop Cheesy Rice with Sharp Cheddar
Make this creamy, comforting cheesy rice side dish on the stovetop in under 30 minutes. It uses simple ingredients like sharp cheddar and garlic for a reliable, flavorful result perfect for weeknight dinners.
- Prep Time: 5 min
- Cook Time: 25 min
- Total Time: 30 min
- Yield: 4 servings 1x
- Category: Side Dish
- Method: Stovetop
- Cuisine: American
- Diet: Vegetarian
Ingredients
- 1 tablespoon unsalted butter
- 2 cloves garlic, minced
- 1 cup long-grain white rice, uncooked
- 2 cups low-sodium chicken broth
- 1/2 cup whole milk
- 1/2 teaspoon salt
- 1/4 teaspoon black pepper
- 1 cup sharp cheddar cheese, shredded
- 1/2 cup Parmesan cheese, grated
Instructions
- Melt the butter in a medium saucepan over medium heat. Add the minced garlic and cook for 30 seconds until fragrant. Do not let the garlic brown.
- Add the uncooked rice to the saucepan and stir constantly for 1 minute to toast the grains slightly.
- Pour in the chicken broth and milk. Add the salt and pepper. Bring the mixture to a boil, then immediately reduce the heat to low.
- Cover the saucepan tightly and simmer for 18 to 20 minutes, or until the liquid is absorbed and the rice is tender. Do not lift the lid during this time.
- Remove the saucepan from the heat. Let it stand, covered, for 5 minutes.
- Remove the lid. Stir in the shredded cheddar cheese and grated Parmesan cheese until the cheese is fully melted and the rice is creamy.
- Serve the cheesy rice immediately as a side dish.
Notes
- For extra richness, substitute 1/4 cup of the milk with 2 ounces of cream cheese, added with the shredded cheese in the final step.
- You can use pre-cooked rice to speed up the process; skip steps 1 through 4 and simply combine the cooked rice with the broth, milk, and seasonings over low heat until warm, then stir in the cheese.
- This recipe pairs well with grilled chicken or steak.
Nutrition
- Serving Size: 1 cup cooked
- Calories: 380
- Sugar: 2
- Sodium: 550
- Fat: 16
- Saturated Fat: 9
- Unsaturated Fat: 7
- Trans Fat: 0
- Carbohydrates: 45
- Fiber: 1
- Protein: 14
- Cholesterol: 45