
There is just nothing that captures pure, unadulterated comfort quite like a dessert that tastes exactly like childhood. Forget fussy techniques for a moment; we’re talking about a creamy, nostalgic bite that settles right into your soul. That’s why I am so thrilled to share what I consider the absolute pinnacle of simple baking: this fail-proof, silky smooth old-fashioned egg custard recipe. As someone who spent years studying Food Science and then developing professional recipes, my entire goal here at Alchemy Chef is reliability. I promise you, this baked egg custard will deliver that perfect texture, every single time you try it. We’re making magic from milk, eggs, and sugar!
- Why This Old Fashioned Dessert Is Your New Go-To Egg Custard Recipe
- Ingredients for Your Silky Smooth Egg Custard
- The Science of a Foolproof Baked Egg Custard Recipe
- How to Prepare Your Creamy Dessert Homemade
- Variations: From Simple Homemade Pudding to Custard Pie Filling Recipe
- Storage and Reheating Instructions for Classic Egg Custard
- Frequently Asked Questions About Your Egg Custard
- Nutritional Estimates for this Traditional Baked Goods Recipe
- Share Your Alchemy Chef Egg Custard Success
Why This Old Fashioned Dessert Is Your New Go-To Egg Custard Recipe
Listen, when you look for a recipe like this, you aren’t looking for drama. You want that lovely, pure taste of an old fashioned dessert that just melts in your mouth. That’s precisely what we engineered here. My background means I can’t stand the surprise of cracked tops or grainy custard. Honestly, achieving a no crack custard is a non-negotiable point for us at Alchemy Chef!
This baked custard isn’t trying to be trendy; it’s just perfectly executed comfort. It’s designed to be completely foolproof custard, offering that rich, silky smooth texture and creamy consistency you dream about. If you’ve been intimidated by custard before, trust me, this version is simple enough for a beginner but reliable enough for the holidays. It’s the kind of recipe you save immediately, just like the great bakers over at this site do!
Ingredients for Your Silky Smooth Egg Custard
When you’re aiming for that ethereal, velvety finish, the ingredients are non-negotiable. We keep this simple, relying on quality basics to achieve that truly creamy dessert homemade feel. You will need three large eggs, exactly half a cup of granulated sugar, 2 2/3 cups of whole milk, and one teaspoon of pure vanilla extract. If you like a traditional presentation, grab a little pinch of ground nutmeg to sprinkle on top later. That’s all it takes for a wonderful vanilla custard dessert!
Ingredient Notes and Substitutions for Perfect Egg Custard
I get asked all the time about swapping ingredients, especially when aiming for an easy egg custard. Please, stick with whole milk if you can! Using 2% or skim milk seriously compromises the richness that gives this custard its body. You need that fat content for that beautiful mouthfeel. Also, use large eggs—medium eggs will throw off the liquid balance just enough to risk curdling. If you really want to go extravagant and make it ultra-rich, you can absolutely swap out half a cup of the milk for heavy cream. Check out tips on dairy richness here: this culinary source has great general advice!
The Science of a Foolproof Baked Egg Custard Recipe
Okay, so this is where my food science background really shines! People think making a perfect egg custard is all luck, but it’s really about controlling the heat. The number one enemy here is aggressive heat, which makes the egg proteins seize up too fast, resulting in that grainy, rubbery disaster we call curdled custard. Yuck!
That’s why the water bath, or bain-marie, is utterly essential. It’s like buffering your custard from the direct oven heat. Imagine your custard dishes sitting in a gentle, steamy pool—that surrounding heat is much softer than dry oven heat, allowing the proteins to set slowly and evenly. This is the secret to achieving that beautiful, gentle set and that guaranteed silky smooth custard texture.
And don’t you dare skip the straining step! Even if you whisk gently, tiny bits of egg white or undissolved sugar can catch the heat and become hard spots or lumps. Straining the mixture through a fine sieve twice removes all those tiny culprits, ensuring your final product lives up to its promise of being creamy perfection. You can learn more about proper technique for that smooth finish from experts like the folks at this site!
How to Prepare Your Creamy Dessert Homemade
Alright, let’s get mixing! Because this is a beginner baking recipe, I need you to move with intention, but not speed. First things first: get your oven set to 325°F (160°C) and place your pie plate or ramekins right inside the big baking pan you’ll use for the water bath. Having everything ready prevents panicked juggling later!
In a medium bowl, gently whisk those three eggs. And I mean *gently*! We want to combine them, not turn them into foam. If you beat air into them, they puff up, and when they deflate, that’s how you invite cracks into your beautiful dessert. Once the eggs are just joined up, whisk in your sugar until it dissolves—you shouldn’t feel any grit when you rub a bit between your fingers. Then, slowly, slowly, slowly whisk in the milk and vanilla extract. Think of it as introducing new friends politely, not throwing them into a party!
Now for that secret weapon for perfection: run the whole mixture through a fine-mesh sieve. Trust me on this one! This is what guarantees that silky smooth custard because it catches any stray bits that might toughen up. Pour the liquid into your prepared dishes before carefully adding the hot water to the outer pan up to halfway up the sides of your custard dishes. Head into the oven and keep an eye on them—we aren’t leaving this one up to chance! You can see a great example of gentle mixing here: this guide showcases the slow process beautifully.
Essential Tips for Achieving No Crack Custard
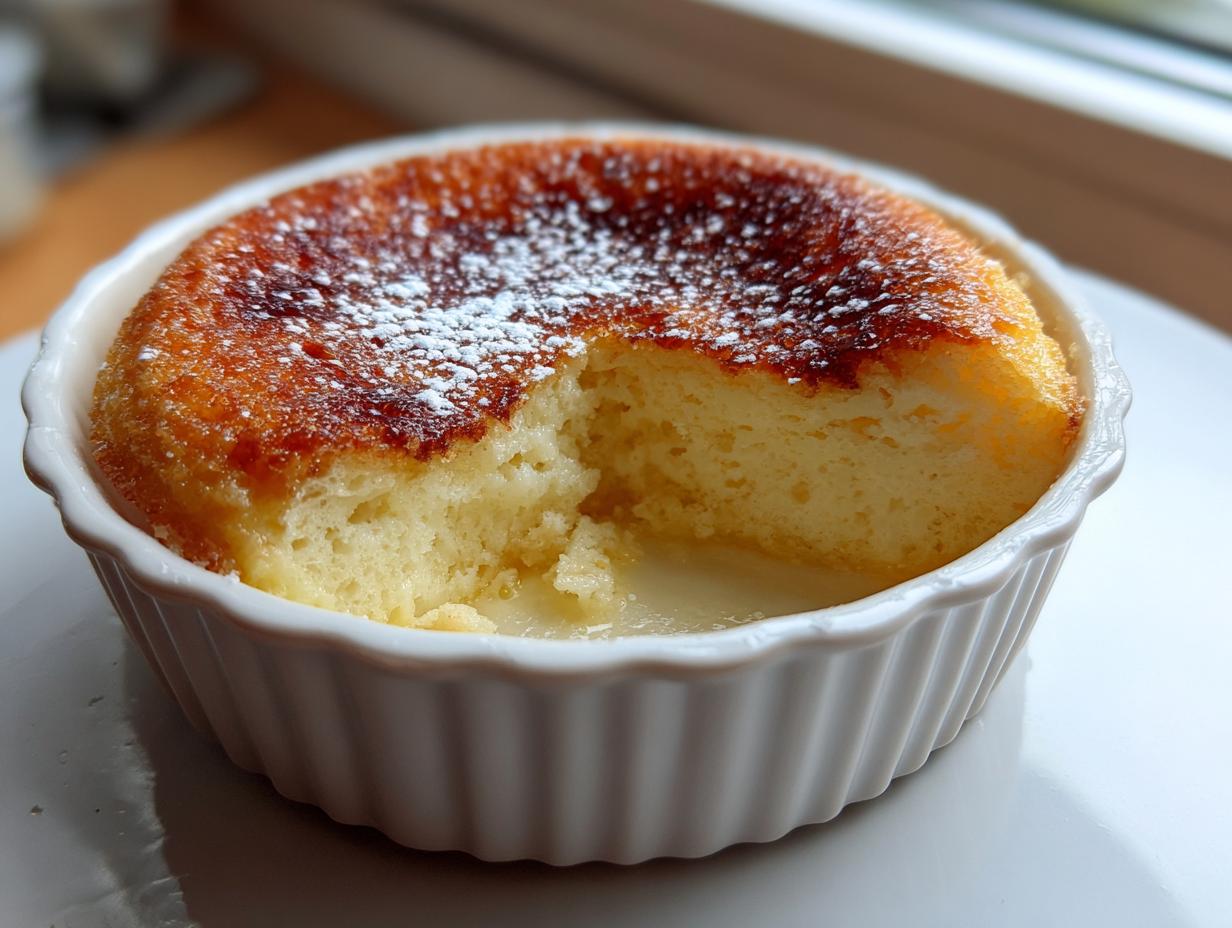
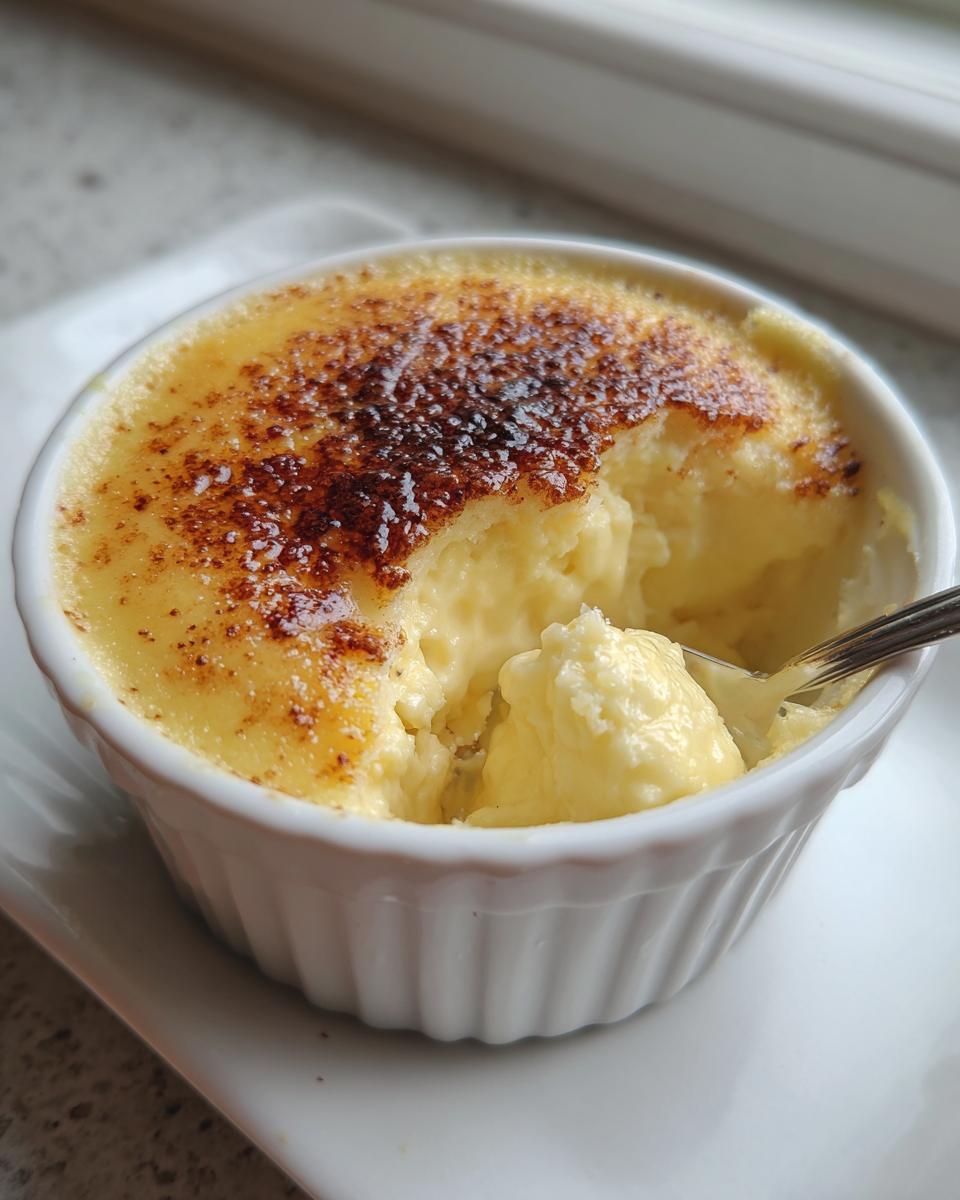
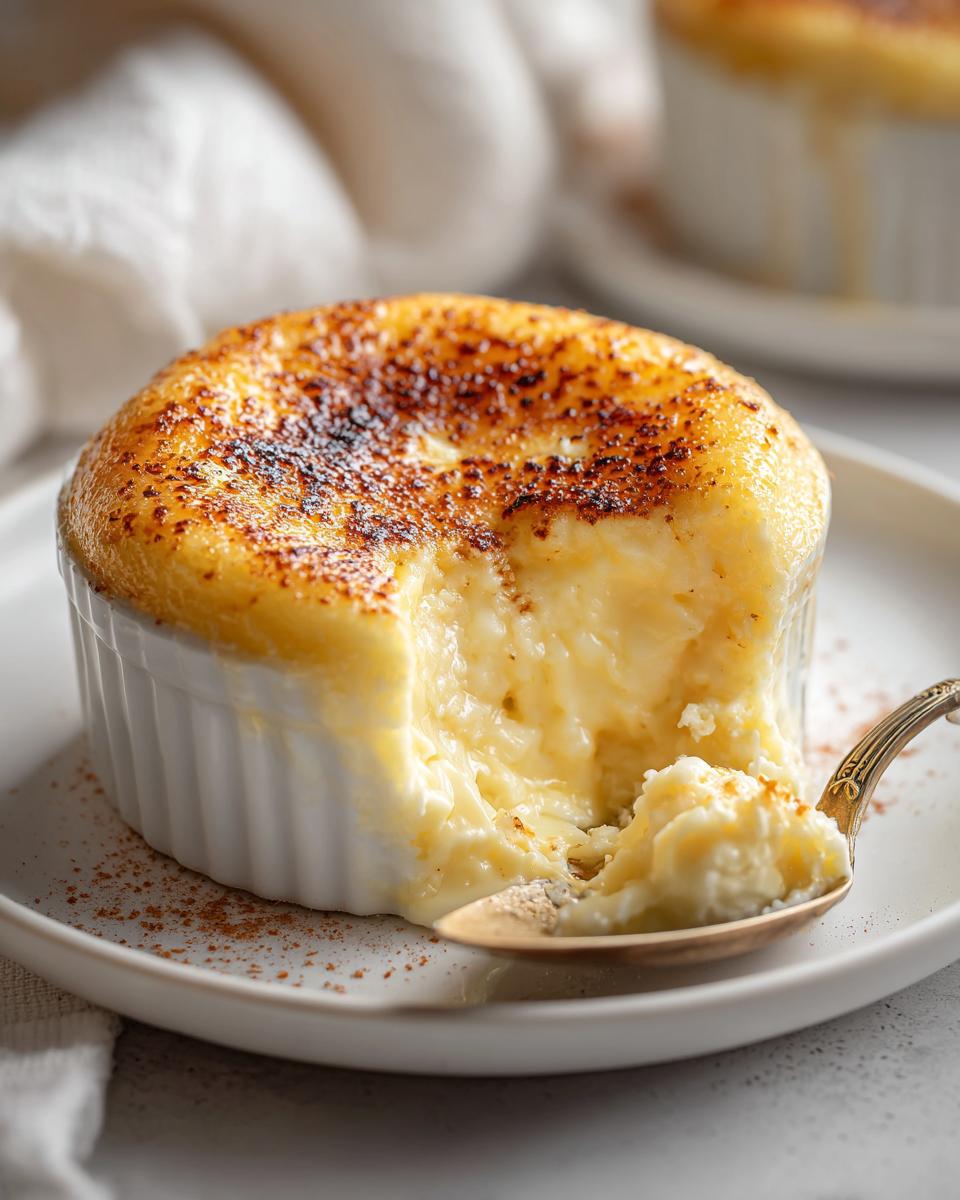
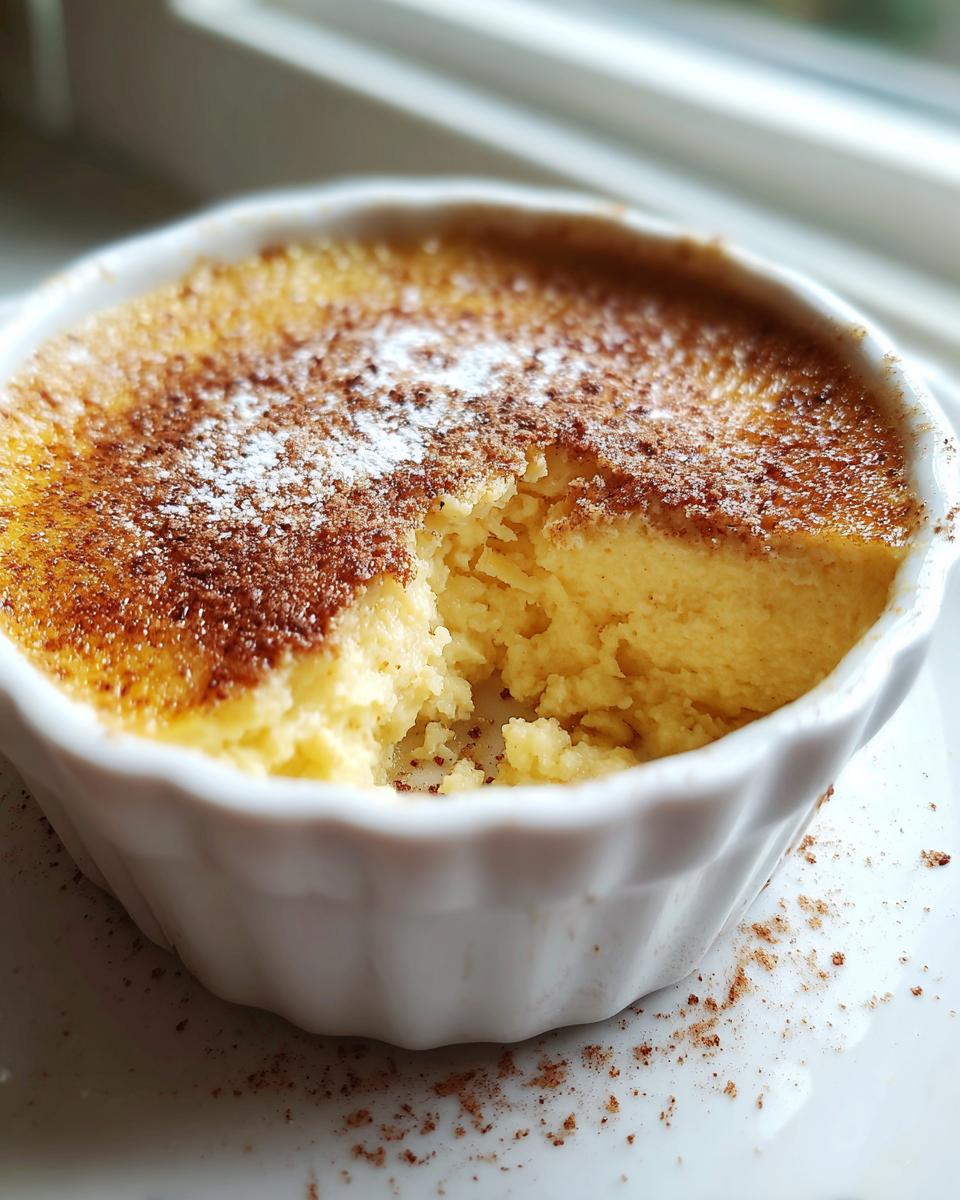
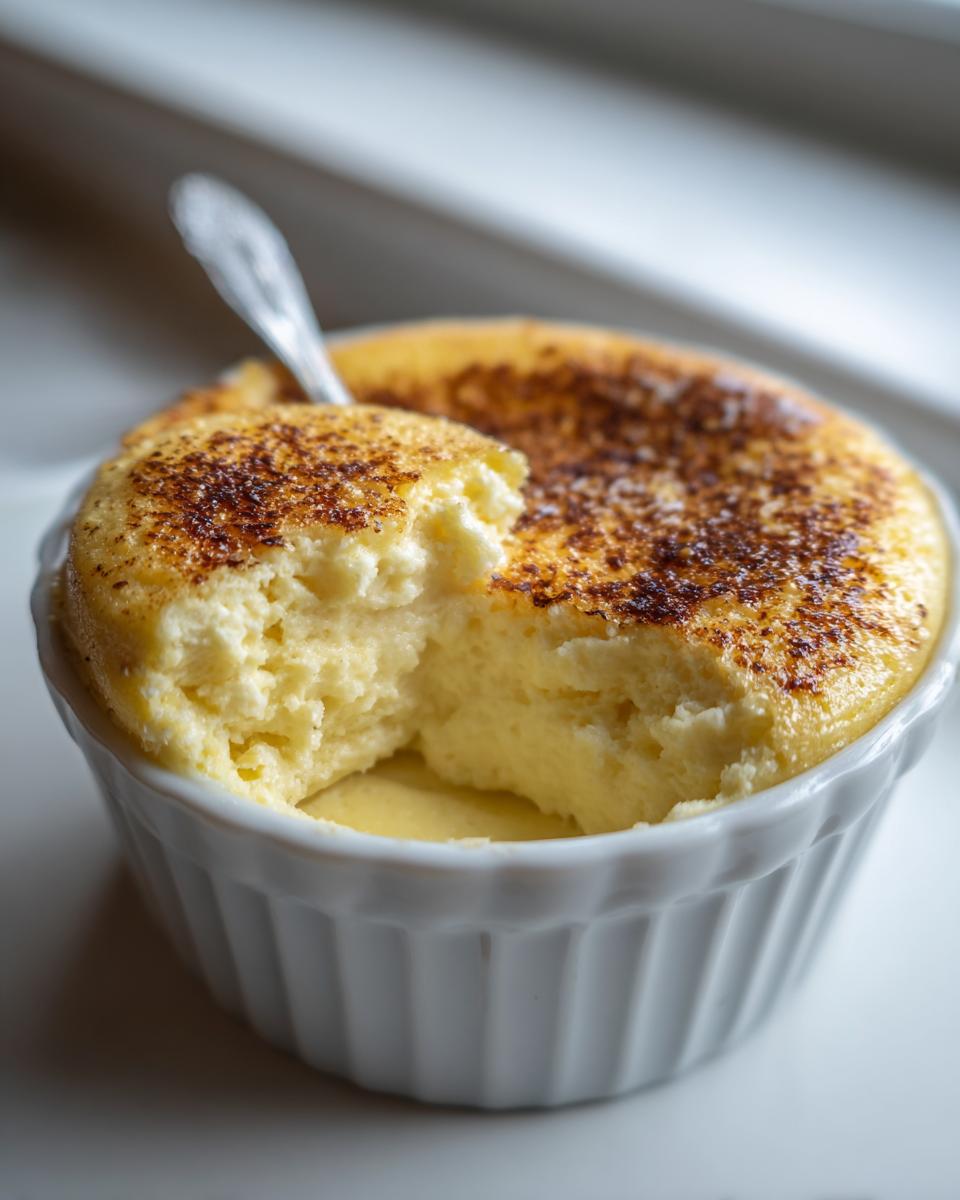
You’ll bake this for about 40 to 50 minutes, depending on if you used a big pie plate or smaller ramekins. The visual cue is everything. You are looking for the edges to be set—like firm gelatin—but when you nudge the pan, the very center should still have a little wobble to it. Don’t bake it until the center is firm, or you’ll end up with cracked tops!
I remember the first ten times I made an egg custard recipe, I pulled mine out when it still looked wet in the middle and came back to a sunken mess. It took a while to trust that slight jiggle! Once they’re done, carefully lift them out of the water bath and let them cool on a rack. They firm up a lot more as they cool down to room temperature, and then they must go to the fridge for at least four hours. That chilling is what sets that final, perfect creamy dessert homemade texture we worked so hard for. No cracking, just pure, nostalgic delight!
Variations: From Simple Homemade Pudding to Custard Pie Filling Recipe
See? That’s the beauty of a good, classic egg custard base—it wears different hats really well! If you don’t want to serve it in a ramekin or pie plate, just pour the strained mixture into a nice loaf pan instead. It becomes a wonderful, sliceable simple homemade pudding that is still incredibly comforting, though you’ll need to bake it a bit longer until it’s firm in the center.
If you’re aiming for a full-blown custard pie filling recipe, the adaptation is super easy. The only real change is that you need a 9-inch pie crust that is already baked—that’s called blind-baking, and it prevents a soggy bottom! Once your crust is cool, just pour the strained custard right in and bake it using the standard water bath, keeping an eye on those doneness cues we talked about.
When you want to jazz up the flavor just slightly? Try adding the zest of half a lemon right into the milk mixture before you heat it. Just strain it out with the egg bits! It keeps that true vanilla flavor but adds a bright little zing. For more ideas on making this a fantastic holiday pie, check out these tips!
Storage and Reheating Instructions for Classic Egg Custard
Luckily for us comfort food lovers, this Classic Egg Custard tastes even better the next day once it’s fully chilled! You must refrigerate your custard for a minimum of four hours, but honestly, overnight is when it achieves peak creaminess. Cover the dishes—I just use plastic wrap—and keep them cold. This whole dessert is really designed to be served chilled, straight from the fridge.
Now, about reheating: I’d advise against it. When you heat a baked custard like this again, you risk drying out those delicate edges because the chilling process stops the cooking, but reheating starts it right back up. If you absolutely must warm a portion, try maybe ten seconds in the microwave on low power, but it really shines when served cold as a perfect, simple, nostalgic dessert treat!
Frequently Asked Questions About Your Egg Custard
I totally get it! When you’re making a delicate dessert like this, you need reassurance. These are the exact questions I use to stress-test my own recipes before I hand them over to you. My goal is to ensure your result is a perfect, silky smooth custard!
Can I skip the water bath when making this egg custard?
Oh, please don’t! If you are looking for that foolproof custard guarantee, the water bath—that gentle hot water surrounding your dish—is your best friend. Skipping it is basically serving up a stress test on your eggs. Without that insulation, the edges cook way too fast while the center barely warms up, and that rapid temperature change is what causes ugly cracks or worse, a curdled mess. We need slow, even heat for that creamy consistency!
How do I know if my vanilla custard dessert is fully cooked?
This is the most important part for getting that perfect set! When the timer goes off, the edges of your vanilla custard dessert should look firm, but when you gently nudge the side of the pan, the very center—about the size of a quarter in the middle—should still have a visible wobble or jiggle. If it’s totally firm, you’ve gone too far! That slight jiggle means residual heat will finish cooking the center perfectly as it cools. Overbaking is the fastest way to ruin the creamy dessert homemade texture we worked so hard for. You can find more troubleshooting tips on reliable baking like this over at this resource.
Nutritional Estimates for this Traditional Baked Goods Recipe
Now, while my focus is always on flavor and texture—that perfect silky smooth experience—I know some of you track things more closely. So, here are the estimated nutritional numbers based on using standard ingredients for one serving of this Traditional Baked Goods recipe. Please remember, these are just ballpark figures, but they give you a good idea of what you’re enjoying!
- Calories: About 180
- Total Fat: Roughly 6 grams
- Carbohydrates: About 20 grams
- Protein: Around 10 grams
This is surprisingly satisfying for how simple it is! We aim for deliciousness first, but balancing inputs is always part of the kitchen alchemy, right? You can see general nutritional context on similar simple recipes here: this site offers good comparison points.
Share Your Alchemy Chef Egg Custard Success
Now that I’ve walked you through all the science and technique to get that perfectly silky smooth result—from gentle whisking to perfect water bath placement—I truly can’t wait to hear how it turned out for you. Creating something extraordinary from the ordinary is what kitchen magic is all about, and sharing that joy is the best part of my job!
If this Classic Egg Custard brought back sweet memories or simply wowed your family with its creamy texture, please leave a rating down below. Letting me know if you achieved that no crack custard finish is incredibly helpful for me as I continue perfecting these recipes. Don’t be shy about popping a photo on social media either; tag me so I can see your beautiful baked custard!
If you want to dive into more recipes that focus on transforming simple ingredients into something special, take a look over at this resource for more ideas. And if you decide to turn this into a spectacular pie, I highly recommend checking out the presentation tips on this lovely site to share your alchemy with the world!
PrintFail-Proof Silky Old-Fashioned Baked Egg Custard

Create a truly silky smooth, creamy egg custard dessert using simple ingredients. This classic, old-fashioned recipe is designed to be foolproof, avoiding cracking or curdling for a perfect result every time.
- Prep Time: 10 min
- Cook Time: 50 min
- Total Time: 60 min
- Yield: 4 servings 1x
- Category: Dessert
- Method: Baking
- Cuisine: American
- Diet: Vegetarian
Ingredients
- 3 large eggs
- 1/2 cup granulated sugar
- 2 2/3 cups whole milk
- 1 teaspoon pure vanilla extract
- Pinch of ground nutmeg (optional, for topping)
Instructions
- Preheat your oven to 325°F (160°C). Place a 9-inch pie plate or four 6-ounce ramekins in a large baking pan.
- Gently whisk the eggs in a medium bowl until just combined. Do not over-whisk to avoid incorporating too much air.
- Whisk in the sugar until it dissolves into the eggs.
- Slowly whisk in the milk and vanilla extract until fully incorporated.
- Strain the custard mixture through a fine-mesh sieve into a clean bowl or measuring cup. This step removes any chalazae or unmixed egg bits, which helps achieve a silky smooth texture.
- Pour the strained mixture into the pie plate or ramekins.
- Carefully pour hot water into the larger baking pan to create a water bath (bain-marie), ensuring the water level reaches halfway up the sides of the custard dishes.
- Carefully transfer the baking pan to the preheated oven.
- Bake for 40 to 50 minutes for a pie plate, or 35 to 45 minutes for ramekins. The custard is done when the edges are set but the center still jiggles slightly when gently nudged.
- Carefully remove the custard dishes from the water bath. Let cool on a wire rack to room temperature.
- Sprinkle the top lightly with nutmeg, if using. Chill in the refrigerator for at least 4 hours before serving for the best creamy consistency.
Notes
- Using a water bath is essential for achieving a no-crack custard by providing gentle, even heat.
- For a custard pie filling, use a pre-baked 9-inch pie crust and pour the strained mixture into the shell before baking in the water bath.
- If you prefer a richer flavor, you can substitute 1/2 cup of the milk with heavy cream.
Nutrition
- Serving Size: 1 serving
- Calories: 180
- Sugar: 20
- Sodium: 75
- Fat: 6
- Saturated Fat: 3
- Unsaturated Fat: 3
- Trans Fat: 0
- Carbohydrates: 20
- Fiber: 0
- Protein: 10
- Cholesterol: 120