
There is just something magical about biting into a perfectly toasted bakery-style breakfast item, isn’t there? We all chase that elusive texture—you know, the amazing, airy pockets we call the “nooks and crannies.” Well, stop searching! My goal, stemming from my background blending food science precision with my dad’s classic Navy cooking, is to bring you that perfection every single time. These **english muffins** you’re about to make are unbelievably fluffy and, here’s the best part, you don’t even need your oven if you don’t want to use it. We’re getting that restaurant-quality lift using just your stovetop, friends. Get ready to transform your mornings!
- Why This is the Best English Muffin Recipe for Homemade Success
- Ingredients for Fluffy Homemade English Muffins
- How to Prepare Your English Muffins from Scratch
- Ingredient Notes and Substitution Guide
- Tips for Your Weekend Baking Project with English Muffins
- Serving Suggestions for Your Fresh English Muffins
- Storage and Make Ahead Breakfast Options
- Frequently Asked Questions About Homemade English Muffins
- Estimated Nutritional Data for English Muffins
- Share Your Kitchen Alchemy
- Estimated Nutritional Data for English Muffins
- Share Your Kitchen Alchemy
Why This is the Best English Muffin Recipe for Homemade Success
I’ve spent years testing recipes formally, and what I found here separates the good batches from the *great* ones. Most home cooks struggle because they rush the rise or mangle the cutting process. Those beautiful, melt-in-your-mouth interiors in restaurant-quality **english muffins** rely on specific chemical and physical reactions happening in the dough. My goal was creating a recipe that guarantees that fluffy interior structure without needing complicated techniques. You can trust these steps because they are built on solid food science principles from my professional background, ensuring you don’t waste your time on a mediocre breakfast. I really think you’ll find this guide, along with tips from others who have chased restaurant-quality results, is the magic ticket.
If you’re looking for the absolute best English muffin recipe, this is where you’ll find it. We skip the oven entirely, which keeps your kitchen cool!
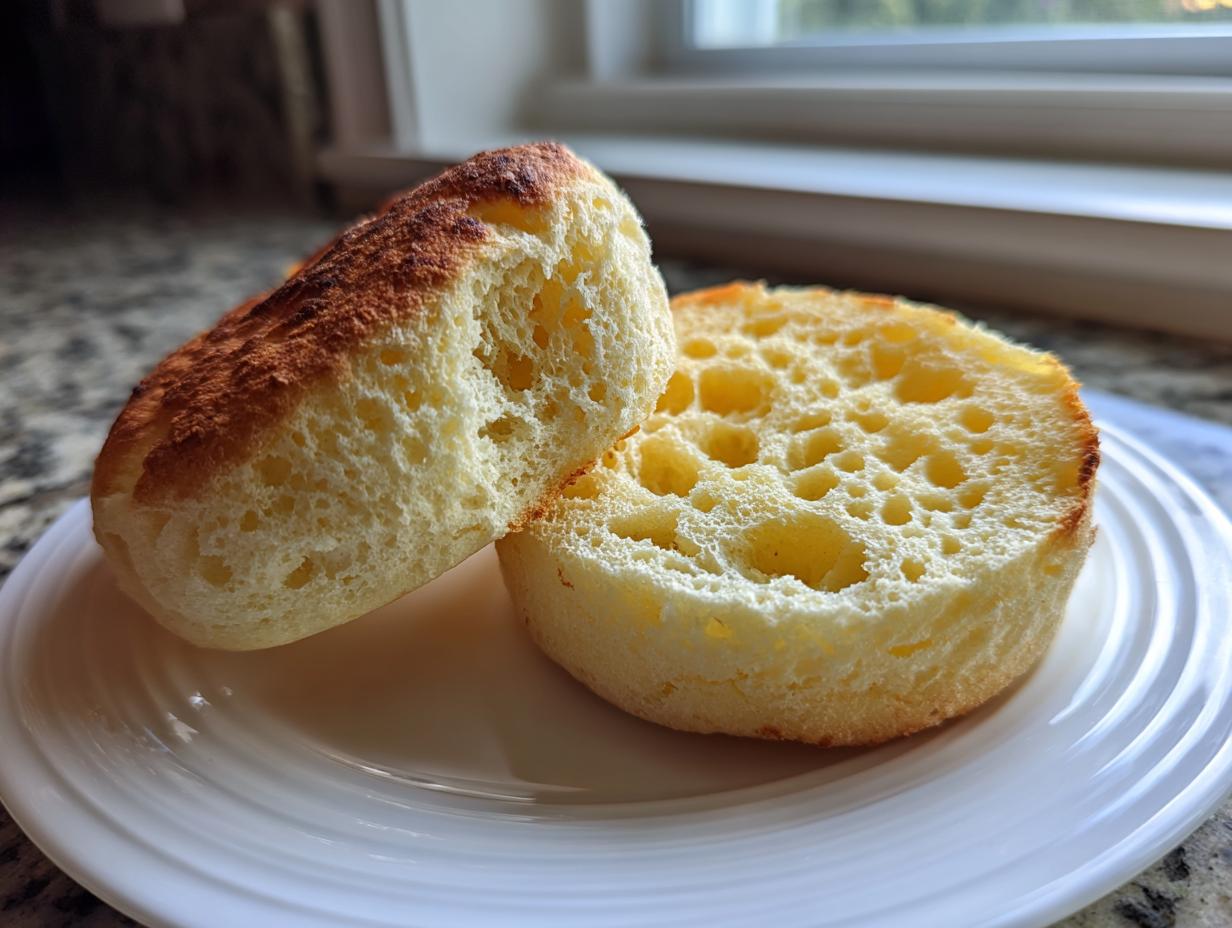
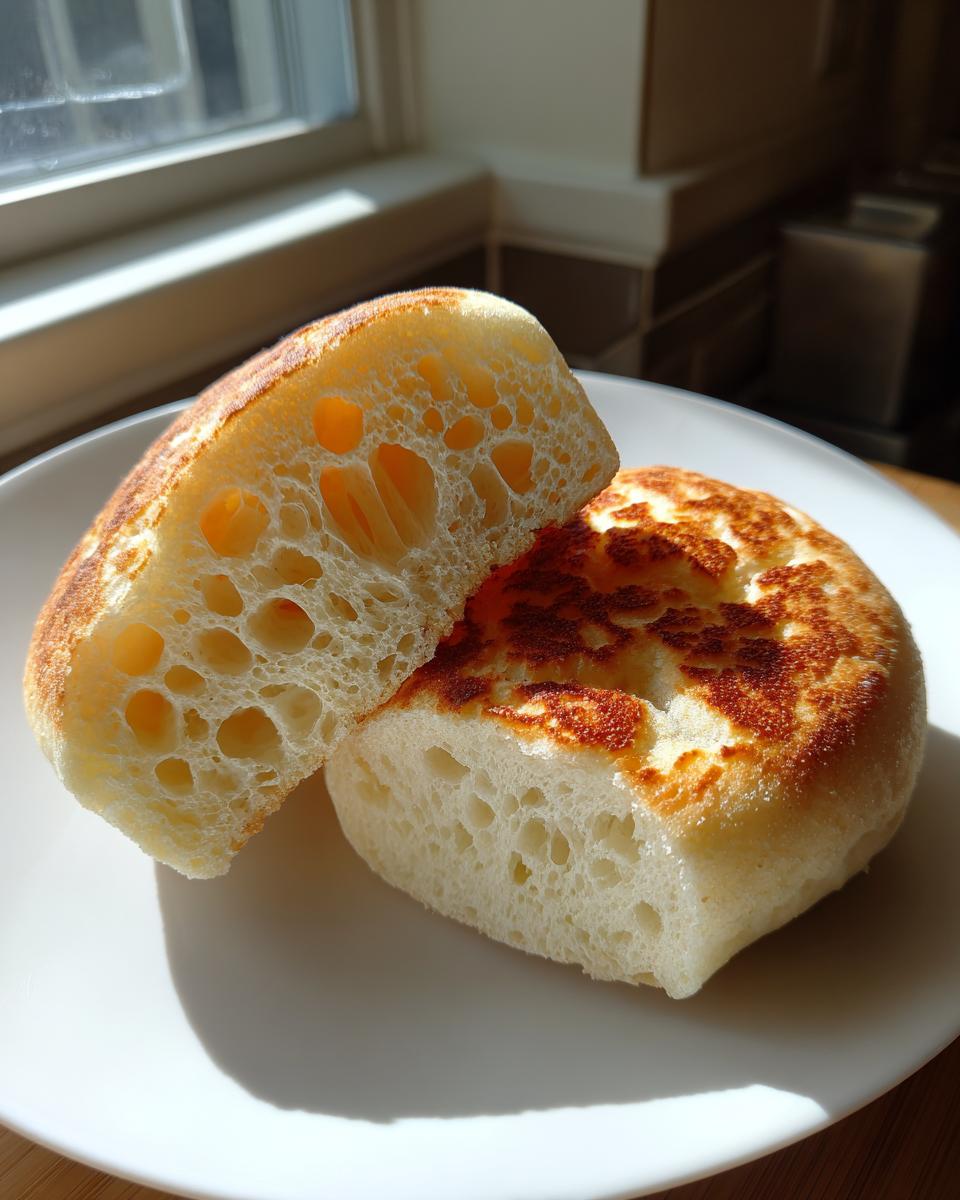
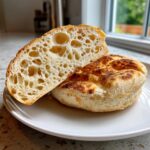
Achieving Perfect Nooks and Crannies
This is the secret sauce, truly! To maximize those characteristic tunnels, you need two things: precision when cutting and patience while cooking. When you use your cutter, press straight down and lift immediately. Do not twist, ever! Twisting seals up the edges, which prevents the internal structure from opening up during cooking. Also, keep that heat low and slow on the griddle. Medium-low ensures the inside cooks through and steams open before the outside turns dark brown. Watch them closely!
Ingredients for Fluffy Homemade English Muffins
When we talk about achieving truly fluffy **english muffins**, the quality of what goes in really matters—just like in any great science experiment! I always stick exactly to these measurements because yeast work is tricky. You only need seven core items, and the milk temperature is key; we want it around 105 to 115°F so the yeast wakes up happy, not grumpy. Those two and a quarter teaspoons of active dry yeast are non-negotiable for that proper rise we are looking for later on. Don’t skimp on the butter either; real butter gives us the best flavor for these amazing bakery-style muffins. For a complete breakdown, you can check out this fantastic recipe layout.
- 1 cup warm milk (make sure it hits 105–115°F!)
- 2 teaspoons granulated sugar
- 2 1/4 teaspoons active dry yeast
- 3 cups all-purpose flour, plus more flour for dusting
- 1 teaspoon salt
- 1/4 cup unsalted butter, melted
- Extra flour or cornmeal for dusting/cooking
How to Prepare Your English Muffins from Scratch
Okay, here is where the real alchemy happens! Turning simple flour and water into those coveted breakfast buns takes a little bit of faith and following the timeline, but trust me, it’s way easier than you think. We move methodically from activating the yeast to cooking them low and slow on the griddle so you get those amazing, soft interiors that grab butter perfectly. Once you see the stages, you’ll realize making bakery-style **english muffins** at home is totally achievable.
Activating Yeast and Mixing the Dough
First things first: wake up that yeast! Mix your warm milk and sugar, then sprinkle the yeast right on top. Don’t touch it for about five to ten minutes. If it gets foamy and bubbly, yay! Your yeast is good to go. Next, stir in the flour, salt, and that melted butter until everything looks messy—a shaggy dough is what we want right now. No need to be neat yet!
Kneading and First Rise for Fluffy English Muffins
Now we build structure. Turn that shaggy mess out onto a lightly floured area and knead it until it feels smooth and elastic. It should still feel a little soft, like a well-loved stress ball. Pop that dough into an oiled bowl, cover it up tight, and find a warm spot in the kitchen. We need this dough to double in size, which usually takes about an hour to an hour and a half. After that first rise, gently deflate those beautiful air pockets. Mastering this gives you the foundation for great **english muffins**!
Cutting and Second Proofing
This part is critical for those coveted tunnels! Dust your surface generously with flour or cornmeal—this helps prevent sticking and contributes to the texture. Gently pat or roll the dough out to about 3/4-inch thickness. Use your 3-inch cutter and, I cannot stress this enough, press straight down and lift. Do not twist the cutter, or you will seal the edges! Reroll the scraps just once, give the shaped rounds about 30 minutes to rest covered, and they’re ready for the heat. You can find great visual guides, like the step-by-step photos others have perfected.
Stovetop Cooking: Mastering the Low Heat
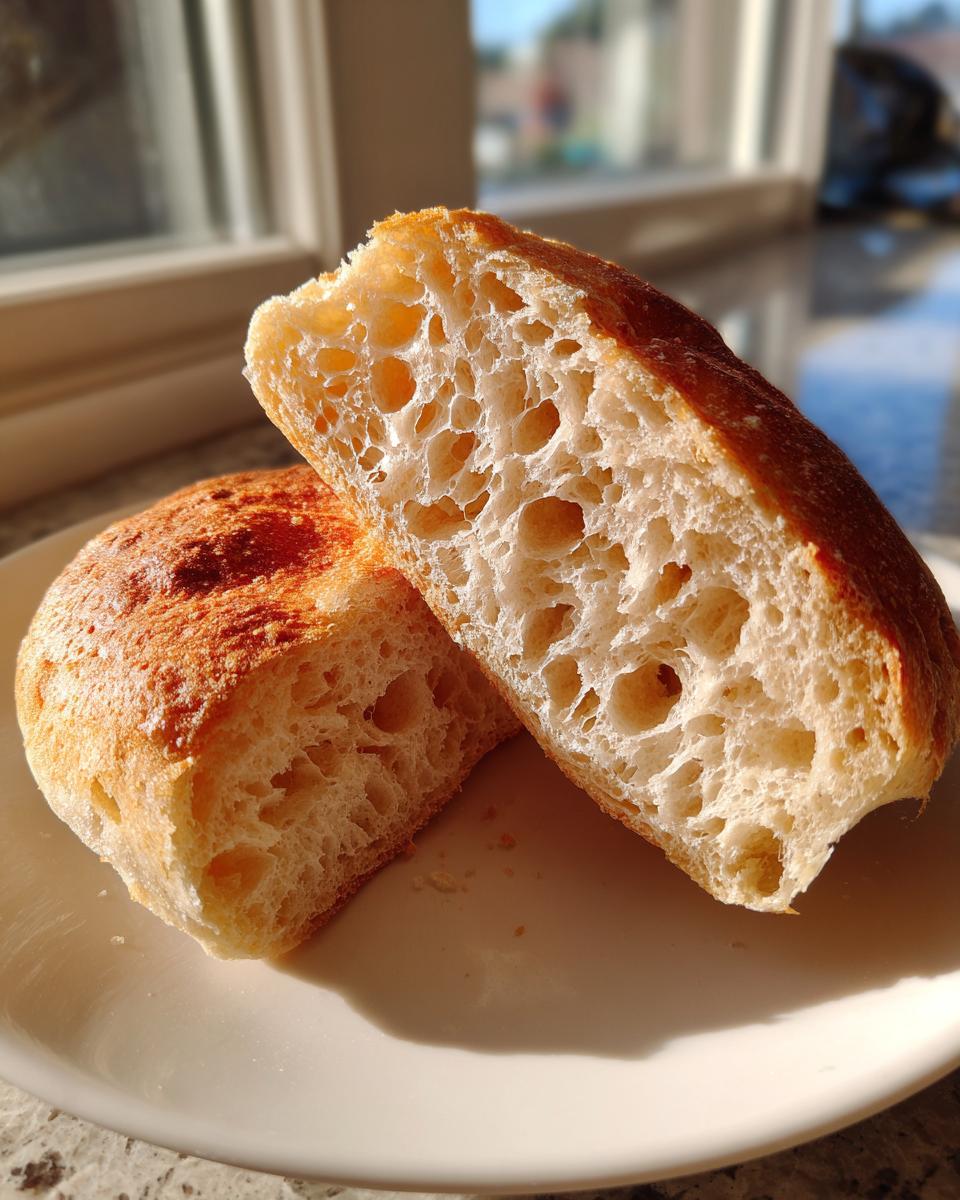
We are skipping the oven! Get a big, heavy griddle or skillet—cast iron is amazing here—and set the heat to medium-low. This needs to be a slow bake, not a quick sear. You don’t add any butter or oil to the pan; these **english muffins** cook dry. Let them cook for a long 8 to 12 minutes per side. If they brown too fast, lower that heat immediately! That long, slow cook is what sets the interior fluffiness perfectly before the outside gets too dark. I always suggest checking out guides like this one if you get nervous about the heat settings or want more visual reassurance on how your muffins should look!
Ingredient Notes and Substitution Guide
When we talk about unlocking that airy texture, we have to discuss the flour. While all-purpose is perfect here and keeps this recipe solidly in the accessible category, I’ve seen some success bumping up to bread flour if you want a little extra chewiness. Remember, you want the dough slightly soft, so if you swap flours, watch the hydration levels closely. And please, use real, unsalted butter—that’s non-negotiable for the flavor depth we are aiming for in these buttery creations! For dusting, I love using cornmeal instead of just flour on the cooking surface. It gives the exterior a subtle crunch and a beautiful, slightly gritty finish that I find really complements the soft rise inside. It’s a tiny detail that makes a big difference, just like the recipes found over at this site.
Tips for Your Weekend Baking Project with English Muffins
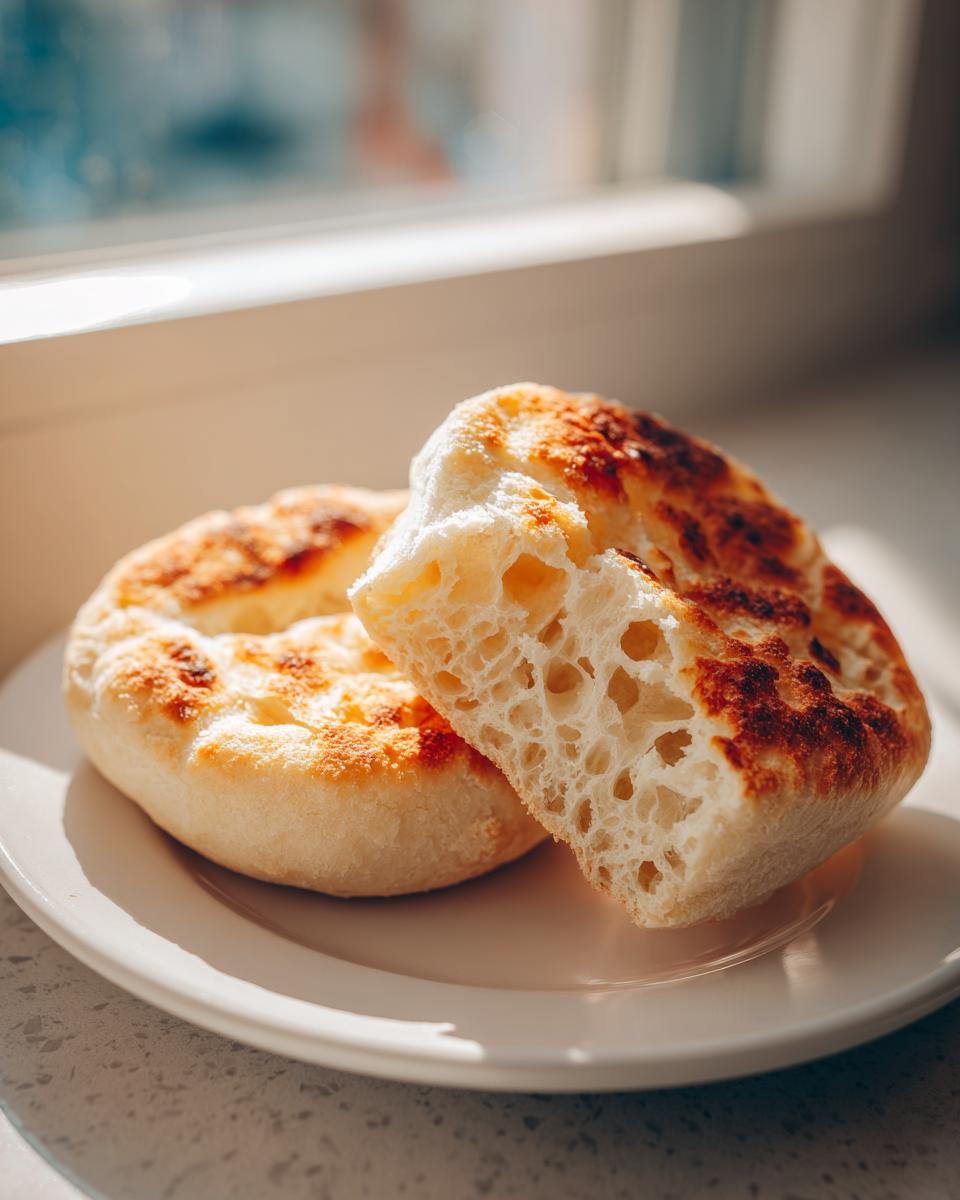
You’ve got the dough right, you’ve cooked them low and slow… now let’s make sure the finish is perfect! I picked up these last few tricks from years of testing recipes, and they really take your homemade **english muffins** from great to absolutely show-stopping. First, the cooling process is essential. As soon as they come off the griddle, put them right onto a wire rack—don’t stack them on a plate! Stacking traps steam, and we want to avoid softening that beautiful, slightly craggy exterior we worked so hard to achieve.
Second, when it’s time to eat them, ditch the knife! A knife squashes those delicate air pockets down the middle. Instead, use a sturdy dinner fork and poke around the circumference until you feel it give, then split them apart. That fork action opens up all the inner layers for maximum butter absorption. For super soft results, you might want to check out the easy tips shared at this great resource. Final tip? If your griddle seems like it’s cooking unevenly, just rotate the muffins halfway through the first side’s cooking time. If you’re nervous about keeping that low heat steady on the stovetop, read this guide here, because consistency is everything when making these **english muffins**!
Serving Suggestions for Your Fresh English Muffins
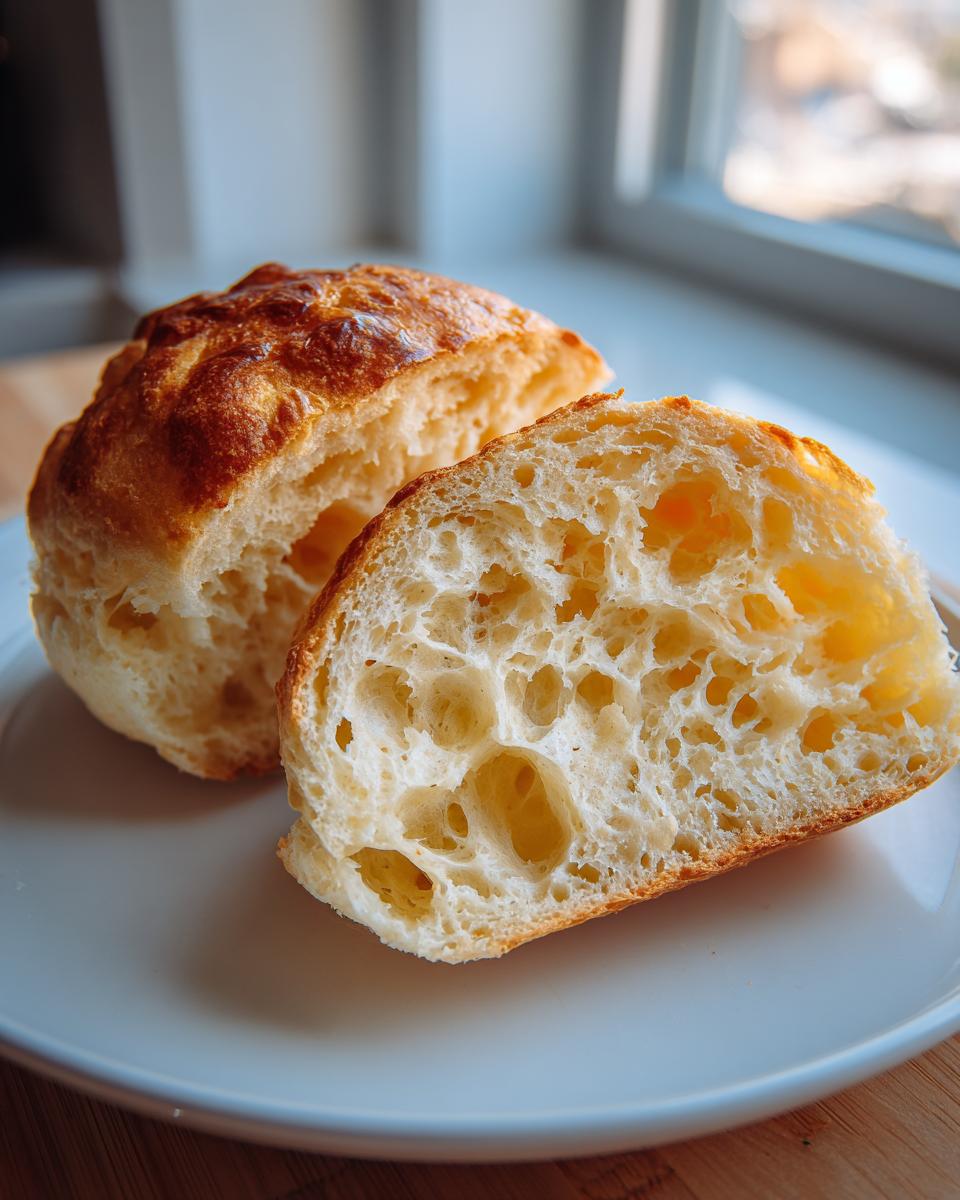
Now that you have these incredible, sturdy **english muffins**, the fun really starts! Because we nailed that texture—crisp outside, chewy inside—they hold up like absolute champions to hearty toppings. Of course, nothing beats splitting one open, popping it in the toaster until it’s just crunchy, and slathering it with cold, salty butter and your favorite jam. That’s classic perfection!
But don’t stop there! These are practically custom-made for stacking. They make the *best* vehicle for an over-the-top breakfast sandwich—think thick slices of ham, a fried egg, and sharp cheddar—because they don’t get soggy under the weight. If you want something a little different, try smashing avocado on a toasted half and topping it with everything bagel seasoning and a drizzle of hot honey. It sounds weird, I know, but the sweet and spicy cuts through the buttery muffin so well! For more meal ideas to pair with your fantastic muffins, this page has some fun inspiration.
Storage and Make Ahead Breakfast Options
One of the best things about making a big batch is knowing you have breakfast sorted for the entire week! If you have any leftovers you plan to eat within two or three days, just keep them in an airtight container on the counter. Don’t put them in the fridge because that actually speeds up staling, believe it or not! If you’re like me and you want to spread the joy out longer, freezing is the absolute way to go for a perfect make-ahead breakfast solution.
To freeze them safely, make sure they are totally cool—I mean completely room temperature, or they’ll get ice crystals. Store your baked treats in a heavy-duty, airtight freezer bag. They are good to enjoy for about three months! When you’re ready for one, just pop it straight from the freezer into the toaster. No need to thaw; the toaster handles the rest beautifully.
Frequently Asked Questions About Homemade English Muffins
I know baking from scratch can bring up a few niggling worries, especially when you’re aiming for that bakery quality! I’ve pulled together the most common questions I get about making stellar **english muffins** so we can clear up any lingering confusion. Let’s dive into these just like we’re grabbing a coffee together!
Can I use bread flour instead of all-purpose flour?
Oh, that’s a great question about ingredient swapping! You absolutely can use bread flour if you want an even chewier texture. Bread flour has a higher protein content, which develops more gluten. My recipe is balanced for all-purpose flour to result in that soft-fluffy texture—a hallmark of the best **english muffins**. If you switch, just watch your dough; you might need an extra teaspoon or two of milk if it seems too stiff, or you might need to knead just a bit longer until it feels resilient.
What if I am totally missing my nooks and crannies?
This is the most common heartbreak, but don’t worry, it’s usually an easy fix! If you aren’t seeing those amazing tunnels, 99% of the time it means the outside edges got sealed. Remember what I stressed earlier? Do not twist that cutter! Press straight down and lift. The second big cause is heat that is too high. If the surface burns before the interior steams open, you lose the characteristic texture. Check out this quick troubleshooting guide for more tips on getting that airy inside.
I don’t have whole milk; can I substitute it?
You certainly can swap out the milk! Whole milk offers a slightly richer flavor and better overall structure because of the fat content, but regular 2% works beautifully too. If you are using skim milk, I highly recommend adding an extra teaspoon of melted butter to the wet ingredients to make up for the lost fat. Alternatively, if you are interested in the tangier world of sourdough English muffins, using water might be required, but for this standard recipe, stick to a whole or 2% dairy option if you can!
Why do my muffins seem dense instead of fluffy?
Density usually points to an issue in the kneading or proofing stages. Either you didn’t knead enough, and the gluten network didn’t form correctly to trap the CO2, or you let the dough over-proof and the yeast got tired, resulting in a weak structure. Make sure you are checking the dough after 60 minutes of rising and not just letting it go for a set time. You need to see that double-in-size cue! For more reliable outcomes, make sure to check out the excellent advice over at Amanda’s blog!
Estimated Nutritional Data for English Muffins
Since we are working with scratch ingredients, the numbers can fluctuate a little based on the brand of butter or the exact flour you used. However, based on the recipe provided, here are my estimated figures per one muffin serving. Remember, these are estimates for one whole muffin, not just one half! You’ll find these homemade treats are generally lower in sugar and higher in protein than most store-bought versions you can grab quickly!
- Serving Size: 1 muffin
- Calories: 180
- Fat: 5g
- Carbohydrates: 30g
- Protein: 6g
- Sugar: 2g
- Sodium: 250mg
Share Your Kitchen Alchemy
Alright, master bakers! I truly hope this recipe guides you to the best batch of **english muffins** you have ever made at home. Seeing your results is honestly the best part of my job. Please come back, rate this recipe with five stars if it worked its magic for you, and drop any extra questions you have down in the comments below. Let’s keep this conversation going and share the joy of extraordinary, accessible baking!
Estimated Nutritional Data for English Muffins
Since we are working with scratch ingredients, the numbers can fluctuate a little based on the brand of butter or the exact flour you used. However, based on the recipe provided, here are my estimated figures per one muffin serving. Remember, these are estimates for one whole muffin, not just one half! You’ll find these homemade treats are generally lower in sugar and higher in protein than most store-bought versions you can grab quickly!
- Serving Size: 1 muffin
- Calories: 180
- Fat: 5g
- Carbohydrates: 30g
- Protein: 6g
- Sugar: 2g
- Sodium: 250mg
Share Your Kitchen Alchemy
Alright, master bakers! I truly hope this recipe guides you to the best batch of **english muffins** you have ever made at home. Seeing your results is honestly the best part of my job. Please come back, rate this recipe with five stars if it worked its magic for you, and drop any extra questions you have down in the comments below. Let’s keep this conversation going and share the joy of extraordinary, accessible baking! If you want more ideas on enjoying your handiwork, check out what others recommend over at their great source.
PrintUltimate Homemade English Muffins with Perfect Nooks and Crannies (Stovetop Option)
Create bakery-style, fluffy homemade English muffins from scratch. This reliable recipe guarantees the classic ‘nooks and crannies’ texture, perfect for toasting or making breakfast sandwiches. You can cook these right on your stovetop.
- Prep Time: 25 min
- Cook Time: 30 min
- Total Time: 1 hour 55 min
- Yield: 10 muffins 1x
- Category: Breakfast
- Method: Stovetop Griddling
- Cuisine: American
- Diet: Vegetarian
Ingredients
- 1 cup warm milk (about 105-115°F)
- 2 teaspoons granulated sugar
- 2 1/4 teaspoons active dry yeast
- 3 cups all-purpose flour, plus more for dusting
- 1 teaspoon salt
- 1/4 cup unsalted butter, melted
- Extra flour or cornmeal for dusting/cooking
Instructions
- Combine the warm milk and sugar in a large bowl. Sprinkle the yeast over the top and let it sit for 5 to 10 minutes until foamy. This confirms the yeast is active.
- Add the flour, salt, and melted butter to the yeast mixture. Stir with a wooden spoon until a shaggy dough forms.
- Turn the dough out onto a lightly floured surface. Knead for 5 to 7 minutes until the dough is smooth and elastic. It will remain slightly soft.
- Place the dough in a lightly oiled bowl, turning once to coat. Cover the bowl with plastic wrap or a clean kitchen towel. Let the dough rise in a warm spot for 1 to 1.5 hours, or until doubled in size.
- Gently punch down the risen dough. Turn it out onto a surface dusted generously with flour or cornmeal. Pat or lightly roll the dough out to about 3/4-inch thickness.
- Use a 3-inch round biscuit or English muffin cutter to cut out the rounds. Do not twist the cutter; press straight down to maintain the edges, which helps create the nooks and crannies. Reroll scraps once.
- Place the cut rounds on a baking sheet lined with parchment paper and lightly dusted with cornmeal. Cover loosely and let them rest for a second rise for 30 minutes.
- Heat a large, heavy-bottomed skillet or griddle over medium-low heat. You do not need oil or butter for cooking.
- Place the dough rounds on the dry, preheated skillet, leaving space between them. Cook for 8 to 12 minutes per side. The heat must be low enough to cook the inside thoroughly without burning the exterior. They should be golden brown.
- Once browned, remove the muffins. For the best texture, immediately place them on a wire rack to cool completely.
- To open, use a fork to split the cooled muffins in half horizontally. Toast them well before serving with butter or jam.
Notes
- For the best ‘nooks and crannies,’ press the cutter straight down without twisting, and cook them slowly on the griddle.
- You can freeze baked English muffins for up to three months. Cool completely, then store them in an airtight freezer bag.
- If you prefer an oven method, bake the proofed muffins at 375°F (190°C) for 15 minutes instead of cooking on the stovetop.
Nutrition
- Serving Size: 1 muffin
- Calories: 180
- Sugar: 2
- Sodium: 250
- Fat: 5
- Saturated Fat: 3
- Unsaturated Fat: 2
- Trans Fat: 0
- Carbohydrates: 30
- Fiber: 2
- Protein: 6
- Cholesterol: 15