
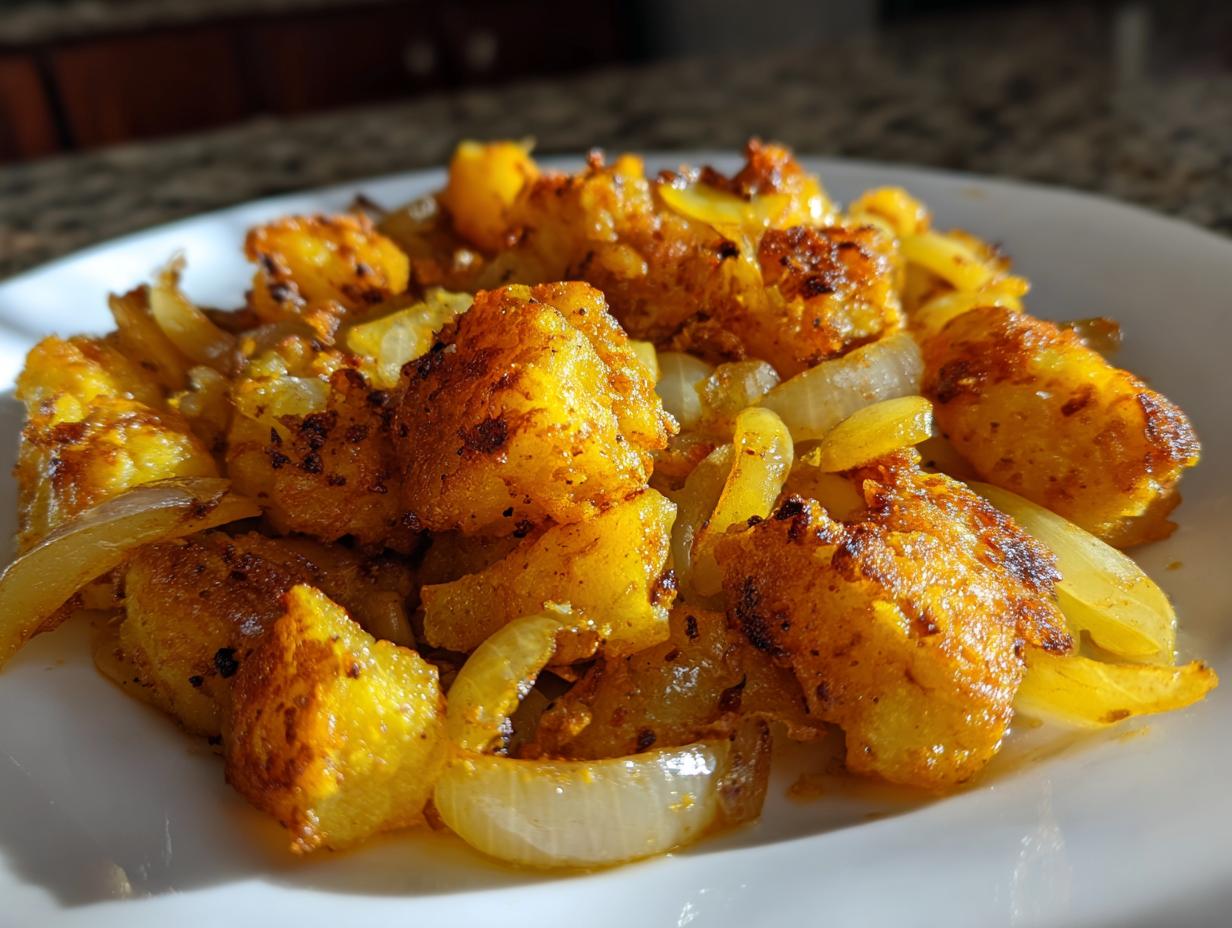
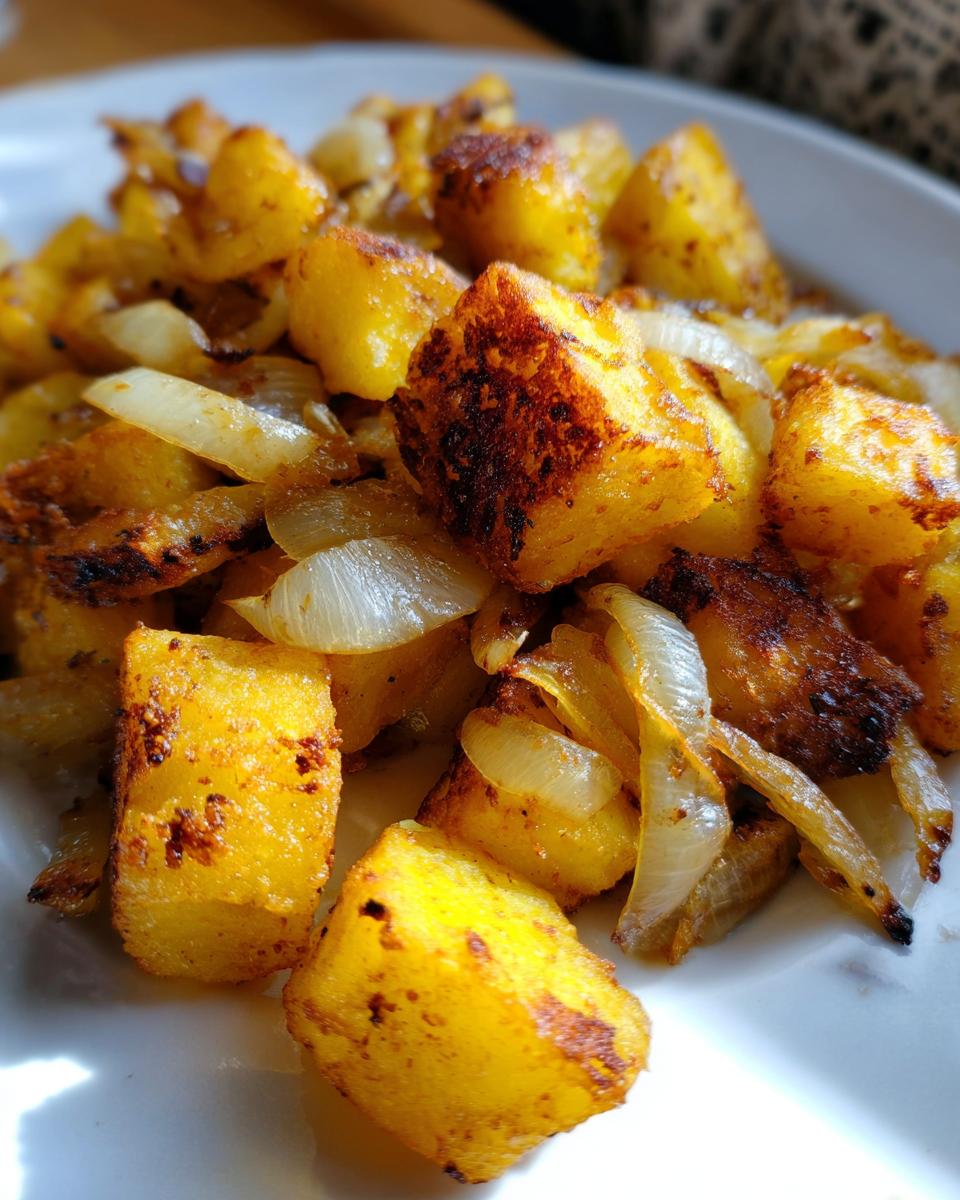
Forget soggy potatoes that just steam in the pan! If you’ve ever dreamed of making perfectly fried potatoes—the kind with those shatteringly crisp edges and a fluffy interior you only usually find at a real diner—you’ve come to the right place. I’m Juliana Cruz, and after years of developing recipes using the precision of food science, I’m sharing my foolproof method for the “Crispy Diner-Style Pan Fried Potatoes with Onions.” This skillet technique eliminates guesswork and guarantees that classic, comfort-food crunch every single time. Trust me, these are the side dish you’ve been searching for!
- Why You Will Master These Fried Potatoes (The Alchemy Chef Promise)
- Ingredients for the Best Fried Potatoes Recipe
- Essential Equipment for Perfect Skillet Fried Potatoes
- How to Make Crispy Potatoes: Step-by-Step Instructions
- Expert Tips for Old Fashioned Fried Potatoes Success
- Variations: Garlic Herb Fried Potatoes and More
- Serving Suggestions for Your Easy Potato Side Dish
- Storage and Reheating Perfectly Cooked Potatoes
- Frequently Asked Questions About Fried Potatoes
- Nutritional Estimate for Buttery Pan Potatoes
- Share Your Alchemy Chef Fried Potatoes Creations
Why You Will Master These Fried Potatoes (The Alchemy Chef Promise)
I know what you’re thinking: “I’ve tried, and my fried potatoes end up gummy!” But that’s where the science comes in. My formal food science background means I’ve tested the variables so you don’t have to! We’re skipping the guessing game and making sure you nail that perfect, comforting flavor.
- Guaranteed Crisp Edges: We focus on starch removal first, which pulls out the enemy of crispiness before the heat even hits the pan.
- Simple Flavor, Big Impact: This is old-fashioned comfort food, relying on quality fat and careful timing—no complicated spice mixes required.
- Skillet Perfection: We teach you the exact moment to leave those potatoes alone so they develop that beautiful crust, just like they do at the best diners. You can check out some other great techniques over here at Pan Fried Potatoes Just Like Grandma Made for comparison!
Ingredients for the Best Fried Potatoes Recipe
When making the best fried potatoes recipe, the ingredients list needs to be short and sweet! We rely on technique, not twenty different spices. You absolutely must use Russet potatoes here; they have the starch content we need for that fluffy inside. For the fat, I prefer the smoky flavor of bacon grease, but good quality butter works wonders too.
- 3 tablespoons bacon grease or butter
- 2 pounds Russet potatoes, peeled and diced into 1/2-inch pieces
- 1 small yellow onion, thinly sliced
- 1/2 teaspoon kosher salt
- 1/4 teaspoon black pepper
- 1/4 teaspoon garlic powder
That’s it! Simple, classic ingredients leading to amazing golden brown potatoes recipe results.
Essential Equipment for Perfect Skillet Fried Potatoes
Okay, even when we are making something as wonderfully simple as fried potatoes, having the right tools makes all the difference between a five-star home fry and a sad, grey pile of cooked potato.
Because we are aiming for that true diner texture—that intense, high-heat sear—you need to make friends with your cast iron skillet. Seriously, if you have one hanging around gathering dust, now is its moment to shine! The heavy bottom of cast iron holds heat so beautifully, making it easier to get that deep, even crust without steaming the potatoes.
Here’s the short list of what you’ll need assembled before you even start dicing:
- A large, heavy-bottomed skillet, preferably cast iron.
- A good-sized bowl for soaking those starches out!
- Plenty of paper towels to get them bone-dry afterwards. Don’t skimp here; wet potatoes equal sad potatoes!
If you want the absolute best results for your home fries recipe, make sure you have a skillet large enough so you aren’t overcrowding the potatoes on that first sear. You can always work in two batches if you need to. Have everything ready to go; once the grease is hot, we move fast!
For more on getting those home-style textures right, I always appreciate checking out the reliable methods others use, like this guide on Home Fried Potatoes Recipe.
How to Make Crispy Potatoes: Step-by-Step Instructions
Alright, this is where we turn those humble Russets into restaurant-quality crispiness! This sequence is fundamental to making how to make crispy potatoes that don’t just sit there absorbing oil. If you follow these steps for this pan fried potatoes recipe easy to master, you’ll never go back to the old way! We rely on solid technique, developed through rigorous testing, to deliver that perfect diner experience, ensuring every bite is heavenly. If you want even more in-depth looks at technique, check out the inspiration over at Pan Fried Potatoes.
Prepping the Potatoes for Maximum Crispiness
Step one is non-negotiable, okay? You have to soak those diced potatoes in cold water! This is my food science trick for you—we’re bathing away the surface starch. Too much starch equals steam and mush. Once they’ve had their soak (at least 30 minutes!), drain them completely. Then, and I cannot stress this enough: you must pat them bone-dry with paper towels. If there’s any moisture left, we’re frying water instead of potato, and we won’t get that glorious color. A great way to start layering flavor is by thinking about additions like those found in Garlic Herb Skillet Fried Potatoes, but first, we nail the base!
The Initial Sear: Building the Golden Brown Potatoes Recipe Crust
Get your heavy skillet humming over medium-high heat with your chosen fat shimmering hot. Add your completely dry potatoes. You want them to sizzle immediately! If they don’t, wait a minute longer. Now, the huge secret for that diner-style crust: Don’t touch them! Let them lie there for a full 8 to 10 minutes. Resist the urge to stir or check. You are building a golden-brown foundation, and moving them interrupts that vital crust development. We want that deep sear, just like the great Southern Fried Potatoes everyone loves!
Finishing the Southern Fried Potatoes with Onions and Seasoning
Once you see a gorgeous, deep crust on the bottom layer, give everything a stir and continue frying for about 10 more minutes until most sides have browned up. Now we bring the heat down just a bit to medium. Toss in your sliced onions and let them soften—about 10 to 15 minutes more. This is the phase where you stir more frequently so the onions don’t burn while the insides finish cooking through. When a fork pierces them easily, it’s time for the final touch! Sprinkle on your salt, pepper, and garlic powder, stir to combine, and cook for 1 final minute. This method ensures your final dish is perfectly seasoned comfort food!
Expert Tips for Old Fashioned Fried Potatoes Success
Look, I’ve tested these potatoes under every condition imaginable, so let me share the little laboratory findings that will elevate your fried potatoes from good to legendary. My background in food science really highlights how small changes in timing make massive differences in texture, which is why I’m sharing these insights!
First off, remember the cardinal sin: Don’t stir too early! I know it’s hard when you hear that nice sizzle, but resisting that urge during the first 8-10 minutes is how you get that deep, shatteringly crisp crust. If you keep moving them around, they steam up, and then you’re just boiling them in their own moisture. You want golden brown, not pale and soft!
If you absolutely need guaranteed, next-level crispiness—maybe you’re serving these for guests—try what the professionals sometimes do: par-boil them first. Take those thoroughly dried potatoes from our prep step, boil them gently for about 5 minutes until they just start to soften on the very edges, then drain and dry them again. This pre-cook guarantees tenderness inside. You can see fantastic detail on achieving that Southern preparation style over at Southern Fried Potatoes.
Also, if you’re looking for other great timing tips on pan-frying, make sure to check out the advice from Eating on a Dime. Mastering the timing is everything when it comes to making the best fried potatoes recipe!
Variations: Garlic Herb Fried Potatoes and More
My base recipe for fried potatoes is designed to be a sturdy, delicious canvas. Once you nail that crispiness using the initial searing method, you can absolutely start experimenting! That’s the fun part of being in your own kitchen—you get to decide what magic happens next. We’re going to use those last few minutes of cooking time to infuse some serious flavor.
For a simple aromatic upgrade that screams comfort food, try turning this into garlic herb fried potatoes. About five minutes before you add the final salt and pepper—right when the onions are softening nicely—toss in two cloves of minced fresh garlic. Be careful, though! Garlic happens fast, especially in hot oil. Stir it constantly for about 60 seconds until you can really smell it, then immediately mix it in with the onions so it doesn’t burn.
If you want that rich, smoky depth that people associate with true Southern fried potatoes, you need bacon! If you aren’t using bacon grease as your initial fat, try crumbling up about 4 slices of pre-cooked, crispy bacon into the pan during the last 10 minutes of cooking. The little bits will crisp up alongside the potatoes, adding salty bursts of flavor.
Herbs totally transform this dish too! A sprig of fresh rosemary or some dried thyme added right when you reduce the heat for the onions gives the potatoes an earthy, almost woodsy note. It takes them from simple breakfast side to something feeling really special. You can find some beautiful inspiration for riffing on classic potato dishes over at Crispy Fried Potatoes and Onions. Just remember the golden rule: add the garlic and tender herbs late so they don’t scorch!
Serving Suggestions for Your Easy Potato Side Dish
The beauty of getting your fried potatoes texture just right is that they stop being just a side dish and become the star! Since this recipe delivers that perfect blend of savory fat, onion sweetness, and crispy potato crunch, they are unbelievably versatile.
For traditional morning meals, these are the quintessential potato side for breakfast. Think about piling them next to scrambled eggs, or serving them alongside crispy bacon and fluffy pancakes—they bring that classic diner energy to your kitchen table. They are fantastic tucked into a breakfast burrito too, honestly!
But don’t stop there! At dinnertime, these buttery pan potatoes are the perfect counterpoint to richer mains. They stand up beautifully next to a slow-roasted pork loin or a big, juicy steak. Honestly, if you’re serving just about anything savory, these potatoes belong right next to it on the plate.
Storage and Reheating Perfectly Cooked Potatoes
Even the most perfect batch of fried potatoes—and trust me, these are perfect—sometimes has leftovers, unless you’re feeding a crowd! The goal when saving them is to protect that hard-won crispiness we worked so hard to achieve. Don’t just leave them sitting on the counter, though; we need to treat them right so they are just as delicious tomorrow.
Once the potatoes have cooled down completely—this is important!—transfer them to an airtight container. I usually use a glass one, but heavy-duty zip-top bags work if you press all the air out. They should keep just fine in the refrigerator for about three or four days. They’re fantastic to have on hand for a super-fast second breakfast!
Reheating for Crispiness Preservation
Now, let’s talk about reheating, because the microwave is the absolute enemy of crispy potatoes. It heats them from the inside out using steam, and you’ll end up with sad, soft potatoes instantly. That’s a science fail we just won’t tolerate here!
Instead, we are going to aim for re-crisping them:
- The Oven Method: Spread the cold potatoes in a single layer on a baking sheet. Pop them into a preheated oven at about 375°F (190°C). Give them about 10 to 15 minutes until they heat through and you can hear that beautiful little sizzle coming back.
- The Skillet Re-Crisp (My Favorite): If you aren’t reheating a huge pile, toss them back into a dry, hot skillet (or use a tiny bit of fresh oil) over medium-high heat. They only need about 5 to 7 minutes, stirring gently, to wake up and get that golden exterior back.
- Air Fryer Magic: If you have an air fryer, this is your secret weapon for leftovers! A quick 4-5 minute blast at 375°F revives them instantly, making them taste almost freshly made.
Remember, the trick is high heat applied dryly. You can find some great tips on preventing them from sticking when you reheat them by reviewing the techniques shared over at How to Make Fried Potatoes. Happy saving!
Frequently Asked Questions About Fried Potatoes
I get so many questions about getting that perfect texture, which is totally understandable because mastering the fried potatoes technique takes a little practice! Here are the top things folks ask me when they want to make restaurant-quality potatoes at home, whether they’re making diner style breakfast potatoes or a hearty side dish for dinner.
1. Can I use Yukon Gold potatoes instead of Russet for this recipe?
Honestly, I really advise sticking with Russets for this specific method if you want that classic crisp-outside, fluffy-inside texture. Russets have higher starch content, which is what we need to soak out to develop a proper crust. Yukon Golds are naturally lower in starch and higher in moisture, so they tend to get smoother and creamier when fried, which is great for other recipes, but for these crispy potatoes, Russets win every time. You can see how different techniques apply to other potato types over at Iris Cooks Southern Fried Potatoes.
2. Can I skip the 30-minute soaking step?
You certainly *can* skip it, but if you do, you are sacrificing that ultra-crispy exterior we are aiming for! The soaking is crucial because it draws out excess surface starch. If you leave that starch on, when the potatoes hit the hot oil, that starch gelatinizes and creates a gummy layer instead of a crisp, golden brown crust. For the easiest potato side dish, that 30 minutes of hands-off soaking pays off huge dividends!
3. What is the best fat to use for these fried potatoes?
My top choice, which gives you that unbeatable old-school, savory flavor, is bacon grease. It has a high smoke point and adds that subtle North Carolina-style richness that makes these Southern fried potatoes with onions famous. If you aren’t using bacon, clarified butter (ghee) is fantastic for the flavor, but regular unsalted butter is fine too, provided you keep the heat managed so it doesn’t burn before the potatoes are done. For another take on flavor profiles, check out the ingredients used in this resource on Fried Potatoes and Onions.
4. Why are my potatoes steaming instead of frying?
That usually means one of two things happened: either your pan wasn’t hot enough for the initial sear, or you overcrowded the skillet! Remember, we want that sizzle the second the potatoes hit the fat. If the pan is too cold, the potatoes cool the oil down, and they start releasing their moisture faster than the fat can cook it off, essentially boiling themselves. Make sure you are cooking in batches if necessary to keep those potatoes in a single layer!
Nutritional Estimate for Buttery Pan Potatoes
Now, because we are using that glorious bacon grease (or butter, if you prefer!), these fried potatoes are definitely rich comfort food. While they aren’t intended to be a ‘light’ snack, knowing what’s in them is just part of the kitchen alchemy! These numbers are just estimates based on the exact ingredients listed in my pan fried potatoes recipe easy above, and they assume the recipe is divided evenly into four servings. Remember, these potatoes are dense with flavor, which means they bring a lot of satisfaction in just one serving!
Here is a snapshot of the estimated nutritional breakdown per serving:
- Calories: Approximately 280 per serving
- Fat: Around 14 grams (This is where our satisfying cooking fat comes in!)
- Total Carbohydrates: About 35 grams
- Protein: Roughly 4 grams
You can see the breakdown is pretty straightforward. We’re trading lightness for serious, satisfying flavor and texture! If you’re watching ingredients, keep in mind that the sodium content reflects standard seasoning, so feel free to back off the main salt if you need to control that number. These skillet fried potatoes taste incredible, and a little bit of mindful eating lets you enjoy them guilt-free!
Share Your Alchemy Chef Fried Potatoes Creations
Wow, I truly hope you enjoyed making this recipe! It feels like such a classic, and I always get so excited when readers conquer the fear of the hot skillet and nail that perfect, shatteringly crisp texture. When you make these fried potatoes, you are carrying on a great tradition of simple, honest cooking!
I would absolutely love to hear how they turned out for you! Seriously, don’t be shy. Head down to the comments section below and let me know—did you use bacon grease? How long did you let them sear before you dared to stir them? A rating of 5 stars means the world to me and helps others find this reliable technique, so if these earned that spot, please leave it!
And please, show off those beautiful, golden results! Snap a picture of your buttery pan potatoes on your plate, tag me on social media, and use the hashtag #AlchemyChef. Seeing your success is the best part of my job as a recipe developer.
If you loved learning the science behind making the best fried potatoes recipe today, I encourage you to look around the site! I have tons of other comfort food classics where we break down the actual science behind why certain techniques work so well. I think you’ll particularly enjoy my guide on Pan Fried Potatoes (Just Like Grandma Made!) for more nostalgic inspiration!
PrintCrispy Diner-Style Pan Fried Potatoes with Onions
Follow this reliable recipe to create perfectly cooked potatoes that are shatteringly crisp on the outside and tender inside. This skillet method, using simple ingredients, delivers classic comfort food flavor ideal for breakfast or as a side dish.
- Prep Time: 15 min
- Cook Time: 35 min
- Total Time: 50 min
- Yield: 4 servings 1x
- Category: Side Dish
- Method: Pan Frying
- Cuisine: American
- Diet: Vegetarian
Ingredients
- 3 tablespoons bacon grease or butter
- 2 pounds Russet potatoes, peeled and diced into 1/2-inch pieces
- 1 small yellow onion, thinly sliced
- 1/2 teaspoon kosher salt
- 1/4 teaspoon black pepper
- 1/4 teaspoon garlic powder
Instructions
- Place the diced potatoes in a bowl and cover them completely with cold water. Let them soak for at least 30 minutes to remove excess starch, which helps achieve crispiness. Drain the potatoes well and pat them completely dry with paper towels.
- Heat the bacon grease or butter in a large, heavy-bottomed skillet (cast iron works best) over medium-high heat until shimmering.
- Add the dried potatoes to the hot skillet in a single layer if possible. Do not overcrowd the pan; cook in batches if necessary. Let the potatoes cook undisturbed for 8 to 10 minutes until a deep golden-brown crust forms on the bottom.
- Flip the potatoes and continue cooking, stirring occasionally, for another 10 minutes until most sides are golden brown.
- Reduce the heat to medium. Add the sliced onion to the skillet. Stir everything together.
- Continue cooking, stirring every few minutes, until the onions are soft and translucent and the potatoes are cooked through and tender when pierced with a fork, about 10 to 15 more minutes.
- Sprinkle the salt, pepper, and garlic powder over the potatoes and onions. Stir to combine and cook for 1 final minute.
- Serve immediately as a delicious side dish for breakfast or dinner.
Notes
- For extra crispiness, you can par-boil the dried potatoes for 5 minutes before frying, then drain and dry them thoroughly again.
- Do not stir the potatoes too often during the initial cooking phase; this prevents them from developing a proper crust.
- Bacon grease adds a classic Southern flavor, but butter or a neutral oil works well too.
Nutrition
- Serving Size: 1 serving
- Calories: 280
- Sugar: 2
- Sodium: 350
- Fat: 14
- Saturated Fat: 6
- Unsaturated Fat: 8
- Trans Fat: 0
- Carbohydrates: 35
- Fiber: 4
- Protein: 4
- Cholesterol: 15