
Okay, let’s talk about those candy bar cravings. You know the ones—you just need that perfect crunch of shortbread, followed by that dreamy, chewy caramel, all wrapped up in chocolate? Forget fighting the urge; we’re beating it by making our own! Seriously, nothing beats a homemade twix bar. The flavor you get when you make this copycat version at home just blows the store-bought ones out of the water. Here at Alchemy Chef, we take that reliability seriously. My journey started with watching my dad, a retired Navy chef, make precise meals, mixed with my mom’s vibrant Filipino flavors. That’s why I lean on my Food Science background to ensure this recipe is absolutely flawless every single time you try it.
- Why Our Homemade Twix Recipe Delivers the Best Chocolate Caramel Dessert
- Gathering Ingredients for Your Homemade Twix Bars
- Step-by-Step Instructions for the Best Homemade Twix Recipe
- Tips for Success When Making Twix Cookie Recipe Easy
- Variations: Cookie Bar Variations for Your Twix
- Storage & Reheating Instructions for Homemade Candy Bar Recipes
- Frequently Asked Questions About Making Twix
- Nutritional Estimates for This Indulgent Chocolate Treat
- Share Your Kitchen Copycat Desserts Success
Why Our Homemade Twix Recipe Delivers the Best Chocolate Caramel Dessert
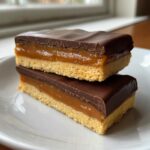
You simply have to trust me on this one. When you make your own candy bars, you control the quality, and that’s everything! We aren’t just throwing things together; this is about making the absolute best homemade Twix recipe possible. The result is these incredible layered dessert bars that taste brighter and fresher than anything wrapped in foil.
- The shortbread base gets perfectly crisp but still tender enough to bite through easily.
- The caramel is cooked just right—chewy, deep-flavored, and never runny.
- The final chocolate coating is pure indulgence.
Experience the Alchemy Chef Difference in This Twix Copycat Recipe
I spent ages testing the ratios for these components. Since I studied Food Science, I look at recipes like puzzles that need to fit perfectly. My goal here was to achieve that nostalgic flavor but with a texture that actually holds up better than the original. We meticulously test every baking time and temperature to make sure your bottom shortbread layer doesn’t burn while the caramel sets up perfectly. If you want to see how serious I am about the structure of that bottom layer, check out some of my testing notes here: Perfect Layers Guide. It’s all about precision that tastes like pure joy!
Gathering Ingredients for Your Homemade Twix Bars
Alright, now that we’re hyped up on the pure magic of making a superior candy bar, let’s get strategic about what we bring into the kitchen. Getting the right stuff here is step one for that Easy Caramel Shortbread dream! I always lay everything out first—it’s one of those things my dad, the retired chef, drilled into me. No scrambling mid-process, especially when the caramel is bubbling! We are going to organize this into three little task groups so you know exactly what’s going where. If you want to bookmark this list, make sure you save this page now so you don’t lose it! It’s easy to follow along.
Shortbread Base Ingredients for the Twix
This is the foundation, so we need that buttery richness. Remember, butter must be softened—not melted! That’s crucial for the creaming step later on.
- 1 cup (2 sticks) unsalted butter, softened
- 1/2 cup granulated sugar
- 2 cups all-purpose flour
- 1/4 teaspoon salt
Making the Chewy Caramel Layer for Your Twix
This is where the real alchemy happens! The combination of condensed milk and corn syrup gives us that perfect, pliable, chewy texture we are aiming for. Don’t skimp on the quality here!
- 1 (14 ounce) can sweetened condensed milk
- 1/2 cup light corn syrup
- 1 cup packed light brown sugar
- 1/2 cup (1 stick) unsalted butter
- 1 teaspoon vanilla extract
- 1/4 teaspoon salt
Chocolate Coating Essentials for Perfect Twix Coating
- 12 ounces semi-sweet chocolate chips
- 2 tablespoons shortening or coconut oil
Step-by-Step Instructions for the Best Homemade Twix Recipe
Okay, are you ready to see the magic happen? This is where we turn those ingredients into the most amazing handheld candy bar you’ve ever tasted. Since we are relying on that buttery shortbread texture, the order we do things in matters a lot! Remember, precision gets you closer to candy perfection, so keep that thermometer handy for the caramel phase. You can find some great visual guides on getting the layers right here if you need a little encouragement along the way: Karli’s Cookie Tips. Follow these steps exactly, and you’ll have professional-looking twix bars!
Baking the Shortbread Layer of Your Twix
First things first, get that oven preheated to 350°F (175°C). Grab that 8×8 inch pan and line it with parchment paper—make sure you leave an overhang! Trust me, this simple trick makes lifting the entire block out so much easier later on. In a big bowl, cream that softened butter and granulated sugar until it looks light and fluffy, like soft whipped cream. Slowly mix in your flour and salt until it just comes together into a dough. Press it down firmly and evenly into the pan. You want to bake this for about 15 to 18 minutes until you see those edges just blushing golden brown. Then, pull it out!
Cooking the Gooey Caramel for Your Twix
While that crust is cooling down just a little, we attack the caramel. Get a medium saucepan, combine your condensed milk, corn syrup, brown sugar, the other 1/2 cup of butter, vanilla, and salt. You must stir this constantly over medium heat. This is so important! If you let it sit, it burns, and burned caramel tastes bitter, not rich. Keep stirring until your candy thermometer hits 240°F—that’s the soft-ball stage. If you don’t have a thermometer, be patient; this usually takes about 8 to 10 minutes. Err on the side of caution!
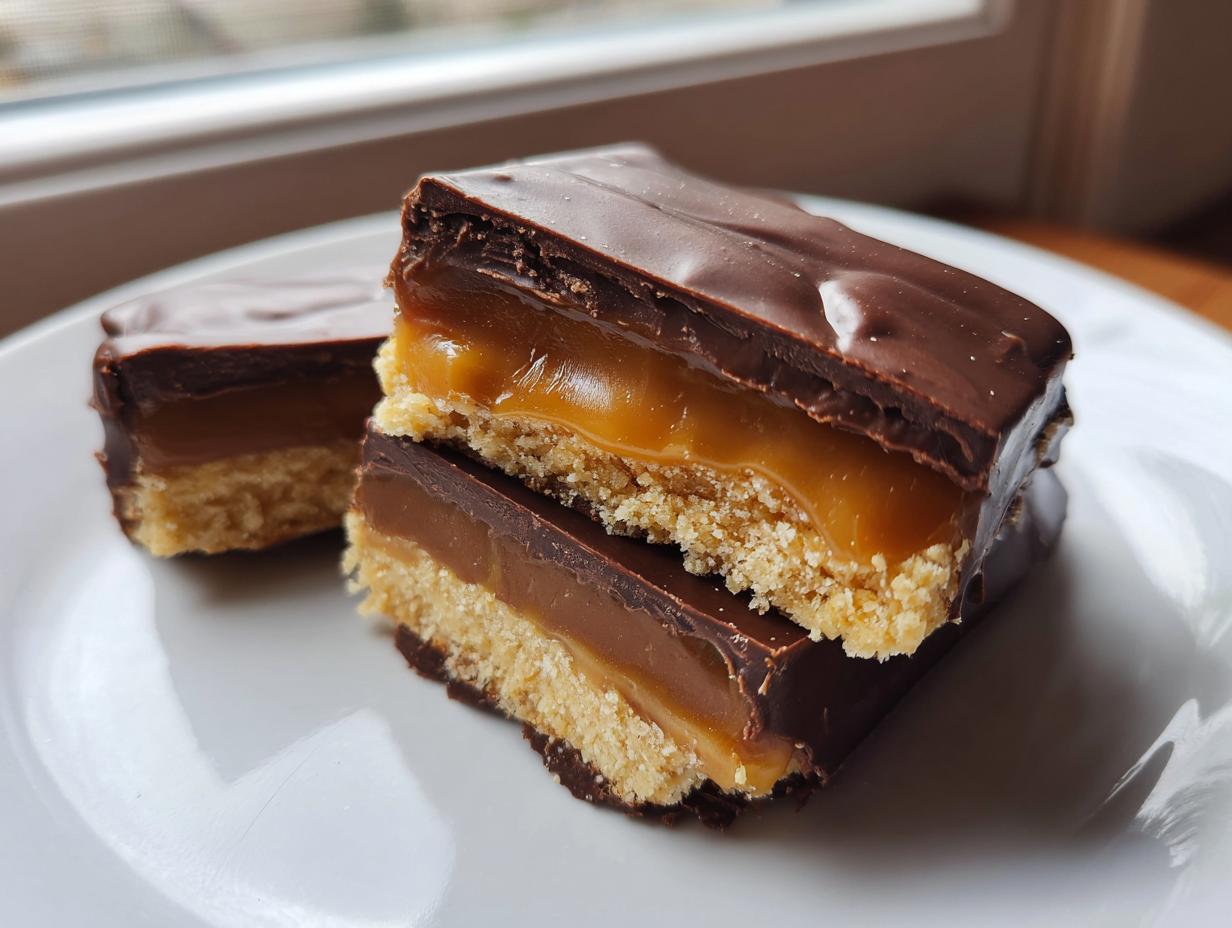
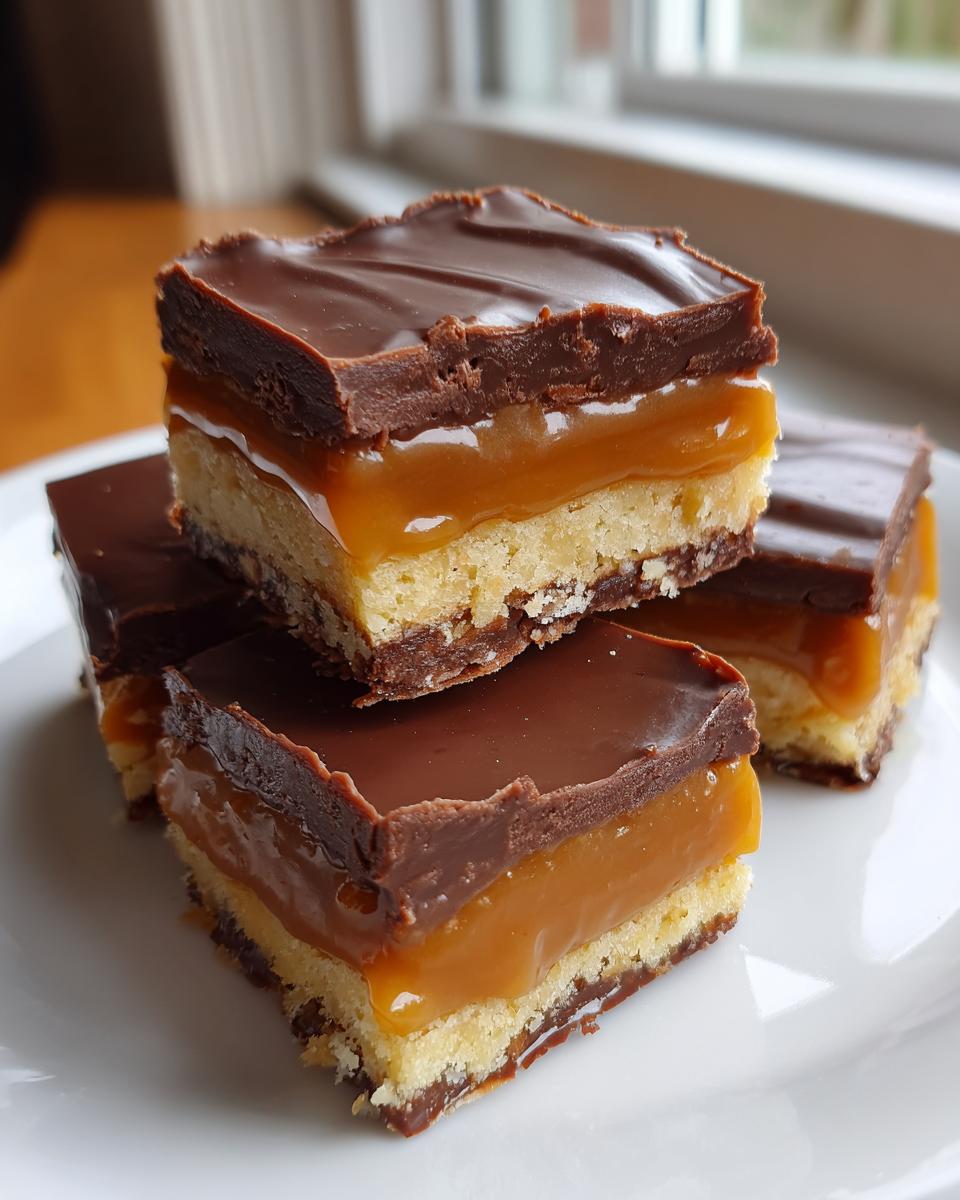
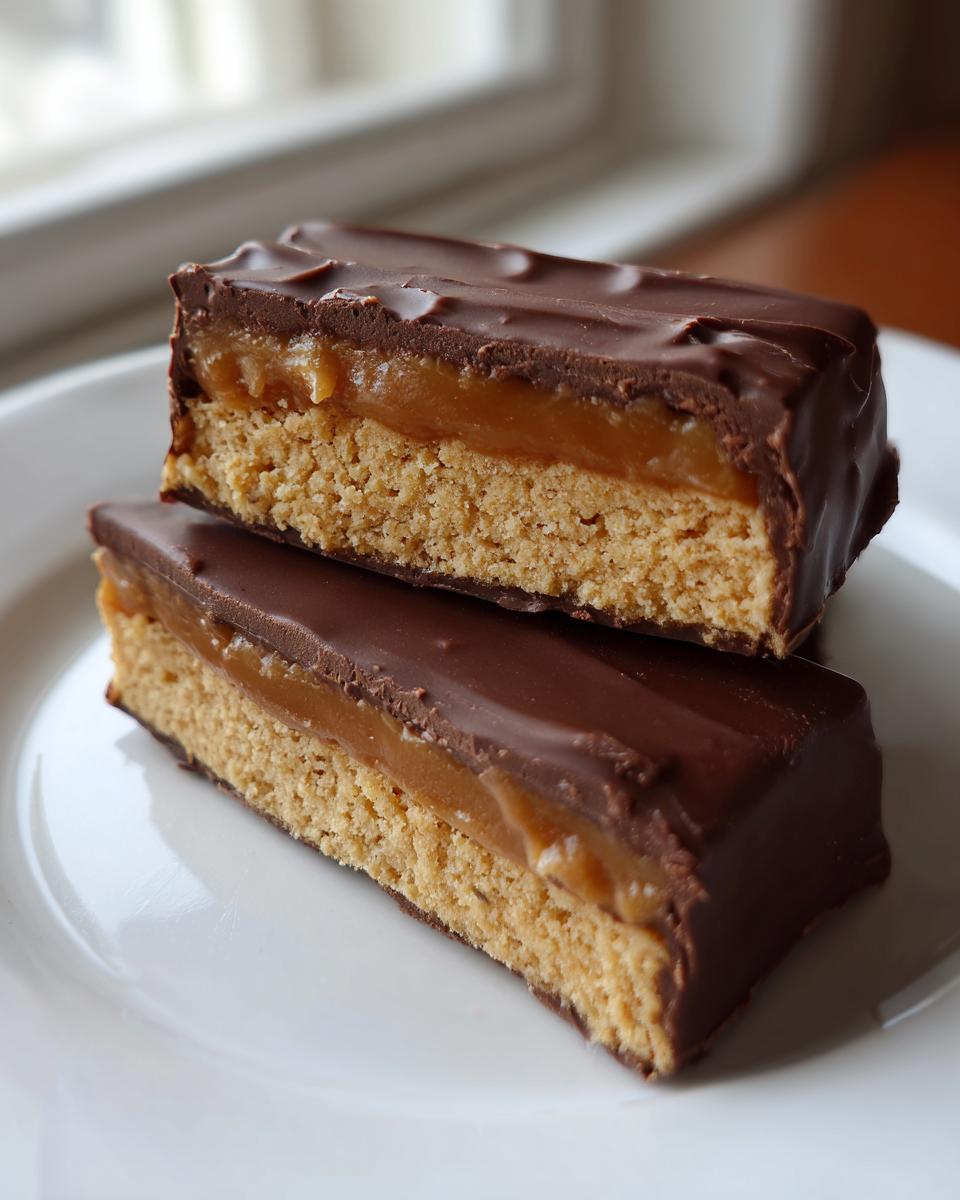
Assembling and Setting the Layered Dessert Bars of Twix
Once your caramel hits temp, pour it right over that warm shortbread base. Spread it around gently so it’s level. Now, we wait! You need this to set up so you can handle it without making a huge sticky mess. Let it cool on the counter for at least one full hour, or pop it in the fridge if you’re in a hurry. Once it’s firm enough, lift it out using those parchment overhangs and slice it into neat bar shapes, just like the candy bars you love!
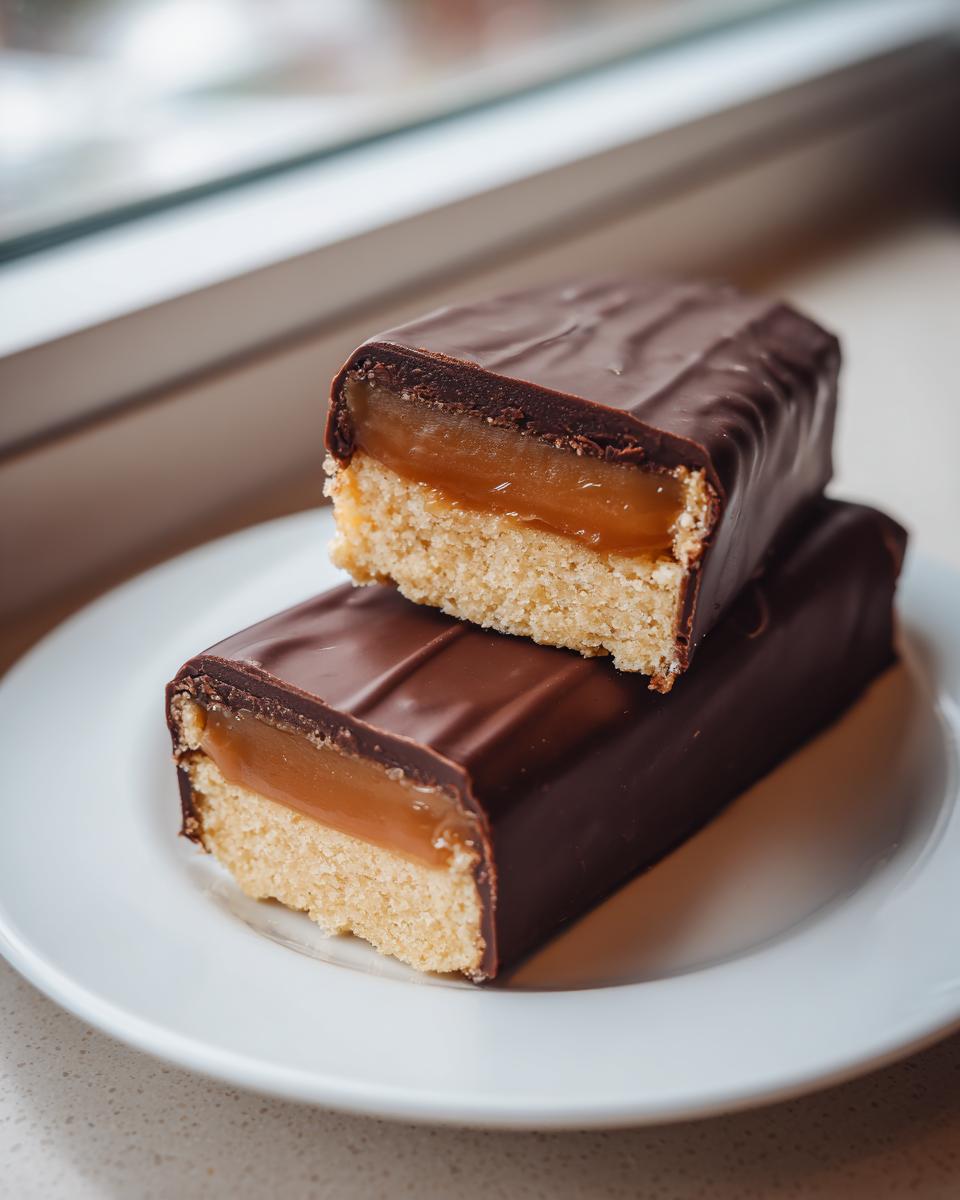
Coating Your Twix Bars in Smooth Chocolate
Time for the finale! Take your chocolate chips and that little bit of shortening (that’s what makes the coating so shiny and smooth) and melt them using 30-second bursts in the microwave, stirring well in between each burst until it’s totally silky. Now, dip each bar, letting the extra chocolate drip off before setting it back onto a clean, parchment-lined sheet. Don’t skip the drip! Finally, these need a nice long chill—at least 30 minutes in the fridge—to make sure that chocolate coating sets hard and gives you that satisfying snap.
Tips for Success When Making Twix Cookie Recipe Easy
Even though we are striving for an easy Twix cookie recipe, there are a couple of spots where a small tweak can make a huge difference between a great bar and a *legendary* bar. My biggest pro-tip revolves around that caramel! If your caramel seems too stiff after cooling, just pop the saucepan (wipe it clean first!) back on low heat for 30 seconds and stir well before pouring. That little bit of warmth makes it manageable. Also, for the chocolate coating, don’t rush the setting time in the fridge.
Patience here ensures a clean snap when you bite in. If you’re finding your chocolate gets a little dull looking, next time try adding just a tiny bit more shortening—it helps stabilize that glossy finish. You can see some other great structural tips over here at The Cook’s Treat. Honestly, taking these small extra steps is what turns a good copycat into one you’ll bake forever!
Variations: Cookie Bar Variations for Your Twix
Now that you’ve mastered the classic beauty, let’s talk about playing dress-up! Sometimes you don’t want a full-sized bar; maybe you just need a quick sweet fix, or maybe you have dietary needs to consider. That’s where these simple adjustments come in handy. Because we built this recipe on a sturdy foundation, changing things up is actually pretty easy. I’ve pulled some great ideas focusing on making these smaller or shifting the ingredients slightly. If you’re curious about some of the lighter takes on this classic, you should definitely look at this resource for inspiration: Healthier Twix Ideas.
Here are a couple of fun ways I like to switch things up when I bake a double batch:
- Go Bite Sized Candy Recipes Style: Instead of baking everything in that 8×8 pan, you can press the shortbread into a standard 9×13 pan for a thinner base. After the caramel sets, use a small cookie cutter—maybe a 1-inch round—to punch out perfect Bite Sized Candy Recipes. You’ll drastically increase your yield, and honestly, they are dangerously easy to eat this way!
- A Nod to Healthier Options: If you or a guest needs a different approach, this recipe accepts swaps quite well. To keep the core structure but adjust for an alternative diet, swap the all-purpose flour for a high-quality 1-to-1 gluten-free blend when making the shortbread. It works like a charm! Just make sure the blend you choose already contains xanthan gum so your shortbread holds together nicely.
- The Peanut Butter Twist: Because how can you make chocolate and caramel better? By adding peanut butter, obviously! Before you pour the caramel over the hot shortbread, spread a thin, even layer of creamy peanut butter over the base. Then, pour the cooked caramel right on top of that. It adds a fantastic salty depth that mimics some other famous candy bars!
Storage & Reheating Instructions for Homemade Candy Bar Recipes
Now we get to the tough part: having leftovers! Don’t worry, these Homemade Candy Bar Recipes keep beautifully, but they do need a little special handling because of that perfect, chewy caramel layer we worked so hard to create. The bottom line is that your refrigerator is your best friend here.
Since these twix bars have that cooked caramel, they absolutely must be stored in an airtight container in the fridge. If you leave them on the counter for too long, especially if your kitchen is warm, that caramel gets soft, and your beautifully cut bars will start to lean on each other and get messy. I find that chilling them actually firms up the shortbread just a tiny bit, making them taste even more like a chilled, store-bought treat.
When you store them, it’s best to put down a layer of parchment paper between each layer of bars. This stops the chocolate coating of one bar sticking to the caramel of the one right above it. Seriously, parchment paper is the unsung hero of homemade candy making! If you want to bring them out to serve, let them sit on the counter for just about 10 to 15 minutes before eating. This takes the chill off the chocolate and softens that caramel back up to that perfect, satisfying chew. If you’re planning on gifting these delicious treats, make sure they are well-wrapped and note clearly on the tag that they should be refrigerated. You can keep them good in the fridge for a solid week, easily!
For a fantastic look at making them bite-sized for sharing (and easier storage!), take a peek at these fun Twix Cookie Bites—they follow a similar storage principle!
Frequently Asked Questions About Making Twix
I totally get it—when you’re making something as amazing as these homemade twix bars, you have questions! It’s all part of the learning process, and I want you to feel totally confident in your kitchen alchemy. Since we went deep into the shortbread and cooked caramel, a few things naturally come up about texture and shortcuts. Don’t worry if you need clarification; that’s what this section is for! If you find yourself wanting to try a different, quicker assembly that skips the oven altogether, you might find some inspiration in how they handle assembly over at Rolo Twix Bites, though remember, our classic shortbread needs that bake time!
Can I make No Bake Twix Bites instead of baking?
That’s a great question for those days when the oven feels like too much work! Unfortunately, for this specific recipe, the shortbread base absolutely needs to be baked. That golden-brown butter flavor and firm structure are what make the bottom layer sturdy enough to handle the cooked caramel!
However, you *can* turn this into a no-bake assembly if you get creative. Instead of making our buttery shortbread dough, you could use a crushed cookie base—think vanilla wafers or shortbread cookies pulsed with melted butter—pressed firmly into your pan. Then, you would pour the cooked caramel over that base and proceed with chilling and dipping. It hits that Sweet Tooth Fix Desserts note quickly, but you miss the delicious, fresh-baked flavor of the shortbread.
What is the best way to get thick chocolate coating on my Twix?
The thickness of the chocolate coating really comes down to two things: the coating mixture itself and the cooling environment. We added that 2 tablespoons of shortening or coconut oil to help thin the chocolate just enough so it flows smoothly over the cold bars. If you dip a cold bar into warm chocolate, the chocolate sets up instantly, resulting in a very thin shell.
For a thicker coating, you have a couple of options, Chef! First, make sure your caramel and shortbread bars are chilled solid before dipping. Second, try setting up a double boiler instead of microwaving the chocolate. Melting it slowly over simmering water (making sure no steam hits the chocolate!) usually gives you a silkier, slightly thicker melt that clings better. You’ll get a much more satisfying crunch when you bite through that extra layer of chocolate!
How long does the caramel need to set before cutting the Twix bars?
This is arguably the most important question here because messy cuts mean lost chocolate-covered edges later! You really need that caramel to stop being totally gooey before you even look at a knife. I always recommend letting it set up at room temperature for a minimum of one hour. This allows the texture to firm up evenly.
If you are short on time and need to get to the cutting stage—which is key for making perfect Bite Sized Candy Recipes—pop the whole pan into the refrigerator for about 45 minutes instead. You want it firm enough that when you press a finger lightly into the caramel, it holds its shape without your fingerprint sinking in. If it’s too soft, trust me, you’ll end up with a sticky caramel nightmare that wastes good chocolate!
Nutritional Estimates for This Indulgent Chocolate Treat
I know, I know, when you’re eating something this wonderfully rich and homemade, you probably aren’t thinking about the macros! But because we are running a professional recipe kitchen here, I always track the estimates to give you a full picture of what you’re enjoying. Remember, this is food science coming into play again—these numbers are based carefully on the specific ingredients and amounts listed in the recipe card.
I really need you to see this as a guideline, though. If you swap out semi-sweet chips for dark chocolate, or if your brand of brown sugar is extra moist, the numbers will shift a little. So, take these as a happy estimate for one of these marvelous Indulgent Chocolate Treats, and don’t stress too much about it!
- Serving Size: 1 bar
- Calories: 280
- Sugar: 28g (Yep, it’s candy, but it’s *homemade* candy!)
- Fat: 17g
- Saturated Fat: 10g
- Protein: 3g
- Carbohydrates: 30g
- Sodium: 85mg
This is a treat, pure and simple, crafted with care from scratch instead of coming off a factory line. Enjoy it guilt-free because you made it yourself!
Share Your Kitchen Copycat Desserts Success
And just like that, we’ve transformed simple pantry staples into something truly extraordinary! You’ve conquered the shortbread, tamed the caramel, and given those bars the perfect chocolate hug. Now comes the best part: sharing the delicious results of your own kitchen alchemy. I truly want to see what you created!
Making these Homemade Candy Bar Recipes is always a team effort, even if I’m the one testing the first batch. Did the caramel set just right for you? Did you slice them into classic bars or go for those fun little bites like the ones you’d find over at a site like Twix Candy Bar Bites? Drop a comment below and tell me all the details! Hearing how this recipe worked in *your* kitchen is honestly the fuel that keeps me testing and developing new, reliable treats like this one.
If you loved this copycat experience, please hit that star rating right near the top of the recipe card! A rating helps other home cooks find this reliable recipe, and I would be so grateful. Better yet, snap a picture of your finished, glossy chocolate bars and tag me on social media so I can cheer you on. Or, if you’re looking for another amazing, reliable recipe to tackle next, check out what my friends are baking up here: Simple Homemade Twix Bars.
Go ahead, grab a chilled bar, take a bite, and savor that incredible crunch. You earned it! I can’t wait to see your creations, and I hope you bookmark this recipe right now so you can come back and make these perfect twix bars again soon!
PrintHomemade Twix Bars: Caramel Shortbread Chocolate Treats
Create copycat candy bars at home with this reliable recipe for Homemade Twix Bars, featuring buttery shortbread, chewy caramel, and a rich chocolate coating.
- Prep Time: 30 min
- Cook Time: 25 min
- Total Time: 1 hour 55 min
- Yield: 24 bars 1x
- Category: Dessert
- Method: Baking and Chilling
- Cuisine: American
- Diet: Vegetarian
Ingredients
- 1 cup (2 sticks) unsalted butter, softened
- 1/2 cup granulated sugar
- 2 cups all-purpose flour
- 1/4 teaspoon salt
- 1 (14 ounce) can sweetened condensed milk
- 1/2 cup light corn syrup
- 1 cup packed light brown sugar
- 1/2 cup (1 stick) unsalted butter
- 1 teaspoon vanilla extract
- 1/4 teaspoon salt
- 12 ounces semi-sweet chocolate chips
- 2 tablespoons shortening or coconut oil
Instructions
- Prepare the shortbread layer: Preheat your oven to 350°F (175°C). Line an 8×8 inch baking pan with parchment paper, leaving an overhang on two sides for easy removal.
- In a large bowl, cream together 1 cup of softened butter and 1/2 cup of granulated sugar until light and fluffy.
- Gradually mix in the flour and 1/4 teaspoon of salt until a crumbly dough forms. Press the dough evenly into the bottom of the prepared pan.
- Bake the shortbread for 15 to 18 minutes, or until the edges are lightly golden. Remove from the oven and let it cool slightly while you prepare the caramel.
- Prepare the caramel layer: In a medium saucepan, combine the sweetened condensed milk, corn syrup, brown sugar, 1/2 cup of butter, vanilla extract, and 1/4 teaspoon of salt.
- Cook the caramel mixture over medium heat, stirring constantly, until it reaches 240°F (soft-ball stage) on a candy thermometer, about 8 to 10 minutes. Do not let it burn.
- Pour the hot caramel evenly over the warm shortbread crust. Let the caramel set at room temperature for at least 1 hour, or until firm enough to handle.
- Cut the cooled shortbread and caramel into bar shapes, similar to the size of a candy bar. Place the bars on a parchment-lined baking sheet.
- Prepare the chocolate coating: In a microwave-safe bowl, combine the chocolate chips and shortening (or coconut oil). Microwave in 30-second intervals, stirring well after each interval, until the chocolate is smooth and fully melted.
- Dip each caramel shortbread bar into the melted chocolate, ensuring it is fully coated. Use a fork to lift the bar out, allowing excess chocolate to drip off.
- Place the coated bars back onto the parchment-lined baking sheet. Refrigerate for at least 30 minutes, or until the chocolate is set.
Notes
- For a quicker set on the caramel, you can chill the shortbread layer for 30 minutes before pouring the caramel on top.
- If you prefer a thinner chocolate coating, add 1 teaspoon more shortening to the melted chocolate mixture.
- Store your finished Homemade Twix Bars in an airtight container in the refrigerator for the best texture.
Nutrition
- Serving Size: 1 bar
- Calories: 280
- Sugar: 28g
- Sodium: 85mg
- Fat: 17g
- Saturated Fat: 10g
- Unsaturated Fat: 7g
- Trans Fat: 0.2g
- Carbohydrates: 30g
- Fiber: 1g
- Protein: 3g
- Cholesterol: 35mg