
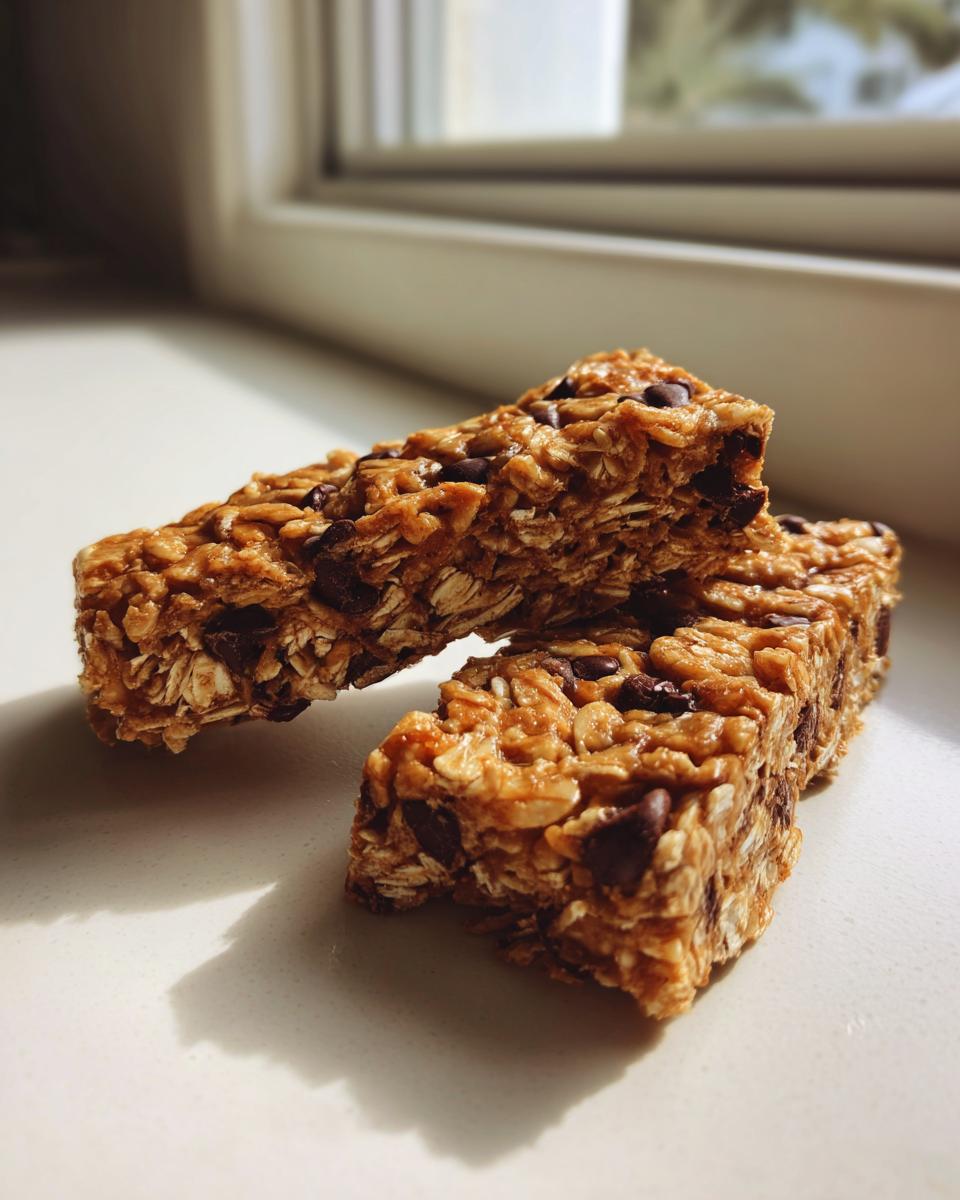
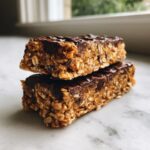
Okay, let’s talk about beating the heat because who wants to turn on the oven when it’s already blazing outside? Seriously, when I crave that satisfying crunch and chew of a great snack bar, the last thing I want is to wait an hour for preheating and baking. That’s why I’m sharing my absolute favorite formula for the ultimate chewy no bake granola bars. These aren’t the crumbling, dry things you sometimes find, either! As a food scientist by training and a professional recipe developer before I focused on Alchemy Chef, I obsess over texture. This recipe nails that perfect, gooey, yet firm bite every single time using simple techniques. You are going to love how quickly these come together for your meal prep!
- Why These Are The Ultimate Chewy No Bake Granola Bars
- Gathering Ingredients for Your No Bake Granola Bars
- Step-by-Step Guide to Making No Bake Granola Bars
- Tips for Perfect Oat Energy Bars Every Time
- Ingredient Notes and Substitutions for Easy Snack Recipes
- Storing and Preparing Make Ahead Snacks
- Serving Suggestions for Quick Breakfast Ideas
- Frequently Asked Questions About No Bake Granola Bars
- Estimated Nutrition for These Wholesome Snack Bars
Why These Are The Ultimate Chewy No Bake Granola Bars
I know you want reliable recipes that actually work, which is why I put these through the wringer in my test kitchen. These aren’t your average snack; they are formulated for maximum satisfaction. If you’re looking for the best no bake granola bars out there, stick with me for a minute. You can get an entire batch ready to chill in about 15 minutes!
- They are the ultimate no oven treats—perfect for summer baking fatigue!
- They hold together beautifully, making them fantastic for tossing into lunchboxes.
- We focus intensely on the chew factor, ensuring you avoid dry, crumbly messes.
Speed and Simplicity: True No Bake Recipes
The beauty of this recipe is that it embraces true simplicity. We cut out all the downtime. You aren’t waiting for an oven to warm up or cool down. It’s about 15 minutes of active work combining everything, and then the fridge does the heavy lifting. That makes these ideal for super quick homemade treats when you need an emergency batch of healthy grab and go snacks.
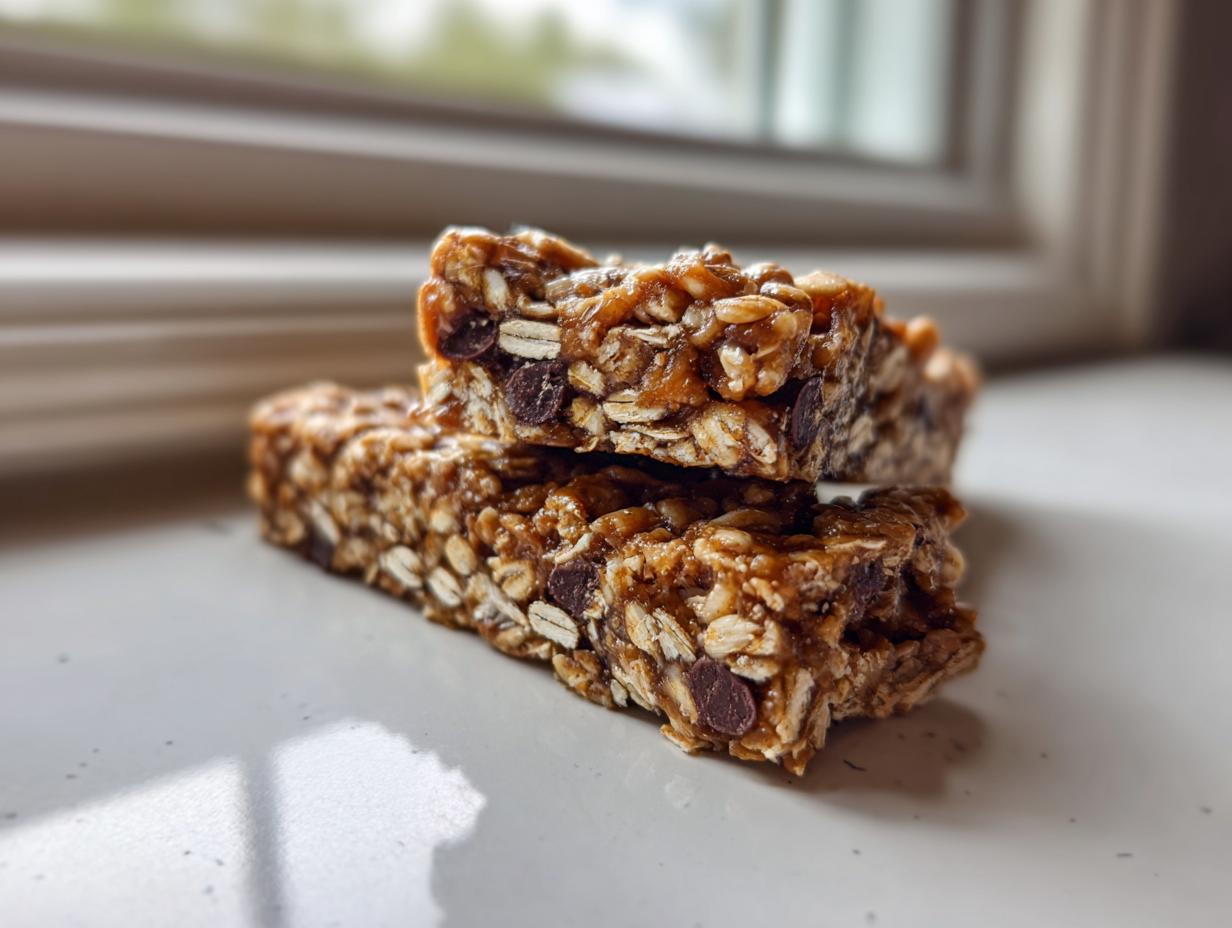
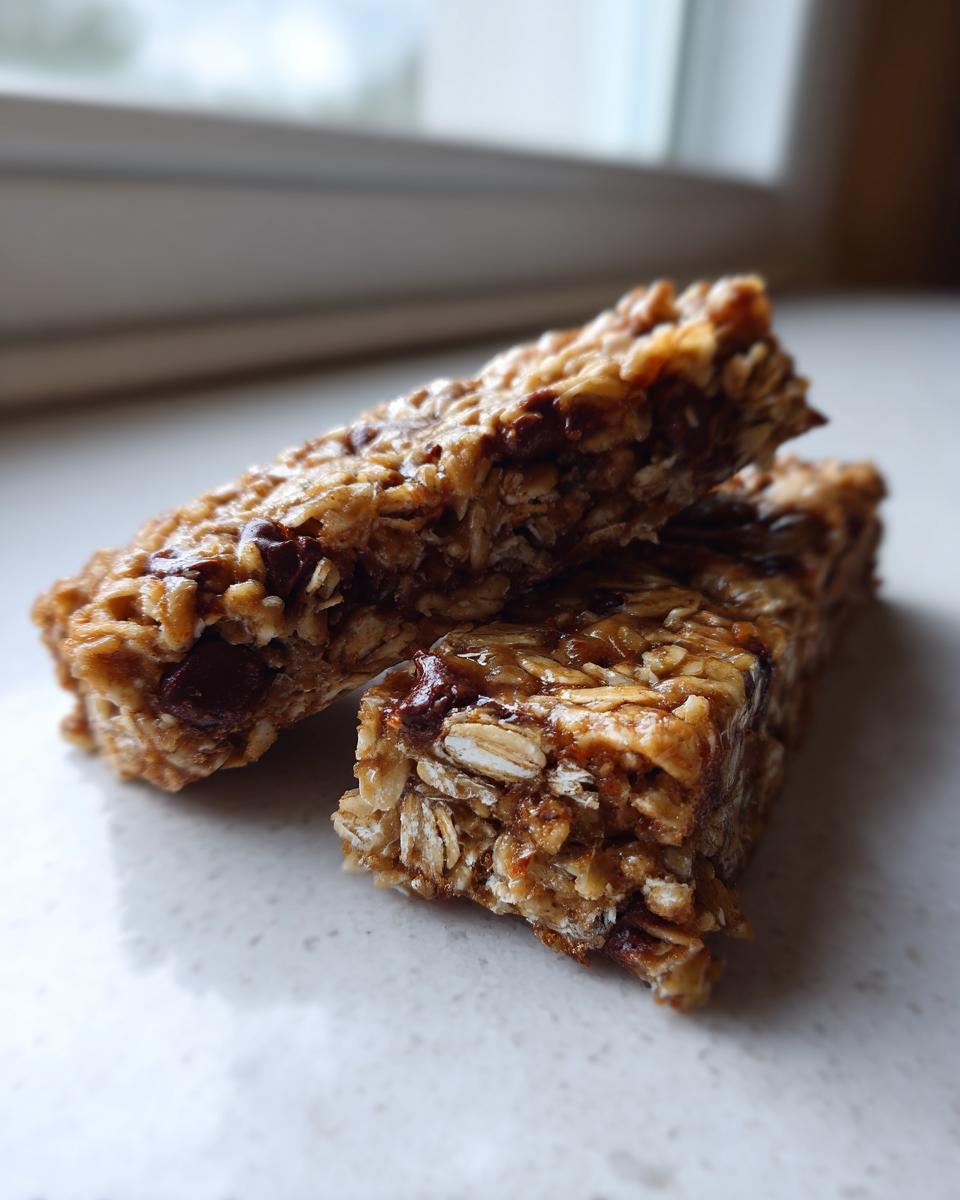
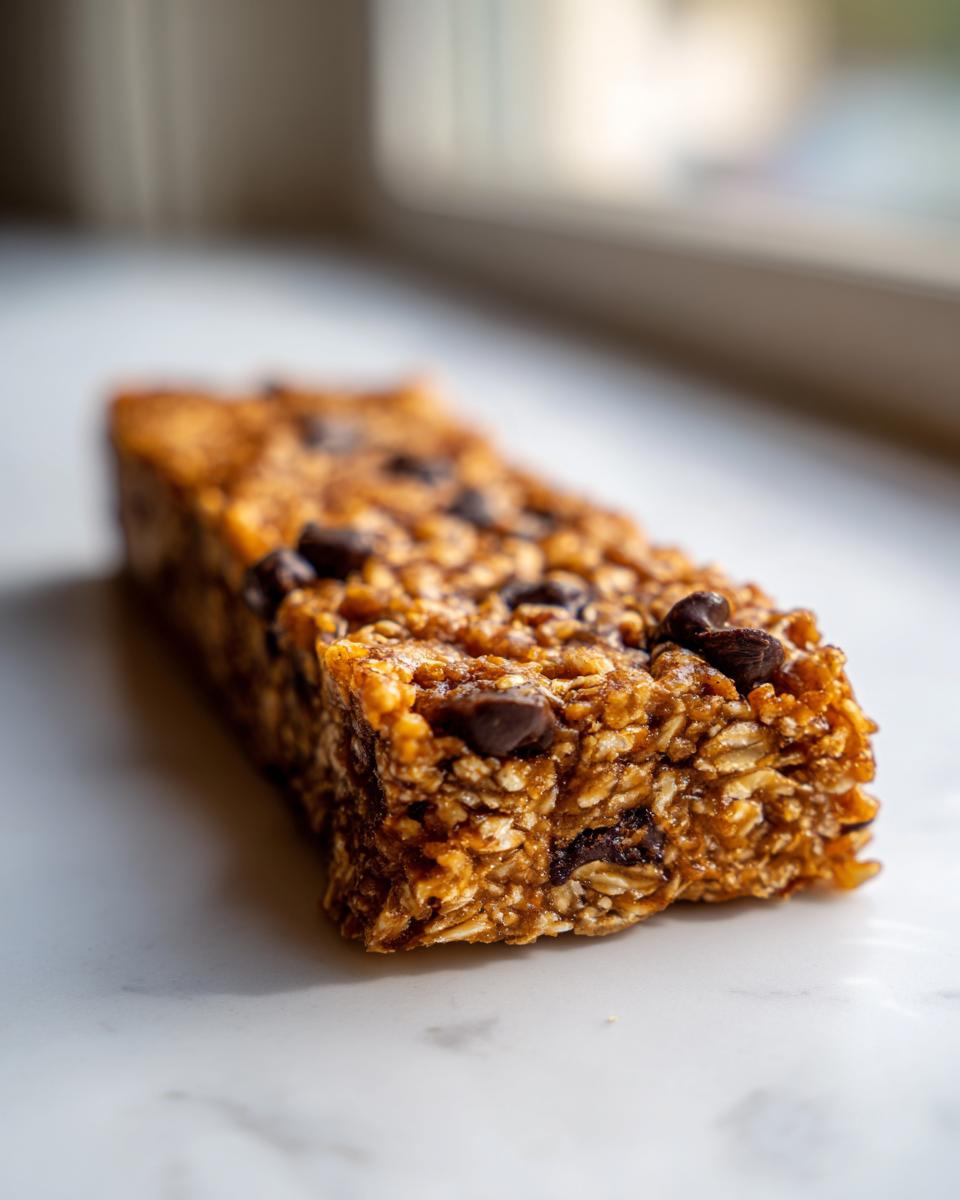
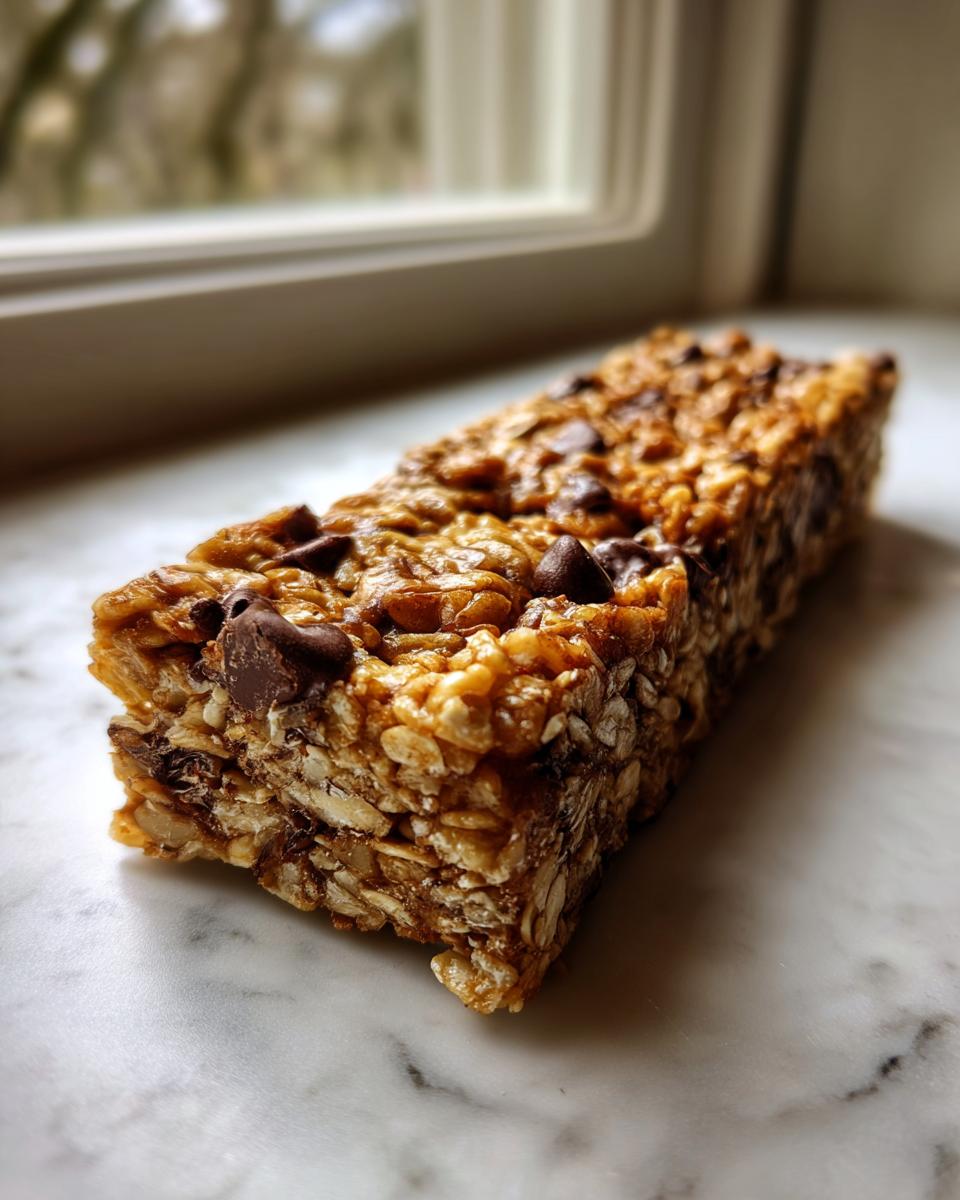
Perfect Texture: Achieving Chewy Granola Bars Every Time
Here’s where my food science background pays off! The secret to getting truly chewy granola bars—and not having them disintegrate when you cut them—is all in the binder. We gently warm the honey and peanut butter just enough so they mix seamlessly with the dry oats. That perfectly emulsified, warm coating is what locks everything together during the chill time, giving you that satisfying, slightly gooey texture store-bought versions just can’t match. You can see how much people love this technique at sites like Simple No-Bake Recipes.
Gathering Ingredients for Your No Bake Granola Bars
Okay, assembling these no bake granola bars is the easiest part, but choosing your ingredients wisely makes a huge difference in the final texture and health factor. You need just a few core items, plus whatever delicious extras you want to throw in. Don’t stress too much; we’re keeping this wholesome and easy. Remember, consistency in the main players guarantees that satisfying chewiness we’re aiming for! I’ve found that folks who pack these for lunchboxes, like the ones checking out sites like Kid Friendly No Bake Bars, really appreciate knowing exactly what binds these together.
Binding Agents: Honey and Peanut Butter Granola Bars
The structure of these bars relies completely on the magical marriage of creamy peanut butter and your sticky sweetener. I always lean toward natural, runny peanut butter or almond butter for the best melting consistency; the crunchy kind sometimes leaves the binder feeling a little grainy. The honey—or maple syrup if you prefer a vegan touch—creates that delicious gloss that makes these irresistible peanut butter granola bars. Make sure both are room temperature so they yield smoothly when warmed.
Customizing Your Mix-Ins for Healthy Grab and Go Snacks
This is where you personalize your flavor and boost the nutrients! The recipe calls for 1/2 cup of mix-ins, which leaves room for creativity to make these truly healthy grab and go snacks. I love adding pumpkin seeds and ground flaxseed for fiber and Omega-3s. Crushed pretzels offer a salty crunch if you have kids (or you!) who love that contrast. Dried cranberries or apricots are wonderful for tartness, but always chop your dried fruit smaller so it mixes in evenly!
Step-by-Step Guide to Making No Bake Granola Bars
Now we get to the fun part, where we take those beautiful ingredients and turn them into something you can eat immediately—well, almost immediately! Remember, since these are no oven treats, our control over temperature is crucial for achieving deep flavor and that perfect final set. We’re going for ease here, but don’t rush the warming step; that’s where a lot of people go wrong and end up with scorched sweetener!
Preparing the Pan and Warming the Binder for No Bake Recipes
First things first: get your pan ready. Grab an 8×8 inch pan and line it completely with parchment paper, making sure you leave plenty of overhang on the sides. Think of these overhangs as built-in handles for easy lifting later! Next, you need to gently awaken that binder. Put your peanut butter and honey into a small saucepan over the absolute lowest heat setting. You must stir this constantly—I mean constantly! We just want it smooth enough to pour easily, almost like warm syrup. If it starts to bubble or smells burnt, pull it right off the heat! That low and slow warming is our secret weapon for success in all no bake recipes.
Combining Oats and Pouring the Mixture for Homemade Granola Bars
While the binder warms up, put your rolled oats and all your dazzling mix-ins into a big bowl. Once the peanut butter mixture is smooth and off the heat, stir in your vanilla extract quickly. Now, pour that warm, lovely liquid right over the oats. Use a sturdy spatula and mix everything until every single oat flake looks coated. You have to work fast here because the mixture will start to stiffen up as it cools down. Make sure you’ve got an even distribution of nuts and seeds throughout your homemade granola bars before you move on to the next crucial step. I always encourage people to explore other great tips on making these bars solid by checking out resources like Irresistible No-Bake Bars when they have a free moment.
The Pressing Technique for Firm No Bake Granola Bars
This is the moment of truth that dictates whether you end up with beautiful slices or a pile of oat crumbles! Transfer your mixture into that prepared pan. Now, here’s the key: you *must* press it down incredibly firmly. Use the bottom of a measuring cup or the flat back of a spatula—whatever gives you leverage—and physically compress the mixture until it’s dense and flat. That compression is what creates that delightful, toothsome chew in the final product. After you press it tight, pop it into the fridge for a minimum of one hour until it’s rock solid. Trust me, you need that chill time for these no bake granola bars to slice cleanly!
Tips for Perfect Oat Energy Bars Every Time
Even though these are some of the easiest oat energy bars you’ll ever make, a few tiny details can absolutely transform them from “good” to “I-will-never-buy-them-again-I-must-make-these-forever.” Because I’ve made about a million batches of these things—sometimes accidentally solidifying them into something you could use as a paperweight—I’ve learned a few tricks that guarantee success.
The number one thing I preach is temperature control. When you’re melting your peanut butter and honey, don’t treat it like you’re setting up a caramel sauce. You don’t want it piping hot; you just want it warm and liquid enough to completely coat the oats without cooking them. If the binder is too hot when you mix it in, it can start to dry out the oats slightly before they even hit the pan, leading straight to crumbliness later on. Keep that heat low!
Secondly, let’s circle back to the press. I cannot stress this enough: pressing is everything. You need to commit to this step! Use significant body weight if you have to. I often place a piece of plastic wrap over the mixture and then use the base of a heavy glass measuring cup to push down firmly across the entire surface, making sure every square inch is packed tight. This firm compression is what fuses the oats together. If you’re serving these to friends who enjoy high-protein snacks, maybe check out the tips on binding ingredients at No-Bake Protein Bars for extra structuring ideas, even though our honey method usually works perfectly on its own!
Finally, give them the full chill time. Folks always want to cheat and only chill them for 30 minutes because they are impatient—I get it! But rushing the refrigeration means the binder hasn’t fully firmed up its molecular structure yet. If you cut them early, they’ll squish or break apart. Give them a solid hour, minimum, in a cold fridge, and you’ll be rewarded with beautiful, sturdy squares.
Ingredient Notes and Substitutions for Easy Snack Recipes
When you’re making staples like these easy snack recipes, people always have questions about swapping or adjusting things, especially if they have allergies or just ran out of one item. Trust me, I’ve been there! The beauty of this recipe is that the base structure is so solid that you have a little room to play around without ruining the whole batch. I always recommend keeping the ratios of wet binder to dry oats the same, but adjusting the add-ins is totally fair game.
Regarding storage, you’ll find them keep fresh for nearly a week in the fridge, which is fantastic for meal prep snacks. People often ask me about making them safe for everyone, and that’s where a few specifics come into play.
Making Gluten Free No Bake Bars an Option
This is a simple fix, but you have to be deliberate about it. The oats are the only ingredient that can cause issues here, so if you need gluten free no bake bars, you absolutely must use certified gluten free rolled oats. Regular oats are often processed on equipment shared with wheat, so cross-contamination happens easily. Just check the packaging carefully! If you use certified GF oats, the rest of this recipe is naturally gluten-free, honey and all. Keep exploring other great ideas for wholesome bars over at Chewy Granola Bars with Oats and Seeds.
Nut Butter Swaps for Allergies or Variety
The peanut butter is doing a heavy lifting job here—it’s providing fat, flavor, and that essential stickiness. But I know peanuts aren’t everyone’s favorite, or sometimes someone in your house has an allergy. You can totally swap it out!
- Almond Butter: This is my next top pick. It melts beautifully just like peanut butter, giving you a similar, rich flavor profile.
- Sunflower Seed Butter (SunButter): This works great for nut allergies. Just know that SunButter can sometimes be slightly runnier than peanut butter, so you might need to add an extra tablespoon or two of oats just to thicken the mixture slightly before pressing.
The goal is always to have a smooth binder, so whatever nut or seed butter you choose, make sure it’s creamy and well-stirred before you start melting it down. For more ideas on customizing these types of recipes, have a look at this guide on No Bake Granola Bars—they have some fun variations too!
Storing and Preparing Make Ahead Snacks
Listen, these no bake granola bars are saints when it comes to making life easier during the week. They are your best friend for make ahead snacks because you make them once, and you’re stocked for days! Since we aren’t baking off all the moisture, the texture holds best when they stay cool. My personal rule, which I learned after a few sad, warm room-temperature batches turned oily, is that these bars belong in the fridge.
Seriously, keep them in an airtight container. If you stack them up in the pan, throw a sheet of parchment paper between the layers so they don’t stick together when they get really cold and dense. This prevents that annoying situation where you pull one bar out and half the layer comes with it!
The notes tell you they keep well for up to a week, and that’s accurate, provided you store them properly. When I make a big batch for meal prep snacks, I usually slice them right away, arrange them in my favorite glass container like I’m laying down fresh tiles, and pop the whole thing in the fridge. If you’re dealing with really humid weather, sometimes I even wrap individual bars tightly in plastic wrap before putting them in the container, just to lock out any moisture.
For quick grabbing, you can definitely pull one out first thing in the morning. They get a touch firmer straight from the fridge, which I actually prefer for a super solid, energy boosting snack. If you plan on eating them immediately after cutting, you can let them sit on the counter for about 10 minutes, but if you’re packing lunches, straight from the cold feels best. You can find lots of great tips on maximizing freshness for these kinds of quick homemade treats over at Simple No Bake Bars that Last!
Serving Suggestions for Quick Breakfast Ideas
While these are the kings of the afternoon slump fix, I find people often overlook how fantastic these are for super quick breakfast ideas when you’re running out the door! You don’t always have time for a full sit-down meal, but you deserve something better than just a stale piece of toast, right? That’s where these chewy wonders shine.
If you grab one straight from the fridge, it offers a firm, cold energy boost that pairs perfectly with a hot travel mug of coffee or espresso. That warm/cold contrast is just sensational. For a slightly softer texture when you’re eating them at home, let them sit on the counter for about 15 minutes before you dig in. This brings the binders back to that perfect, pliable chew.
I also love crumbling one of these bars right over a bowl of plain Greek yogurt. It instantly transforms plain yogurt into a dessert-level experience for breakfast, giving you that extra protein boost alongside the oats and healthy fats. It’s almost like a homemade yogurt parfait base! Think of them as a shortcut to a healthy, textured topping. For more inspiration on squeezing these into your morning routine, check out the ideas shared over at Breakfast Ideas Using No Bake Bars.
Frequently Asked Questions About No Bake Granola Bars
I figured we should chat quickly about a few last things. Even though these are some of the simplest no oven treats you’ll ever make, people always have specific questions about getting that texture just right. It’s smart to ask—that’s the difference between a good snack and a perfect one! For more ways to use these simple treats, take a peek at what the folks at No-Bake Granola Bars are doing.
Can I make these bars vegan or use a different sweetener?
Absolutely! This is one of the great things about these no bake granola bars—they are super adaptable. If you want to make them completely vegan, simply swap the honey out for pure maple syrup. Maple syrup works just as well as a binder, though I sometimes find it’s slightly less sticky than honey, so you might need to press down an extra time or two when you’re compacting them into the pan.
You could also try brown rice syrup, but be careful with syrups that are much thinner than honey; they might struggle to hold the oats tightly once chilled. Always stick to thick, natural sweeteners for the best results!
Why are my homemade granola bars crumbly instead of chewy?
Oh, this is the most common heartbreak, and I promise you, it always comes down to two steps we discussed! If your homemade granola bars are crumbly, it means the binder didn’t fully fuse the dry ingredients together. Did you press down hard enough in Step 7? You need to put some muscle into it to compact those oats! If you under-press, they crumble.
The second reason is almost always the chilling time. If you cut them before they are completely, solidly cold, they will fall apart. Don’t rush it! An hour in the fridge is non-negotiable to ensure you get those perfectly satisfying, chewy slices.
Are these kid friendly snacks suitable for toddlers?
They are wonderful kid friendly snacks for older children, certainly! They are much healthier than anything store-bought. However, if you are making them specifically for very little ones—say, toddlers under three—you need to be careful about the add-ins. Whole hard nuts or seeds can be a choking risk, even when mixed into a chewy bar. For real little ones, I’d recommend skipping the chopped nuts entirely and maybe blending your peanut butter very smoothly, or even using a runny sunflower seed butter as the base instead of chunky peanut butter!
Estimated Nutrition for These Wholesome Snack Bars
I always feel like posting nutrition facts is important when we’re striving to eat wholesome food, but please take these numbers with a little grain of salt—literally! Since we customize our mix-ins so much, the final count changes slightly every time I make a batch. These estimates are based on making 12 bars using standard creamy peanut butter and honey, without any extra chocolate chips. If you load yours up with lots of dried fruit or premium seeds, your values will naturally shift!
Think of this as a fantastic way to track what you’re getting overall when you choose these wonderful homemade healthy treats over highly processed store options. For anyone checking macros or trying to balance their daily intake, it’s good to know what you’re working with when you whip up these no bake granola bars.
Here is what the basic formula usually looks like per bar. If you’re looking for more ideas on swapping ingredients while keeping things healthy, I always suggest browsing resources like Homemade No Bake Bar Recipes for inspiration!
Approximate Nutrition Per Bar (Based on 12 servings):
| Nutrient | Amount |
|---|---|
| Serving Size | 1 bar |
| Calories | 250 |
| Protein | 8g |
| Total Fat | 14g |
| Carbohydrates | 28g |
| Dietary Fiber | 3g |
| Sugar | 12g |
The Ultimate Chewy No Bake Granola Bars: Quick, Healthy, and Ready in 20 Minutes
Make these easy, homemade granola bars without an oven. They are chewy, healthy, and perfect for quick breakfasts or grab and go snacks.
- Prep Time: 15 min
- Cook Time: 0 min
- Total Time: 1 hour 15 min
- Yield: 12 servings 1x
- Category: Snack
- Method: No Bake
- Cuisine: American
- Diet: Vegetarian
Ingredients
- 2 cups rolled oats
- 1 cup creamy peanut butter
- 1/2 cup honey or maple syrup (natural sweetener)
- 1/2 cup mix-ins (e.g., chopped nuts, seeds, dried fruit)
- 1/4 cup mini chocolate chips (optional)
- 1 teaspoon vanilla extract
Instructions
- Line an 8×8 inch baking pan with parchment paper, leaving an overhang for easy removal.
- In a medium saucepan, combine the peanut butter and honey (or maple syrup) over low heat. Stir constantly until the mixture is smooth and easily pourable. Do not let it boil.
- Remove the saucepan from the heat and stir in the vanilla extract.
- In a large bowl, combine the rolled oats and your chosen mix-ins.
- Pour the warm peanut butter mixture over the oat mixture. Stir well until all dry ingredients are evenly coated.
- If using, fold in the mini chocolate chips now.
- Transfer the mixture to the prepared pan. Press the mixture down firmly and evenly using the back of a spatula or a second piece of parchment paper. This step is key for chewy bars.
- Refrigerate for at least 1 hour, or until completely firm.
- Use the parchment paper overhang to lift the block from the pan. Cut into 12 to 16 bars.
Notes
- For a gluten free no bake bars option, use certified gluten free rolled oats.
- Store the finished bars in an airtight container in the refrigerator for up to one week for best texture.
- You can substitute peanut butter with almond butter or sunflower seed butter for variety.
Nutrition
- Serving Size: 1 bar
- Calories: 250
- Sugar: 12g
- Sodium: 110mg
- Fat: 14g
- Saturated Fat: 3g
- Unsaturated Fat: 11g
- Trans Fat: 0g
- Carbohydrates: 28g
- Fiber: 3g
- Protein: 8g
- Cholesterol: 0mg