
Weeknight dinners, right? Sometimes you stare into the fridge, craving that bold, comforting flavor of a takeout burrito but you just don’t have the time (or the patience!) to roll a dozen things up before everyone melts down. Trust me, I’ve been there! That’s why I developed this ultimate **burrito bake** solution. It captures everything you adore about Tex-Mex comfort food—layers of tortillas, seasoned filling, and tons of cheese—all baked into one satisfying casserole dish. As someone who formally studied Food Science and now develops recipes professionally, I promise you total reliability. This isn’t just a recipe; it’s an alchemy of ease and incredible flavor, designed by Juliana Cruz to work perfectly, every single time you pull it out of the oven.
- Why You Will Love This Easy Burrito Bake Casserole
- Essential Ingredients for Your Layered Tortilla Bake
- How to Assemble the Ultimate Cheesy Burrito Casserole Recipe
- Expert Tips for a Flawless Chicken Burrito Bake Ideas
- Variations: Beef Burrito Casserole and Other Twists
- Make-Ahead & Freezer Friendly Casseroles Instructions
- Serving Suggestions for Your Hearty Baked Meal
- Frequently Asked Questions About the Burrito Bake
- Estimated Nutritional Data for This Comfort Food Casserole
- Share Your Kitchen Alchemy
Why You Will Love This Easy Burrito Bake Casserole
When the clock is ticking and you need real flavor, you need this dish in your rotation. I made sure this **burrito bake** was scientifically optimized for speed and satisfaction. It’s the definition of a weeknight win, turning humble ingredients into something genuinely crave-worthy.
- Perfect for Quick Weeknight Dinner Baked Meals: Seriously, we are talking under 45 minutes total! You prep it fast, and the oven does the heavy lifting.
- Maximum Flavor, Minimum Cleanup with This One Pan Burrito Bake: Everything goes into one 9×13 dish. That means more time enjoying your Tex-Mex comfort food casserole and way less time scrubbing pans later.
Perfect for Quick Weeknight Dinner Baked Meals
Forget takeout panic! Because this all comes together in about 15 minutes of hands-on time, you can have this incredibly hearty baked meal on the table before the kids even finish their homework. It’s quick, reliable, and fits perfectly into busy schedules.
Maximum Flavor, Minimal Cleanup with This One Pan Burrito Bake
This is the ultimate one-pan burrito bake. You mix all that delicious, seasoned goodness—the chicken, the beans, the sauce—and just layer it. No flipping, no frying, just one dish to wash. That’s pure kitchen alchemy if you ask me!

Essential Ingredients for Your Layered Tortilla Bake
Okay, let’s talk about what goes into this magic! Because I developed this recipe professionally, I obsess over ingredient quality—it’s how we guarantee this **burrito casserole recipe** tastes intensely Tex-Mex instead of just… okay. Building reliability starts right here with measuring precisely. Don’t skip the details on preparation, because those small steps make our **Mexican casserole** shine!
Ingredient Clarity and Preparation Notes
You’ll want to make sure you have your components ready, especially since we are layering everything up quickly. Remember, the chicken needs to be already cooked and shredded—rotisserie chicken is your best friend here if you’re pressed for time!
- You need 1 pound of boneless, skinless chicken breasts, cooked and shredded.
- Grab one can of black beans; make sure you rinse them well and drain them totally before they go into the bowl.
- We use one 10-ounce can of red enchilada sauce—this brings the signature bold flavor!
- One cup of cooked white rice helps bulk things up and gives structure.
- For the spices—chili powder, cumin, and garlic powder—measure these out carefully; they are key to the flavor profile.
- For that glorious, melty top, make sure you grab both cups of cheese: one cup of Monterey Jack and one full cup of sharp Cheddar. Mixing them is crucial for the best gooey texture!
- Don’t forget the tortillas! You’ll need 8 medium flour tortillas, and this is important: cut them all into quarters before you start assembling the layers.
- And finally, the water—I know, water—it goes over the top layer to help steam those tortillas just enough to keep them soft during the bake.
How to Assemble the Ultimate Cheesy Burrito Casserole Recipe
Now that all your ingredients are perfectly prepped, it’s time for the fun part: assembly! Building this **burrito bake** is like building a delicious, Tex-Mex lasagna, layer by layer. It’s critical that you layer evenly so you don’t end up with a big clump of filling in one spot and bare tortillas in another. Follow these steps precisely, and you’ll nail that perfect flavor distribution every single time. We want consistency across the entire bake, right?
Preheating and Preparing the Base Layer
First things first, get that oven ready! Step one says to preheat your oven to 375 degrees Fahrenheit. Since we want zero sticking drama—especially with cheesy bakes—go ahead and lightly grease that 9×13 inch baking dish. Next, before you put down the main filling, spread a super thin layer of that spiced chicken and bean mixture right on the bottom. This little layer acts like glue and prevents the first layer of tortillas from just drying out against the hot glass. It makes all the difference!
Building the Layers for a Perfect Burrito Bake
Time to layer! Take half of your quartered flour tortillas and arrange them evenly over that base layer you just spread. Remember, these are the structure of our layered tortilla bake. Now, spread half of your remaining chicken filling right over those tortillas. Don’t pile it high; keep it even! Sprinkle generously with half of your combined Jack and Cheddar cheese. Then, we just repeat that process: top with the rest of the tortillas, then the very last bit of the chicken mixture. Even distribution is the secret sauce here!

Baking and Resting the Mexican Casserole
Here’s the little trick for moisture: take that half cup of water and pour it evenly over the absolute top layer—this helps steam things perfectly during the bake. Finish it off by sprinkling the remaining cheese mixture across the top until it’s completely covered. Slide it into the oven for 25 to 30 minutes, or until it’s bubbling hot and that cheese is gloriously golden brown. But wait! Don’t grab a fork immediately! You absolutely have to let this **Mexican casserole** rest for five minutes after it comes out. This resting time lets the layers settle so it doesn’t collapse into a cheesy puddle when you slice into it.
Expert Tips for a Flawless Chicken Burrito Bake Ideas
Even though this is a super simple **burrito bake**, letting a bit of professional testing shine through makes the difference between good and *great*. Since I spent years developing foolproof recipes, I want to pass along a couple of pro tricks. These small adjustments guarantee that your **Tex Mex bake** comes out tender, never soggy, and perfectly seasoned. Trust me, these tips elevate your game without adding any extra minutes!
Achieving Perfect Seasoning in Your Burrito Bake
My biggest rule for any casserole before it hits the oven is: taste the filling! Before you even think about layering tortillas, take a tiny spoonful of that chicken and sauce mixture and taste it. Does it pop? Does it need just a pinch more salt or maybe just one dash more cumin? Because the flavors concentrate a bit when baking, you want the filling to taste slightly bold *before* it goes in. Oh, and quick tip for speed: using shredded rotisserie chicken is an absolute game-changer here. It already has great seasoning, cutting your prep time almost in half!
Preventing a Soggy Tex Mex Bake
The enemy of any great layered dish is sogginess, especially when you’ve got sauce involved. If you’re worried about the tortillas getting mushy underneath all that goodness, here is a little trick I learned: lightly toast them first! Before you cut your 8 flour tortillas into quarters, toss them dry onto a hot, clean skillet for about 30 seconds per side until they just start to look dry and slightly opaque. They won’t taste toasted later—they just gain structural integrity. This little step helps them stand up beautifully to the sauce during the full bake time. You can find more ideas for making your casserole more reliable over at Haute & Healthy Living, too!

Variations: Beef Burrito Casserole and Other Twists
You know I love seeing how you make this **burrito bake** your own! Since this recipe is based on pure Tex-Mex comfort, it begs for little tweaks. If chicken just isn’t what you have on hand, don’t worry one bit—that’s where the magic of recipe flexibility comes in! We can swap out proteins easily to turn this into a delicious **beef burrito casserole** or kick up the heat level if you’re feeling feisty. Check out these simple ways to customize your **comfort food casserole**.
Switching to Ground Beef Burrito Casserole
If ground beef is calling your name, go for it! Just make sure you use about a pound of it, cook it all the way through first, and then drain off every last drop of grease. Seriously, drain it well! Once it’s cooked and drained, you treat that seasoned beef exactly like you treated the shredded chicken in the main recipe—mix it right in with the beans, rice, and enchilada sauce. It tastes fantastic in this format, turning it into a fantastic **beef burrito casserole**.
Adding Heat to Your Burrito Bake
For my fellow spice lovers, this is such an easy fix! When you are mixing up your chicken, beans, and sauce base, toss in about half a cup of diced fresh jalapeños—seeds removed if you don’t want too much fire. If you want a pure background warmth without the texture, just sprinkle in a good 1/4 teaspoon of cayenne pepper along with your cumin and chili powder. This gives your final bake that little extra kick we all crave. Find more amazing flavor combos over at Easy Dinner Ideas!
Make-Ahead & Freezer Friendly Casseroles Instructions
I absolutely love that you’re thinking ahead! This **burrito bake** is one of my top go-to recipes for meal prepping because it freezes and reheats like a dream. It’s one of those wonderful **freezer friendly casseroles** that saves you when you’re having a crazy week. The trick is assembly. You want to assemble the entire casserole following the layering steps exactly as written, but stop right before you add the water and the final cheese topping. You can see some great tips on organizing your meal prep routine over at Evelyn’s Cooking!
Cover that dish tightly—really nice and snug foil coverage is key for stopping freezer burn—and pop it in the fridge for up to two days. If you’re going straight to the deep freeze, wrap it really well and it keeps beautifully for about three months. When you’re ready to bake it straight from the fridge, just add the water and the final layer of cheese, and let it bake for about 10 to 15 minutes longer. If you’re baking from frozen, thaw it overnight in the fridge first, then add the water and cheese and expect that extra 15 minutes of baking time. Efficiency in the kitchen is just good science!
Serving Suggestions for Your Hearty Baked Meal
Once this glorious **comfort food casserole** comes out bubbly and golden, the real fun starts: the toppings! Since this is such a rich, cheesy bake, you want toppings that bring freshness and contrast. Sour cream is non-negotiable for cooling down the heat and adding a creamy tang. A good dollop of vibrant salsa—whether it’s mild pico de gallo or something smoky—wakes up every layer. And of course, fresh toppings! Don’t forget some finely chopped cilantro and maybe a small bowl of creamy guacamole on the side. These simple additions turn your **burrito bake** from a great meal into an absolute fiesta!
Frequently Asked Questions About the Burrito Bake
I get so many questions about this **burrito bake** because everyone wants that reliability! Dealing with casseroles can sometimes feel tricky, but cooking is truly just applied science, and once you unlock the “why,” you aren’t afraid of substitutions. Here are some of the most common things folks ask me about making this **burrito casserole recipe** perfectly for their families. If you want more inspiration on maximizing efficiency for busy weeknights, check out the great advice on comfort food over at Biteish on making comfort food work for you!
Can I use corn tortillas instead of flour for this burrito bake?
That’s a great question! While you certainly *can* use corn tortillas, I strongly advise sticking to the flour ones for the best results. Corn tortillas, bless their hearts, tend to dry out and crack much more easily than the flour versions when they sit underneath all that sauce in the oven. If you absolutely must use them, you’ll need to soften them—maybe give them a quick dunk in warm water or lightly warm them in a dry skillet first—just to prevent them from turning brittle during the bake.
What is the best way to reheat leftovers of this Mexican Casserole?
Oh, the leftovers are almost better the next day, aren’t they? For reheating this **Mexican casserole**, I have two favorite methods. If you just want one slice, the microwave works lightning fast! Just cover it loosely with a paper towel. If you’re heating up the whole dish or a few big squares, I prefer putting it back into a baking dish, covering it tightly with foil, and warming it up in a 350°F oven until it’s piping hot all the way through. That keeps the cheese from getting tough!
Is this a good choice for a large family friendly casserole?
Absolutely! This recipe is truly a **family friendly casserole**. Baked in a standard 9×13 dish, it gives you about 6 generous servings, which is perfect for my crew. If you are feeding a bigger crowd or hosting a potluck, this recipe doubles like a dream. Just grab a larger baking dish or use two standard ones. It holds up beautifully, so don’t be shy about scaling it up!
Estimated Nutritional Data for This Comfort Food Casserole
As a Food Scientist, I always want to give you the full picture, even when we’re talking about pure comfort food! Keep in mind that these numbers for our **comfort food casserole** are just estimates based on the exact ingredients listed in the recipe. Your actual sodium or fat content might change slightly depending on the brands you use or if you load up heavy on the toppings!
- Serving Size: 1 serving
- Calories: 480
- Fat: 20g
- Carbohydrates: 45g (Fiber: 5g)
- Protein: 32g
For more dinner inspiration and reliable family recipes, you can always check out Taste of Home, like this great burrito bake there!
Share Your Kitchen Alchemy
Now that you’ve made this **burrito bake** and flooded your house with that amazing Tex-Mex aroma, I’d absolutely love to hear how it turned out for you! The real magic happens when you bring the recipe into your own kitchen, right?
If this easy baked dinner brought some much-needed comfort to your weeknight routine, please take a second and leave a rating down below. Five stars if it was a total winner! Telling me what worked for you really helps me keep creating reliable recipes that fit your life.
And please, please, post pictures! If you made any little tweaks or just want to show off that glorious, cheesy top layer, tag me on social media! Seeing your success makes all the testing and tweaking worthwhile. Happy cooking, friend!
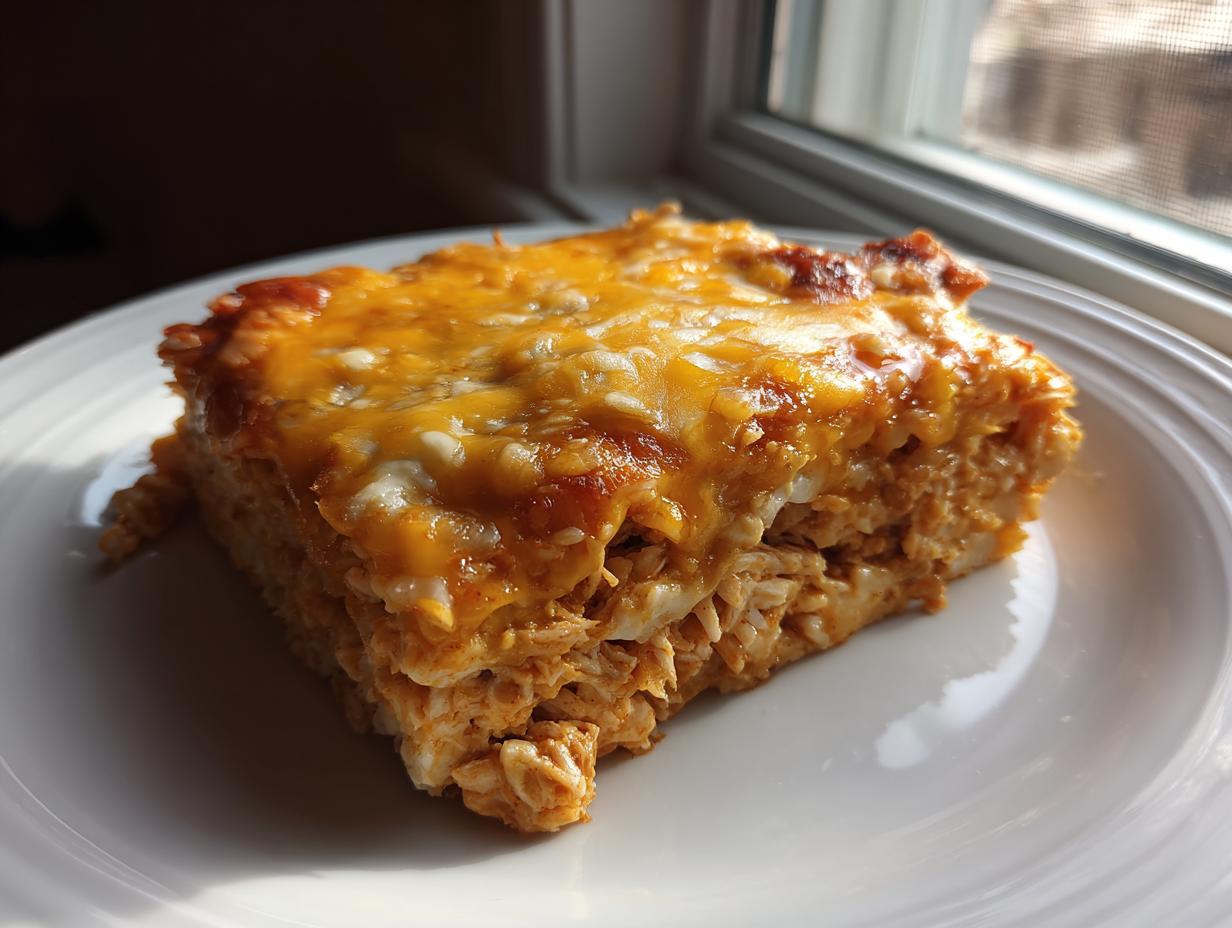
PrintEasy Cheesy Chicken Burrito Bake Casserole
Create this simple, layered burrito bake casserole using seasoned chicken, beans, and plenty of cheese. It delivers classic Tex-Mex comfort food flavors in one easy, oven-baked dish, perfect for weeknight dinners and meal prep.
- Prep Time: 15 min
- Cook Time: 30 min
- Total Time: 45 min
- Yield: 6 servings 1x
- Category: Dinner
- Method: Baking
- Cuisine: Tex-Mex
- Diet: Vegetarian
Ingredients
- 1 tablespoon olive oil
- 1 pound boneless, skinless chicken breasts, cooked and shredded
- 1 (15 ounce) can black beans, rinsed and drained
- 1 (10 ounce) can red enchilada sauce
- 1 cup cooked white rice
- 1 teaspoon chili powder
- 1/2 teaspoon cumin
- 1/4 teaspoon garlic powder
- 1 cup shredded Monterey Jack cheese
- 1 cup shredded cheddar cheese
- 8 medium flour tortillas, cut into quarters
- 1/2 cup water
Instructions
- Preheat your oven to 375 degrees Fahrenheit. Lightly grease a 9×13 inch baking dish.
- In a medium bowl, combine the shredded chicken, rinsed black beans, enchilada sauce, cooked rice, chili powder, cumin, and garlic powder. Mix until all ingredients are evenly coated.
- Spread a thin layer of the chicken mixture on the bottom of the prepared baking dish.
- Arrange half of the cut tortilla pieces over the chicken mixture in a single layer.
- Spread half of the remaining chicken mixture evenly over the tortillas. Sprinkle with half of the combined Monterey Jack and cheddar cheese.
- Top with the remaining tortilla pieces, followed by the rest of the chicken mixture.
- Pour the 1/2 cup of water evenly over the top layer to help keep the tortillas moist during baking.
- Sprinkle the remaining cheese mixture over the top layer.
- Bake for 25 to 30 minutes, or until the casserole is bubbly and the cheese is melted and lightly golden brown.
- Let the burrito bake rest for 5 minutes before cutting into servings.
Notes
- For a beef burrito casserole variation, substitute the shredded chicken with 1 pound of cooked, seasoned ground beef.
- This recipe is freezer friendly; assemble the casserole completely, cover tightly with foil, and freeze for up to 3 months. Thaw overnight in the refrigerator before baking, adding 10-15 minutes to the bake time if baking from cold.
- Serve this hearty baked meal with salsa, sour cream, or guacamole for extra flavor.
Nutrition
- Serving Size: 1 serving
- Calories: 480
- Sugar: 5
- Sodium: 750
- Fat: 20
- Saturated Fat: 10
- Unsaturated Fat: 10
- Trans Fat: 0.5
- Carbohydrates: 45
- Fiber: 5
- Protein: 32
- Cholesterol: 85