
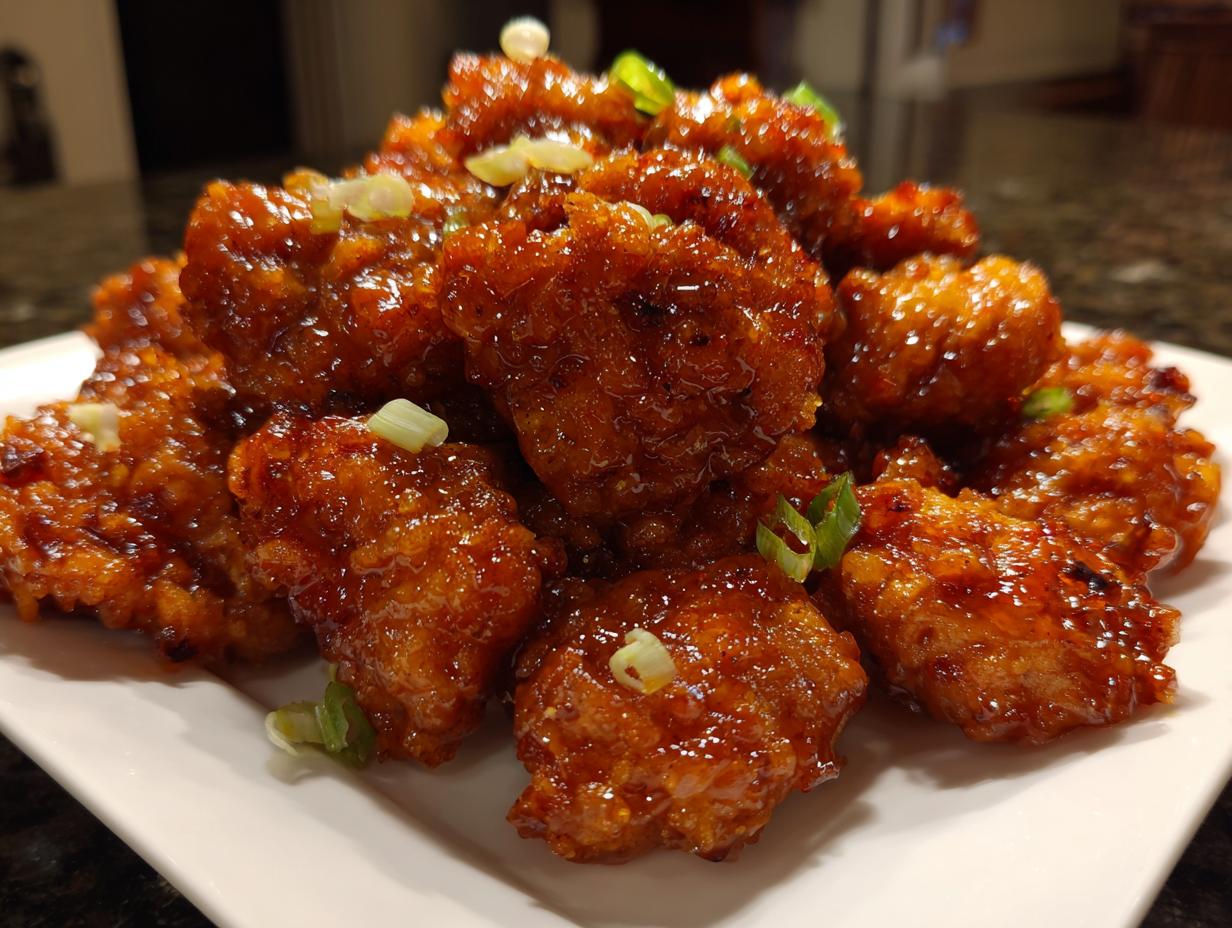
Oh, trust me, I know that feeling! You get that sudden, unavoidable craving for that sticky, sweet, perfectly tangy restaurant-style chicken, but the thought of waiting for delivery—or dealing with the grease of takeout—just kills the vibe. Well, ditch those delivery apps, because what I have for you here is genuinely the ultimate 30-minute, crispy orange chicken recipe that absolutely outshines anything you can pick up on a Friday night. This isn’t just another recipe; it’s one refined through years of development. Our founder, Juliana Cruz, brought her food science background to the table to ensure this cooks up perfectly every single time—think reliable, restaurant-quality flavor right in your own kitchen, fast! You can see how we tackle similar takeout favorites when you check out our homemade Panda Express-style recipes, but this orange chicken is truly the star.
- Why This is the Best Orange Chicken Recipe You Will Make
- Ingredients for Your Ultimate Crispy Orange Chicken Recipe
- The Science of Crispy Chicken: Coating the Chicken for This Orange Chicken Recipe
- Crafting the Sweet Tangy Orange Sauce for Your Orange Chicken Recipe
- Finishing Your 30 Minute Orange Chicken Recipe
- Alternative Cooking Methods for This Orange Chicken Recipe
- Tips for Success with Your Homemade Orange Chicken
- Serving Suggestions for a Complete Weeknight Asian Recipe
- Storage and Reheating Instructions for Leftover Orange Chicken Recipe
- Frequently Asked Questions About This Orange Chicken Recipe
Why This is the Best Orange Chicken Recipe You Will Make
Seriously, you can ditch the takeout menus now! I developed this recipe because I needed that takeout crunch without the wait or the cost, and I nailed it. This is truly Better Than Panda Express Chicken because you control every perfect, juicy bite.
Here’s what makes this the one you’ll keep coming back to:
- It’s done in under 30 minutes—ideal for any busy weeknight!
- We get that amazing crispy coating without having to deep fry everything. Hello, less mess!
- The sweet and tangy glaze is perfectly balanced; no cloying sweetness here.
- It’s budget-friendly since we use simple pantry staples.
If you love making your favorite restaurant dishes at home, check out the tips on how to replicate that Panda Express experience. And for more budget-friendly meals, you can find great ideas over at TipBuzz!
Ingredients for Your Ultimate Crispy Orange Chicken Recipe
Okay, this is where the magic really starts to take shape. Having everything prepped—we call this mise en place—is crucial when you’re moving this fast! Because this orange chicken recipe comes together in 30 minutes, you don’t want to be scrambling for garlic when the chicken is ready. You’ll see everything is focused on getting that perfect balance you crave.
For the Chicken Dredge and Coating, grab:
- One pound of boneless, skinless chicken breast or thighs—cut them into nice 1-inch pieces.
- A half cup of all-purpose flour.
- A quarter cup of cornstarch—this helps with the crisp!
- Half a teaspoon of salt and a quarter teaspoon of black pepper.
- One large egg, just beaten lightly.
- And a quarter cup of water to make that thin egg wash.
For the sauce, you need fresh ingredients for the best flavor boost, especially if you want that amazing authentic taste, as we discuss over at Andianne’s kitchen. We need one cup of fresh orange juice, a half cup of granulated sugar, a quarter cup of rice vinegar, two tablespoons of soy sauce, one tablespoon of minced fresh ginger, two cloves of minced garlic, one teaspoon of sesame oil, and that crucial teaspoon of orange zest!
Finally, to thicken it up, we use one tablespoon of cornstarch mixed with two tablespoons of cold water—that’s our slurry. And don’t forget the garnish: sliced green onions and sesame seeds!
The Science of Crispy Chicken: Coating the Chicken for This Orange Chicken Recipe
This is where we earn that “crispy” in our Crispy Orange Chicken Recipe! You can’t rush this part if you want that perfect exterior shell that holds up to the sauce later. We use a two-stage coating process, which is a little trick I picked up while studying food science—it creates layers that puff up just right when they hit the hot oil. I make sure to grab all the dry coating ingredients from our ingredients list before starting this step!
First, we toss those chicken pieces in the dry mix of flour and cornstarch. Make sure to shake off any excess! Then, into that simple egg and water wash they go. That liquid layer acts like glue, bonding those dry starches to the meat. A key tip from me: Make absolutely certain your chicken is patted dry before you even start coating. Seriously, moisture is the enemy of crispiness, so don’t skip that step!
Pan-Frying Technique for Juicy Chicken Bites
Now we move to the heat! This is Step Three, and it’s all about temperature control. You want your oil hot—medium-high heat in a big skillet—but you cannot crowd the pan. Seriously, resist the urge to dump it all in at once! You must cook these in small batches. Why? If the pan is too crowded, the oil temperature drops instantly, and instead of frying, your chicken starts to *steam*. Nobody wants steamed chicken bites!
We are looking for a gorgeous golden brown and making sure those juicy chicken bites are cooked all the way through. Pull them out once they hit that color and let them rest briefly on paper towels while you work through the rest of the batch. They need that clean, dry surface for the next step!
Crafting the Sweet Tangy Orange Sauce for Your Orange Chicken Recipe
Alright, while the chicken is resting—because crispy chicken needs a little breather—we whip up the star of the show: that glorious glaze! This is Step Four, and this is where we focus on that signature texture we all love. People go crazy for the sticky orange glaze, and I’m telling you, using fresh orange juice makes a world of difference. Don’t cheat on this! That fresh zest and bright juice are what give us that authentic flavor profile that makes this the ultimate sweet tangy orange sauce.
We bring the juice, sugar, vinegar, soy sauce, garlic, ginger, sesame oil, and zest all together in a saucepan and get it simmering. Once it’s bubbling nicely, we move to Step Five: thickening it up. This is the food science trick coming into play! That little cornstarch slurry—that mix of cornstarch and cold water—needs to be whisked one last time right before you pour it in. Slow and steady here!
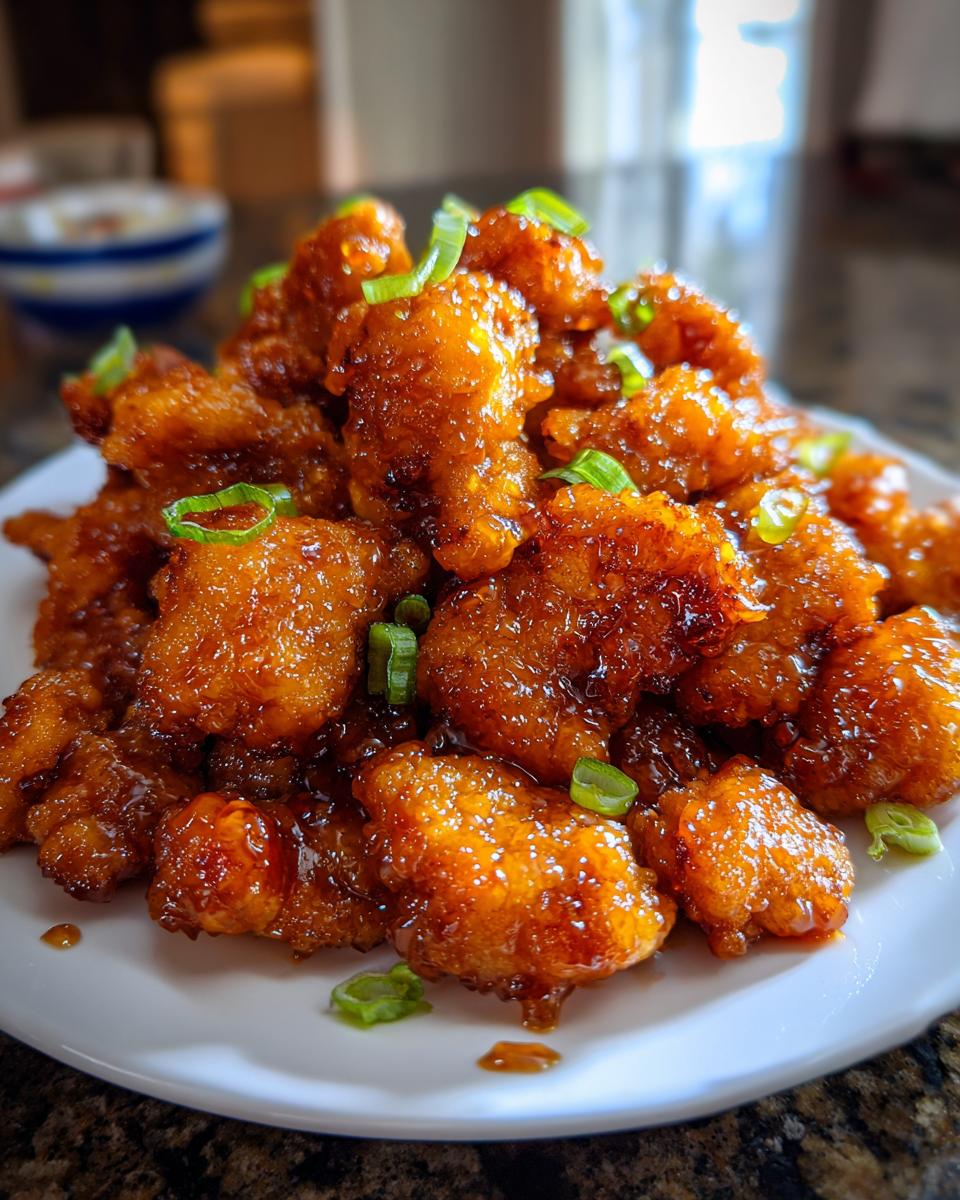
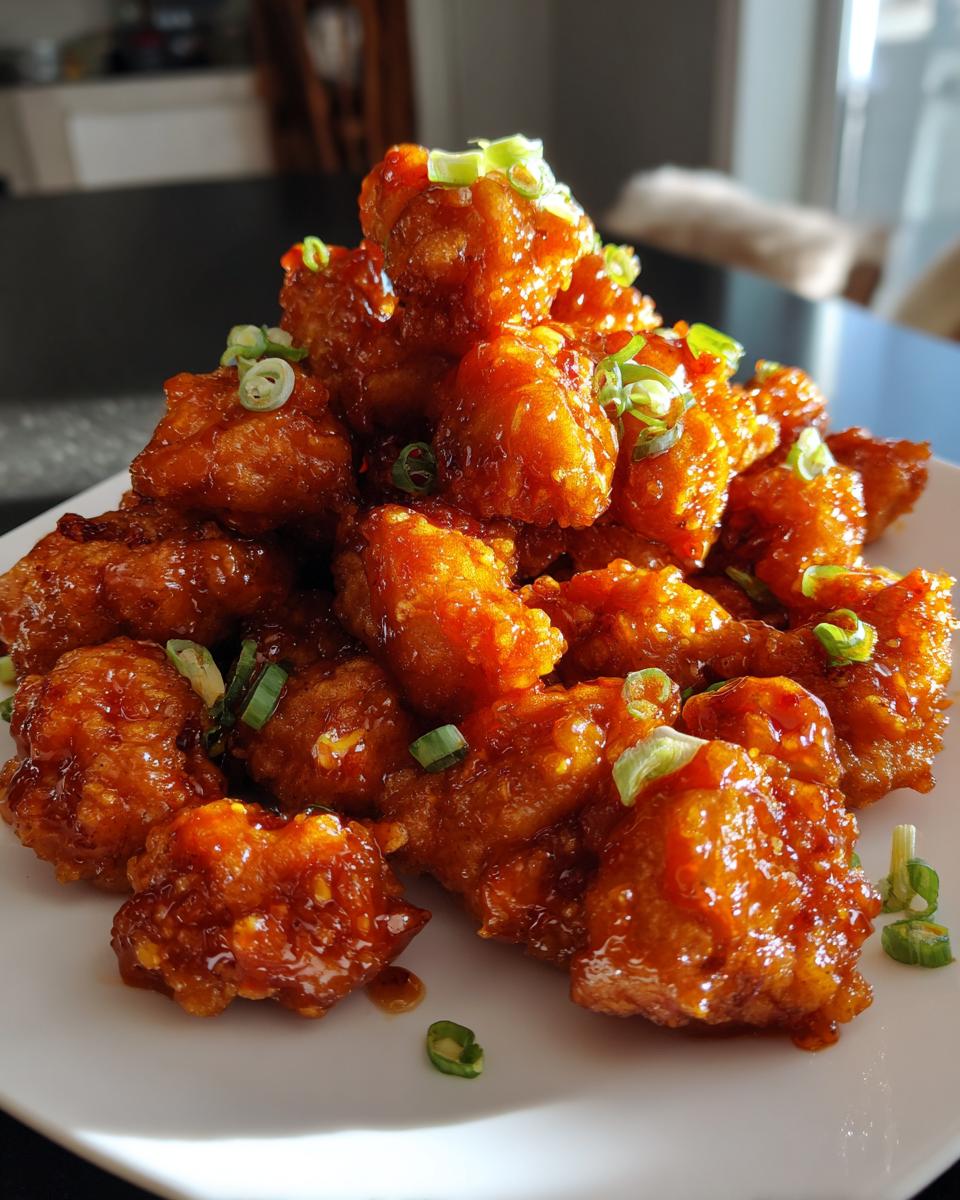
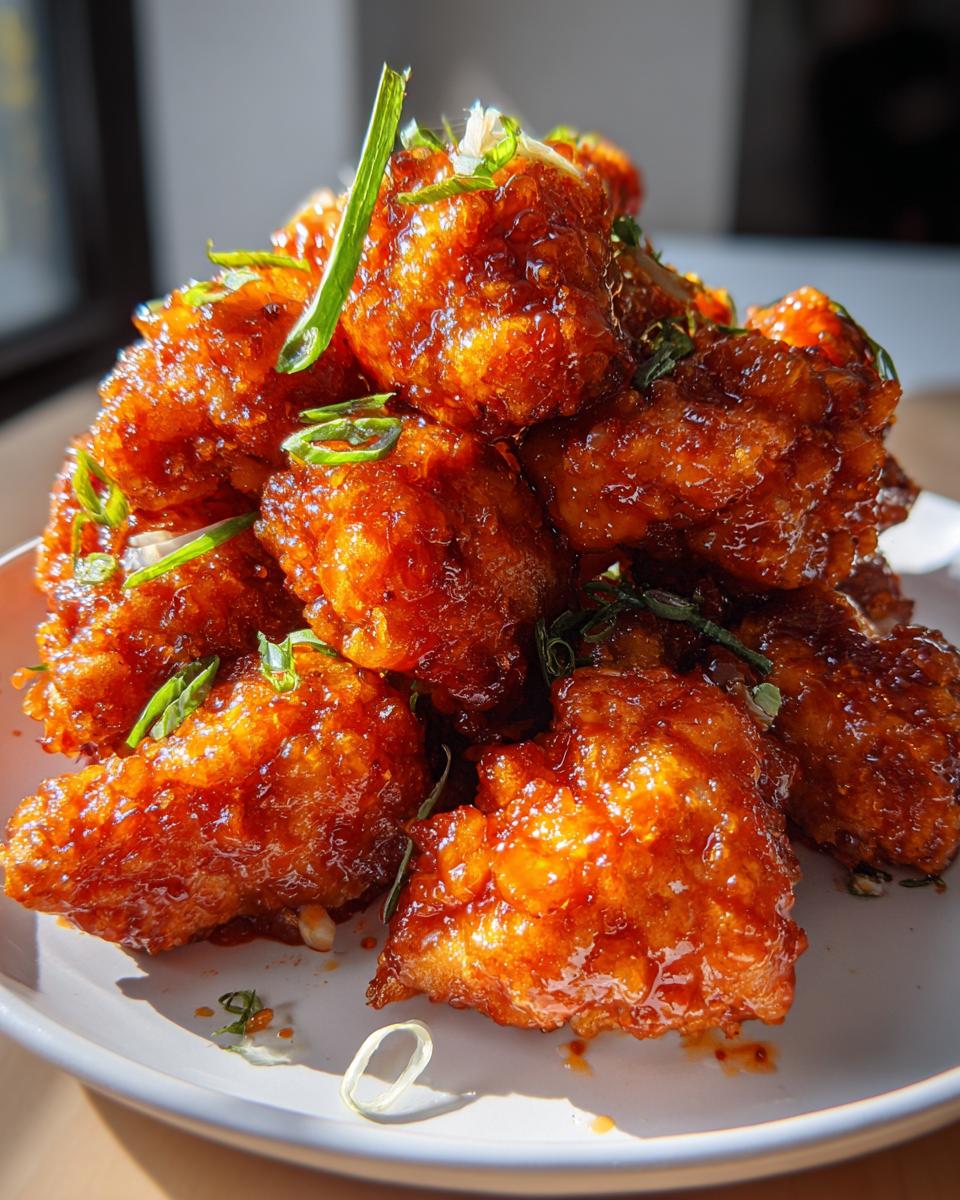
As soon as that slurry hits the hot liquid, you must whisk constantly. It thickens up fast, usually in under a minute, and BAM! You see that beautiful glossy shine forming. It will look like liquid velvet. That’s how you know the sauce is ready to coat all those crispy bites perfectly.
Finishing Your 30 Minute Orange Chicken Recipe
We’ve prepped the crunch and we’ve made the glaze, so now it’s time for the grand finale of this 30 Minute Orange Chicken! Look, this step is important because you’ve worked hard to get those chicken pieces crispy, and you don’t want to undo all that effort sitting around waiting. Once your sauce is glossy and thick—that’s Step Six—it’s time to reunite the stars.
Return all those golden, crispy chicken pieces right back into the skillet with your hot, sticky sauce. Toss everything together gently and quickly. I mean it—a fast, even toss is all you need! You want every piece coated beautifully, but you don’t want to drown them in the glaze until they get soft and heavy. That’s the secret to keeping that awesome texture! Then, right away, scoop it onto your serving plates. Seriously, don’t wait! For amazing homemade tips, check out the instructions over at Bethany’s kitchen!
Alternative Cooking Methods for This Orange Chicken Recipe
I know not everyone loves pan-frying, and honestly, dealing with all that oil can be a pain, especially on a busy Tuesday night. But don’t worry! Since we used that amazing, simple dredge, achieving crispiness without the skillet is totally doable. We can absolutely make this orange chicken recipe work whichever way is easiest for your kitchen setup. The goal is always the same: crispy chicken that soaks up that tangy sauce.
If you prefer a lighter touch, you can totally go for a Baked Orange Chicken Recipe. Just toss those coated pieces in a little spray of oil, lay them out on a wire rack set in a baking sheet (that aeration helps a ton!), and bake them at 400°F (200°C) for about 15 minutes, flipping them halfway through. You get great results, just slightly less intense crunch than pan-frying. For more inspiration on lighter methods, you can peek at the tips on Gelarecipes!
Making Air Fryer Orange Chicken
The air fryer is my secret weapon for low-mess crunch these days! After you coat your chicken pieces using the exact same dredging steps, toss them very lightly with just a tiny bit of oil spray. Pop them into your air fryer basket—don’t overcrowd it, please!—and cook at 390°F (approximately 200°C) for about 10 to 12 minutes. Flip them halfway so they brown evenly. They come out incredibly crispy, ready to be tossed right into that warm sauce!
Tips for Success with Your Homemade Orange Chicken
I want your Homemade Orange Chicken to be legendary, so let me share a few little professional insights that make all the difference. First, I cannot stress enough: use *fresh* orange juice and zest. That bottled stuff just tastes way too processed compared to the bright, tangy burst you get from a real orange. It’s the difference between a good sauce and an amazing one, honestly!
Also, when you are making that sauce, the slurry has to go in while the sauce is steaming hot, right? If the sauce isn’t simmering hard, that cornstarch won’t activate correctly, and you’ll end up with thin, watery goo instead of that lovely sticky glaze. Always test that heat!
And finally, if, for some reason, you have to assemble this ahead of time—maybe you’re having a big family dinner—remember this: do *not* toss the crispy chicken in the glaze until the absolute last minute. The sauce is your enemy of crispiness! Keep the coated, fried chicken in a paper bag on the counter, and when it’s time to eat, toss it quickly and serve immediately. For more simple, authentic flavor building, definitely check out the tips on Charm Recipes!
Serving Suggestions for a Complete Weeknight Asian Recipe
Okay, you’ve got your beautifully glazed, crispy chicken—what now? You can’t just eat it standing over the stove, right? We need to round this out into a proper, satisfying meal that feels complete. Since this is such a rich dish, you need something fresh and simple on the side. Steamed white rice is the classic partner; it’s perfect for soaking up any extra, delicious sticky glaze that drips off!
If you’re looking for a green side to balance everything out—and I highly recommend you do—steamed broccoli or quick-blanched snap peas work like a charm. They bring in that fresh texture that cuts through the sweetness. It truly turns this into a fantastic, budget-friendly Weeknight Asian Recipe that the whole family will devour. For more simple dinner rotation ideas, you can always check out My Family Dinner Ideas!

Storage and Reheating Instructions for Leftover Orange Chicken Recipe
I’m going to be honest with you: leftover orange chicken isn’t nearly as good the next day unless you treat it right. That beautiful crisp shell we worked so hard for? It loves moisture, and sitting in that sweet sauce overnight is basically begging to get soggy. If you know you’re going to have leftovers, the absolute best thing you can do is store the sauce and the crispy chicken pieces completely separate in the fridge.
If you already tossed everything together, don’t panic! Just put it all in an airtight container. But for the best texture restoration, keep them separate. This buys you time before the coating gets mushy. For any leftover sauce, it keeps really well in a small sealed jar for up to four days.
Now, for reheating—this is critical! Microwaving sauced chicken is just going to steam it, and you’ll end up with chewy bites. Nope. If you kept the chicken separate, take those crispy pieces and toss them back into a hot, dry skillet for about two minutes, or throw them into an air fryer at 375°F for just 3 minutes. You want to reheat until it’s crisp and piping hot again. Once it’s hot, then you can quickly toss it with a spoonful of the leftover sauce. It really brings back that takeout-at-home magic!
Frequently Asked Questions About This Orange Chicken Recipe
Can I use chicken thighs instead of breasts in this orange chicken recipe?
Absolutely! Using thighs is my personal favorite, especially if you want those extra juicy chicken bites. Thigh meat is naturally fattier, so it stays incredibly moist even after it gets that crispy coating treatment. Just make sure you trim off any excess fat before cutting them into 1-inch pieces. The cooking time might be just a minute or two longer than breasts, but the flavor payoff is worth it for this Homemade Orange Chicken!
It sounds sweet—how do I make the sauce less sweet?
Great question! If you find the sauce a bit too sweet initially, you can easily tweak that balance. The key to dialing back sweetness while keeping that tang is adjusting the vinegar. Try adding an extra tablespoon of rice vinegar when you bring the sauce to a simmer. If you’re working with very sweet oranges, you might even add a splash of fresh lemon juice at the end for brightness. This helps cut through any overwhelming sugar notes in your Sweet Tangy Orange Sauce.
Can I make the orange sauce ahead of time?
Oh yes, you completely can! That’s a great trick for nailing the 30 Minute Orange Chicken goal on a busy night. You can prepare the entire sauce base—everything except the cornstarch slurry—and keep it refrigerated for up to three days. When you’re ready to eat, just reheat the sauce until it’s simmering, then whisk and add your slurry as directed. You can find more great tips for easy weeknight meals, including making components ahead of time, over at Cookin with Mima!
PrintThe Ultimate 30-Minute Crispy Homemade Orange Chicken Recipe

Make restaurant-quality orange chicken at home faster than delivery. This recipe delivers crispy chicken pieces coated in a perfectly sweet and tangy orange glaze, ideal for a quick weeknight dinner.
- Prep Time: 10 min
- Cook Time: 20 min
- Total Time: 30 min
- Yield: 4 servings 1x
- Category: Dinner
- Method: Pan-Frying
- Cuisine: Chinese American
- Diet: Low Fat
Ingredients
- 1 pound boneless, skinless chicken breast or thighs, cut into 1-inch pieces
- 1/2 cup all-purpose flour
- 1/4 cup cornstarch
- 1/2 teaspoon salt
- 1/4 teaspoon black pepper
- 1 large egg, lightly beaten
- 1/4 cup water
- 2 tablespoons vegetable oil, for pan-frying
- 1 cup fresh orange juice
- 1/2 cup granulated sugar
- 1/4 cup rice vinegar
- 2 tablespoons soy sauce
- 1 tablespoon fresh ginger, minced
- 2 cloves garlic, minced
- 1 teaspoon sesame oil
- 1 teaspoon orange zest
- 1 tablespoon cornstarch mixed with 2 tablespoons cold water (slurry)
- Optional garnish: Sliced green onions and sesame seeds
Instructions
- In a medium bowl, combine the flour, 1/4 cup cornstarch, salt, and pepper. Toss the chicken pieces in this dry mixture until lightly coated.
- In a separate small bowl, whisk the egg and 1/4 cup water together. Dip the coated chicken pieces into the egg wash, letting excess drip off.
- Heat the vegetable oil in a large skillet or wok over medium-high heat. Pan-fry the chicken in batches until golden brown and cooked through, about 4-6 minutes per batch. Remove the crispy chicken and set aside on a paper towel-lined plate.
- While the chicken cooks, prepare the sauce. In a small saucepan, combine the orange juice, sugar, rice vinegar, soy sauce, ginger, garlic, sesame oil, and orange zest. Bring the mixture to a simmer over medium heat, stirring until the sugar dissolves.
- Whisk the cornstarch slurry one more time and pour it into the simmering sauce. Cook, stirring constantly, until the sauce thickens and becomes glossy, about 1 minute.
- Return the crispy chicken to the skillet. Toss quickly to coat all the pieces evenly with the sticky orange glaze.
- Remove from heat immediately. Serve the orange chicken hot over steamed white rice, garnished with green onions and sesame seeds.
Notes
- For extra crispy chicken without deep frying, you can bake the coated chicken at 400°F (200°C) for 15 minutes before tossing in the sauce.
- To achieve a true ‘Better Than Takeout’ flavor, use fresh orange juice instead of bottled.
- This recipe pairs well with steamed broccoli or snap peas for a complete meal.
Nutrition
- Serving Size: 1 serving
- Calories: 450
- Sugar: 35g
- Sodium: 550mg
- Fat: 12g
- Saturated Fat: 2g
- Unsaturated Fat: 10g
- Trans Fat: 0g
- Carbohydrates: 45g
- Fiber: 1g
- Protein: 38g
- Cholesterol: 105mg