
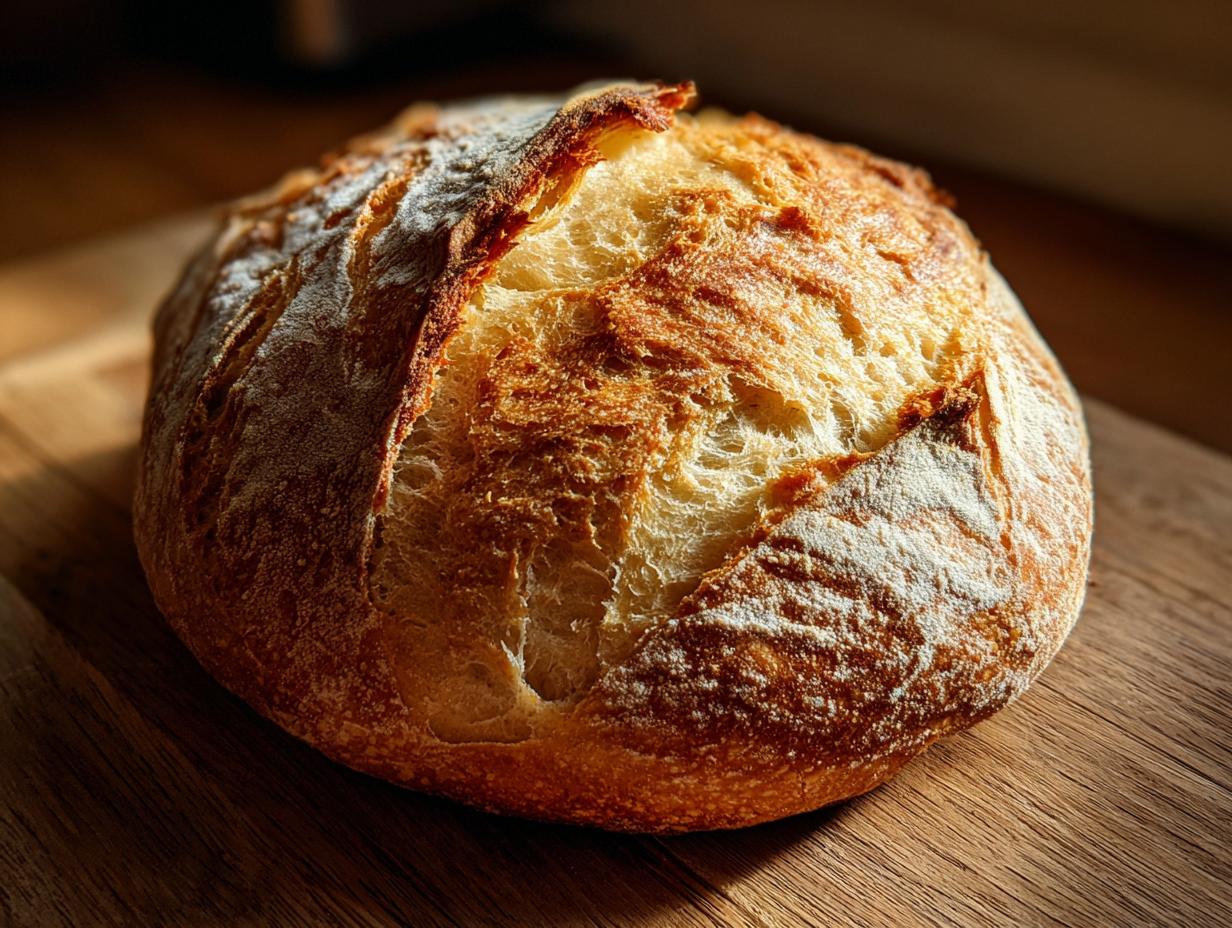
Oh, that moment when the oven timer dings, and you pull out a loaf of the most incredible, bakery-smelling French bread you’ve ever made? It’s pure magic! I promise you, achieving that perfect contrast—a shatteringly crusty exterior hugging an interior that’s unbelievably soft and fluffy—doesn’t need to take all day. I’m Juliana Cruz, and because I formally studied Food Science, my mission is to bottle that kitchen magic into recipes that actually work, every single time.
This recipe takes you from pantry staple to golden brown loaf in under two hours. Forget complicated steps or strange ingredients; this is the reliable, easy-to-follow recipe designed to give you that fresh, crusty artisan bread feel without the fuss.
- Why This Homemade French Bread Recipe Works for You
- Essential Ingredients for Perfect French Bread
- Step-by-Step Guide to Making Soft French Bread at Home
- Baking Homemade Bread Tips for a Perfect French Bread
- Serving Suggestions for Your Easy French Bread
- Storage and Reheating Instructions for Leftover French Bread
- Troubleshooting Common Issues with Your Quick French Bread Recipe
- Frequently Asked Questions About Making French Bread
- Nutritional Estimates for This Tender Crumb Bread
Why This Homemade French Bread Recipe Works for You
I know you’ve seen recipes that claim to be fast loaves, but I designed this one specifically to nail that texture balance everyone craves. Honestly, having that background in food science means I obsess over the small details so you don’t have to!
Here’s why you’ll always come back to this Homemade French Bread Recipe:
- Speedy Rise Time: We use instant yeast and a good warm proofing spot, which means you skip those lengthy, drawn-out rising periods. You get that soft, fluffy loaf ready faster—usually under 90 minutes total hands-on time!
- The Steam Secret: That beautiful, crackly crust you only find at the bakery? It’s all about steam. I give you the super easy trick for getting that perfect, shatter-prone exterior every time we bake soft fluffy French bread.
- Tender Crumb Guarantee: The ratio of water to flour is calibrated perfectly here for a truly tender crumb. It’s ideal for dipping in soup or making amazing sandwiches.
Essential Ingredients for Perfect French Bread
When you’re aiming for that Bakery Style Bread, the ingredients look simple, but their quality and type really matter. Don’t fret, though! Everything you need for this Simple Yeast Bread is likely already in your pantry. We are using just five core components to build the structure and flavor. Remember, this is about transforming the ordinary!
Here is exactly what you need for one beautiful loaf:
- 3 cups all-purpose flour
- 1 teaspoon instant dry yeast
- 1 1/2 teaspoons salt
- 1 1/4 cups warm water (about 105-115°F)
- 1 tablespoon olive oil, plus more for greasing
Ingredient Notes and Simple Substitutions for Your French Bread
I always write recipes to be reliable, so I chose instant yeast here. It goes right in with the flour, no proofing required, which speeds things up wonderfully—perfect for a quick French bread fix! If you only have active dry yeast, just wake it up in a tiny bit of that warm water first with a pinch of sugar before adding it to the dry mix.
For the flour, all-purpose is ideal for that soft interior texture we love. While bread flour works, it can sometimes give you a chewier result than you want in a classic French loaf. Please use filtered water if your tap water is heavily chlorinated; sometimes that chlorine can really slow down or confuse the yeast friends! Don’t skip the olive oil; it adds richness and helps keep the dough manageable during the knead.
Step-by-Step Guide to Making Soft French Bread at Home
Okay, friend, this is where the magic happens! Don’t let the shape intimidate you; we are going to walk through this together. My goal here—since we are aiming for that easy, Quick French Bread Recipe—is gentle handling but decisive action. The science behind beautiful bread is knowing when to be firm and when to be patient.
Mixing and the First Rise for Fluffy Loaf Recipe
First, mix up those dry ingredients in a big bowl—that’s your flour, yeast, and salt. Then, pour in the warm water and that splash of olive oil. Just use a sturdy wooden spoon right in the bowl to mix it until it looks messy, almost like a shaggy clump. Don’t worry if it looks weird; that’s what it’s supposed to do!
Now, dust your counter and turn that shaggy mess out. We knead for about 5 to 7 minutes until it feels smooth and elastic. It should bounce back slightly when you poke it. Then, find a clean bowl, give it a little swipe of oil, toss the dough in, cover it up tight, and tuck it away somewhere warm. We need it to double in size, which usually takes 60 to 75 minutes. Patience, deep breaths!
Shaping and Proofing Your Homemade French Bread
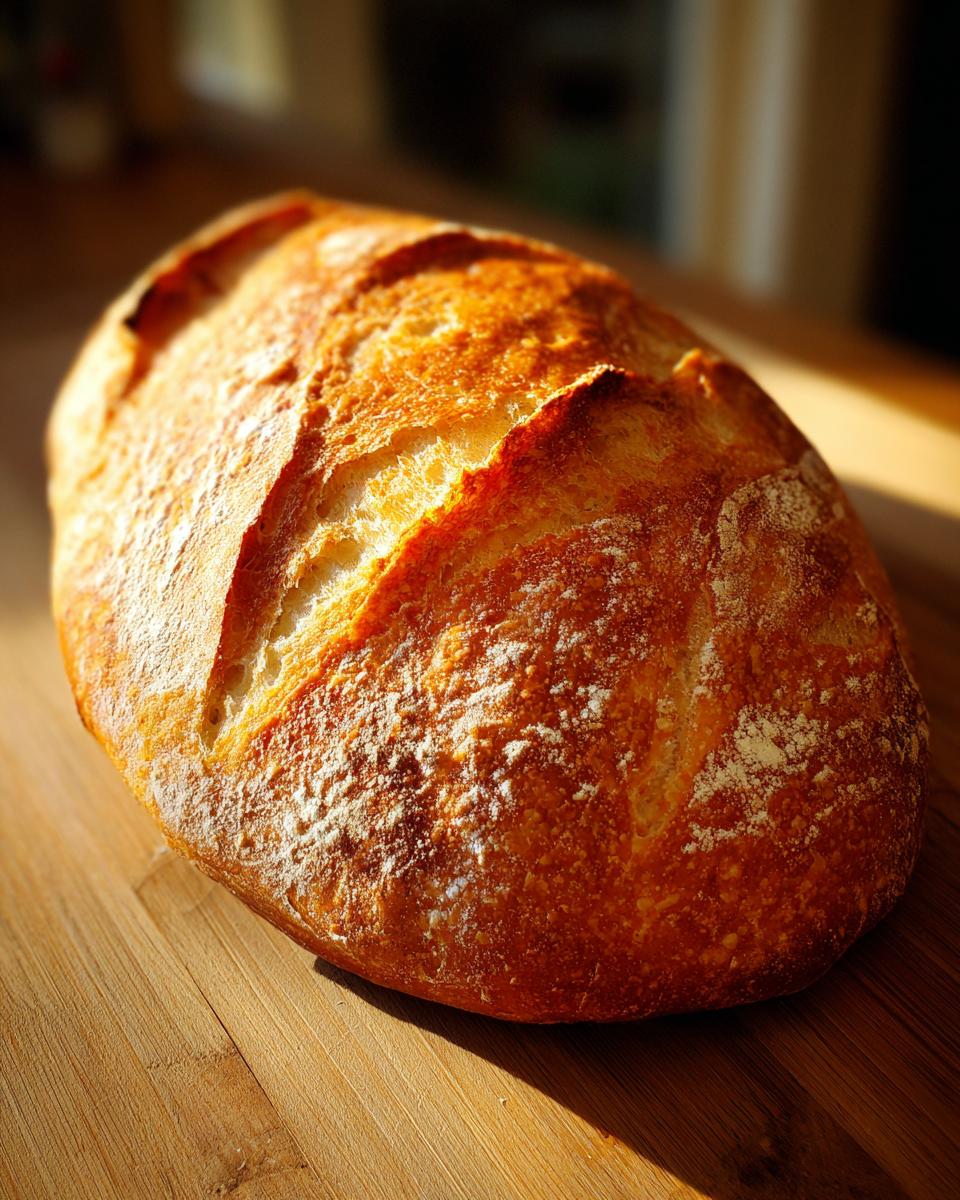
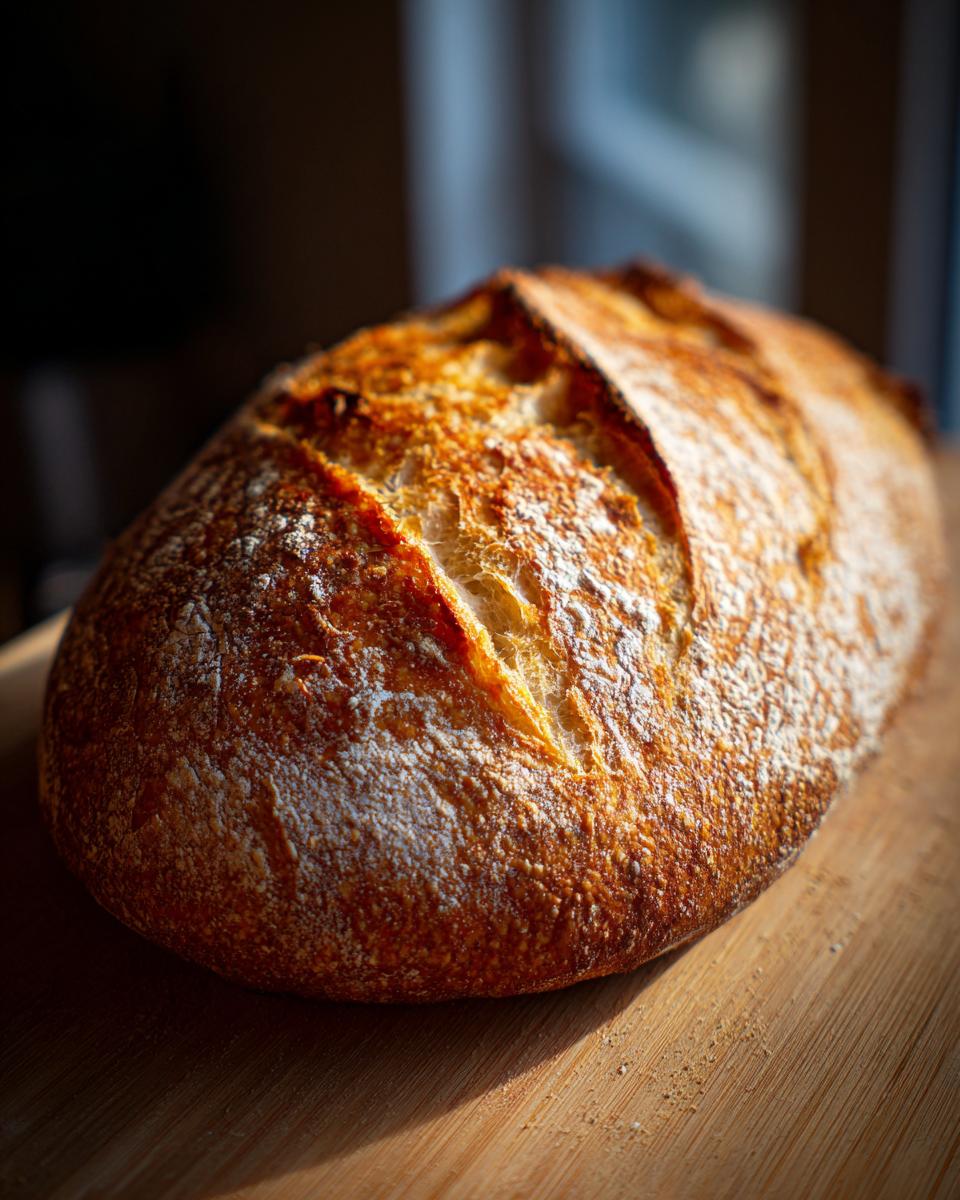
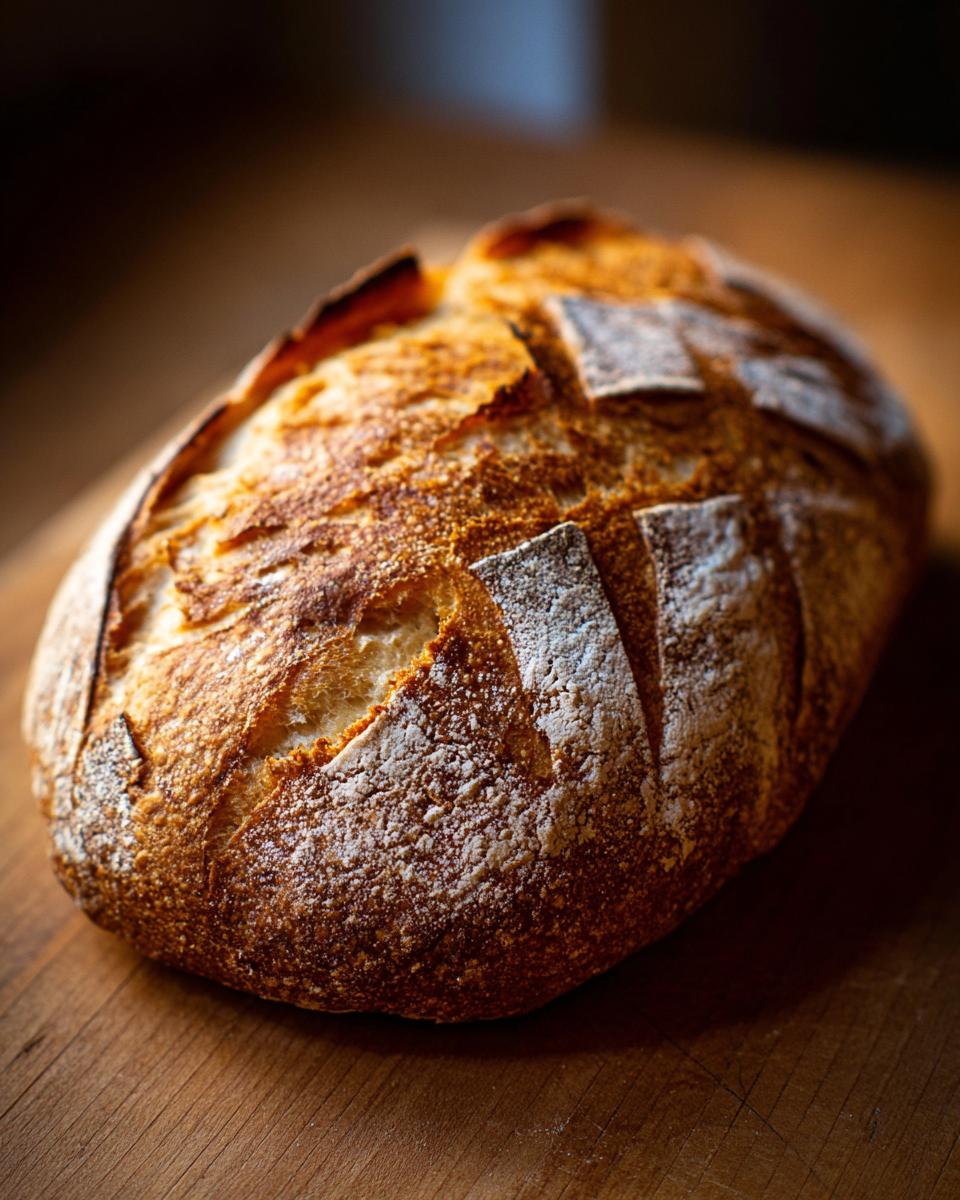
Once it’s doubled, gently deflate it—we call that ‘punching down,’ but be gentle! Turn your dough out onto your lightly floured surface. Now, shape it slowly into a long, even log, think about 14 to 16 inches long. You want a nice, even shape so it cooks evenly later. Place your shaped loaf onto parchment paper on a baking sheet (this is the easiest way to handle it) or a pizza peel.
Cover it loosely again, and this is the second, short rest we call proofing. Just set your timer for 20 minutes. During this time, we’ll get the oven roaring hot.
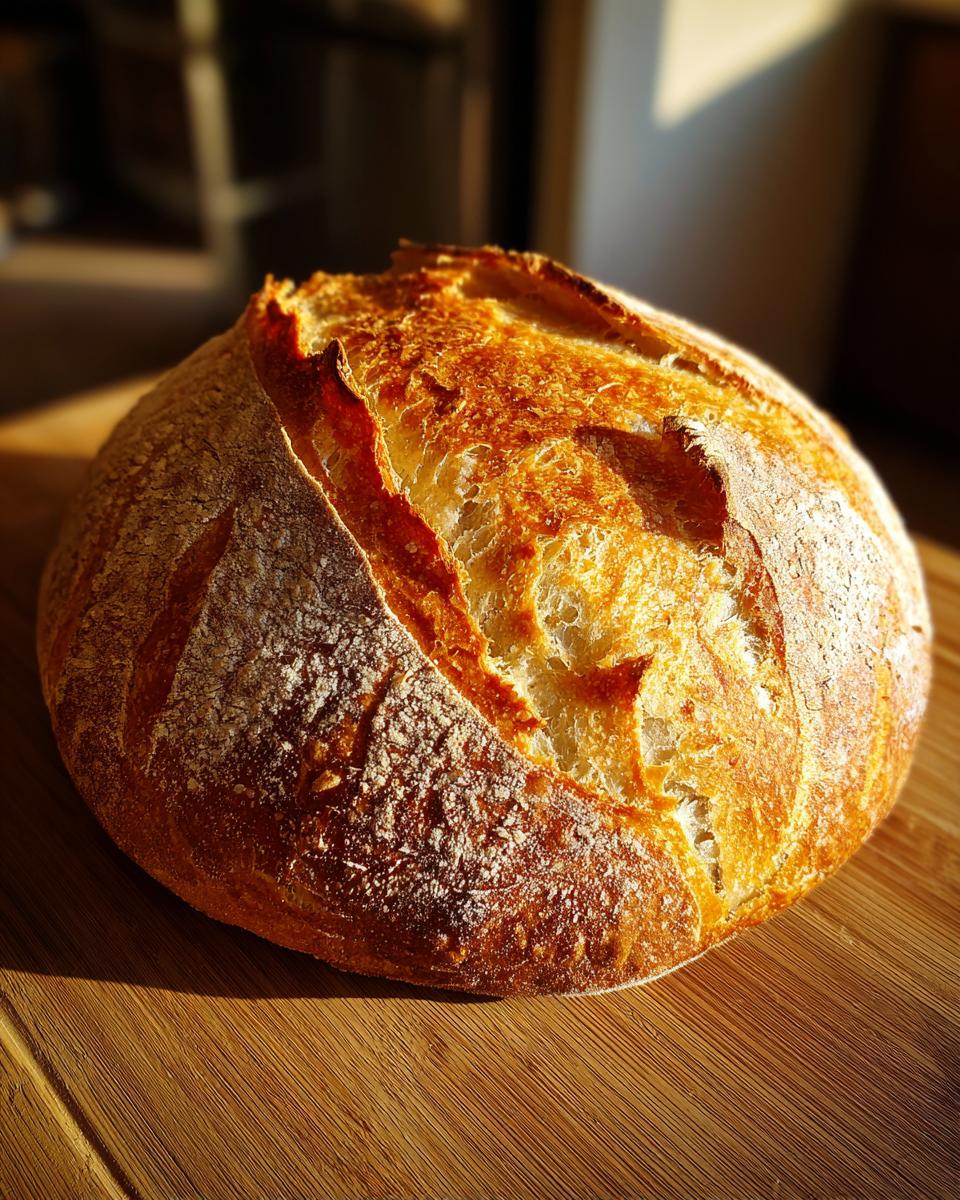
Achieving the Bakery Style Bread Crust with Steam
This is the single most important step if you want that satisfying external crunch. About 15 minutes before that second rise is up, crank your oven to 425°F (220°C). On the very bottom rack, place a shallow metal pan—an old brownie pan works great. This pan is going to hold the hot water for our steam!
When you’re ready to bake, use a super sharp knife or a razor blade to make three quick, diagonal slashes across the top of the loaf. Don’t go too deep, just about half an inch is plenty. Working quickly and carefully, open the oven door and pour about 1 cup of hot water straight into that hot pan—be cautious of the steam that will rush out! Shut the door fast and bake for 20 to 25 minutes. Listen for that crackle as it cools down; that’s the sound of success!
(Note: Internal temperature should hit 200°F for perfect doneness.)
Baking Homemade Bread Tips for a Perfect French Bread
Now that the hard part—the kneading and the steam—is done, let’s cover the final moments of Baking Homemade Bread Tips. Pulling the bread out at the right moment is just as important as mixing the dough correctly. I rely on more than just color; I rely on science!
The absolute best way to know your loaf is done, especially for a tender crumb bread, is checking the interior temperature. You’re aiming for 200°F (93°C) right in the center. If you don’t have a thermometer, tap the bottom—it should sound wonderfully hollow!
Don’t skip the cooling, please! Get that loaf off the baking sheet and onto a wire rack immediately. If it cools on the pan, the bottom will sweat and turn soft, ruining that beautiful crust we worked for. Resist the urge to slice it hot; let it cool completely for the very best texture for your crusty exterior bread.
Serving Suggestions for Your Easy French Bread
Okay, the French bread is out of the oven, the crust is singing, and you’re smelling what I’m smelling! The possibilities for this loaf are endless, right? Since this recipe is designed to be perfect for dipping and serving at a meal, I have a couple of favorite ways to enjoy it immediately.
For a quick appetizer, you absolutely must try dipping thick slices into good quality olive oil mixed with a sprinkle of dried rosemary and a swirl of balsamic vinegar. It makes any weeknight feel fancy! If you’re using this as your Dinner Side Bread, slathering it with softened garlic butter and popping it back in the oven for five minutes creates the best side dish imaginable.
And let’s not forget sandwiches! Because we achieved that wonderful, soft interior, this loaf is sturdy enough to handle hearty fillings—think slow-cooked roast beef or tons of melted cheese. You can explore so many fun ideas for using up your homemade French bread when you have extra, too!
Storage and Reheating Instructions for Leftover French Bread
I know we all hope to devour the entire loaf right away, but if you have any of this beautiful French bread left over, don’t immediately toss it into the fridge! Refrigeration is actually the enemy of good crust texture; it dries bread out shockingly fast. For short-term storage, which is about two days maximum, wrap the loaf tightly in plastic wrap or put it in an airtight bag at room temperature.
To bring that crust back to life, the oven is your best friend! Wrap the bread loosely in foil and heat it at about 350°F for just 5 to 8 minutes. If you want the crust really crisp again, take the foil off for the last two minutes. Trust me, it tastes practically homemade all over again!
Troubleshooting Common Issues with Your Quick French Bread Recipe
Even with the most dialed-in formulas, sometimes things just don’t behave in the oven. That’s totally normal! As a recipe developer, I spend most of my time figuring out why something went wrong so you don’t have to guess. If your loaf isn’t hitting the mark, check these common culprits before you blame your yeast.
If your Homemade French Bread Recipe came out dense, it’s almost always due to one of two things: either the proofing temperature was too cool for the yeast to do its job, or you over-kneaded the dough, developing too much gluten structure that choked the rise. Be gentle; remember we want a soft, fluffy loaf!
Now, if you ended up with a crust that was soft instead of crackly, you probably skipped my favorite step: the steam pan. That burst of moisture when you first slide the dough in is what keeps the exterior soft enough to expand rapidly before hardening into a beautiful, crisp shell. You can often rescue a soft-crusted loaf by spritzing it with water and popping it back into a 400°F oven for five minutes, just like my review on homemade French bread mentions. Don’t sweat it; grab a hot oven and try again next time!
Frequently Asked Questions About Making French Bread
When you’re first trying to Make French Bread from Scratch, I totally get that questions pop up! Baking is chemistry, and sometimes we just need a little confirmation on the process before we commit to that first knead. Here are a few things home bakers ask me all the time about getting that perfect, reliable loaf.
Can I shape this into a traditional French baguette?
You sure can! This dough works beautifully for a classic baguette, but you have to adjust the shaping and baking quite a bit. Since baguettes are much thinner than this standard loaf, their baking time is significantly shorter, usually 15 to 18 minutes max. If you want a detailed guide on the shaping and scoring for those longer loaves, check out my tips for a simple homemade French baguette recipe.
I prefer a chewier loaf over a fluffy one—how do I change the texture?
That’s a great preference! To get a slightly chewier loaf, you should swap out your flour. Instead of using all-purpose, try using a mixture: use 2 cups of all-purpose flour and 1 cup of bread flour. Bread flour has higher protein, which encourages more gluten development, leading to that satisfying chewiness you’re looking for in a more artisan-style bread.
Do I have to use a steam pan to get the crust?
Honestly, if a crispy or crusty exterior is your goal, yes, you need the steam! Without that initial burst of humidity, the crust sets too fast and ends up dull and chewy instead of crisp. If you happen to be in a real pinch, you can try spraying the inside walls of the oven quickly with water right after you put the bread in, but the steam pan method is the most foolproof way to achieve that crusty exterior bread.
Can I use my stand mixer instead of hand-kneading?
Absolutely! This recipe is fantastic for electric mixers too. Use the dough hook attachment for this Simple Yeast Bread recipe. After you mix the wet and dry ingredients until they’re shaggy, mix on low speed for about 5 minutes until the dough cleans the sides of the bowl. It saves your arms a lot of work!
Nutritional Estimates for This Tender Crumb Bread
I know sometimes we want to know the details behind what we are eating, and that’s perfectly fair! Creating a reliable recipe means knowing what goes into it, ingredient by ingredient. Since this Tender Crumb Bread is made from simple, whole components, I’m happy to share the estimates based on my standard recipe calculations.
Keep in mind, while this is a solid starting point, actual numbers can shift a tiny bit based on the exact brand of flour or the size of your measuring scoops. Think of this as a helpful guide rather than a perfect guarantee!
- Serving Size: 1 slice
- Calories: 150
- Sugar: 1g
- Sodium: 300mg
- Fat: 2g
- Saturated Fat: 0g
- Unsaturated Fat: 2g
- Trans Fat: 0g
- Carbohydrates: 30g
- Fiber: 1g
- Protein: 4g
- Cholesterol: 0mg
The best part of making your own French Bread is that you are totally in control of the salt and oil, so you can adjust these numbers upward or downward to fit whatever your family needs!
PrintEasy Homemade Soft and Crusty French Bread (Ready in Under 2 Hours)

Bake delicious homemade French bread fast. This simple recipe delivers soft, golden loaves with a crusty exterior, perfect for dinner or sandwiches. Achieve bakery-style bread with basic ingredients.
- Prep Time: 20 min
- Cook Time: 25 min
- Total Time: 1 hour 40 min
- Yield: 1 loaf 1x
- Category: Bread
- Method: Baking
- Cuisine: French
- Diet: Vegetarian
Ingredients
- 3 cups all-purpose flour
- 1 teaspoon instant dry yeast
- 1 1/2 teaspoons salt
- 1 1/4 cups warm water (about 105-115°F)
- 1 tablespoon olive oil, plus more for greasing
Instructions
- In a large bowl, whisk together the flour, yeast, and salt.
- Add the warm water and olive oil to the dry ingredients. Mix with a wooden spoon until a shaggy dough forms.
- Turn the dough out onto a lightly floured surface and knead for 5 to 7 minutes until the dough is smooth and elastic.
- Lightly grease a clean bowl with olive oil. Place the dough in the bowl, turning to coat. Cover the bowl with plastic wrap or a clean kitchen towel.
- Let the dough rise in a warm place for 60 to 75 minutes, or until it has doubled in size. This is your first rise.
- Gently punch down the dough. Turn it out onto a lightly floured surface and shape it into a long, even loaf, about 14 to 16 inches long.
- Place the shaped loaf on a baking sheet lined with parchment paper or a pizza peel dusted with cornmeal.
- Cover the loaf loosely and let it rest for a second rise for 20 minutes.
- Preheat your oven to 425°F (220°C) about 15 minutes before the second rise finishes. Place a shallow pan on the bottom rack to create steam.
- Just before baking, use a sharp knife or razor blade to make three diagonal slashes across the top of the loaf, about 1/2 inch deep.
- Carefully pour 1 cup of hot water into the shallow pan on the bottom rack to create steam, then quickly close the oven door.
- Bake for 20 to 25 minutes, or until the crust is deep golden brown and the internal temperature reaches 200°F (93°C).
- Remove the bread from the oven and let it cool completely on a wire rack before slicing.
Notes
- For a crispier crust, spray the loaf lightly with water halfway through the baking time.
- If you want a softer crust, skip the steam pan step entirely.
- This bread is excellent served warm with butter or used for hearty sandwiches.
Nutrition
- Serving Size: 1 slice
- Calories: 150
- Sugar: 1
- Sodium: 300
- Fat: 2
- Saturated Fat: 0
- Unsaturated Fat: 2
- Trans Fat: 0
- Carbohydrates: 30
- Fiber: 1
- Protein: 4
- Cholesterol: 0