
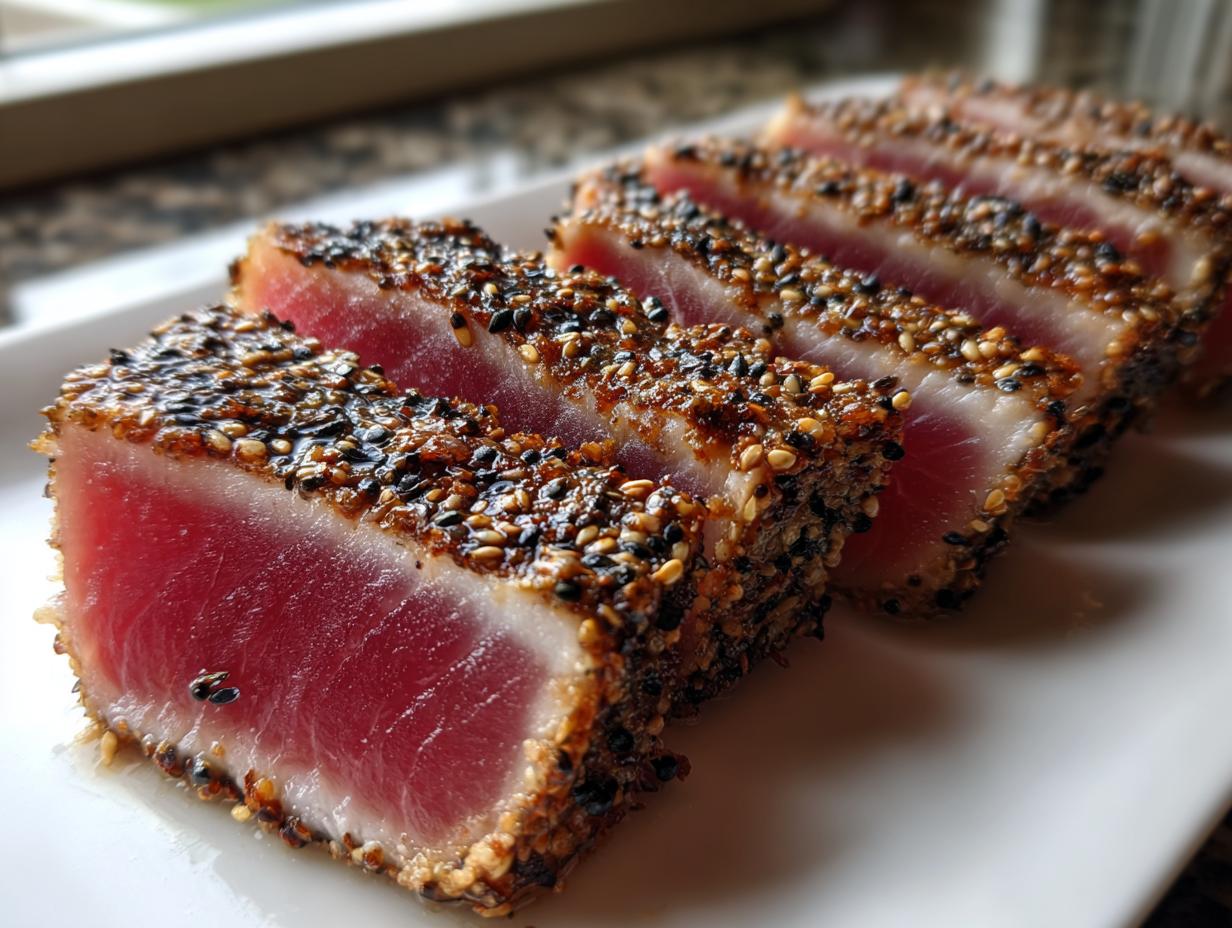
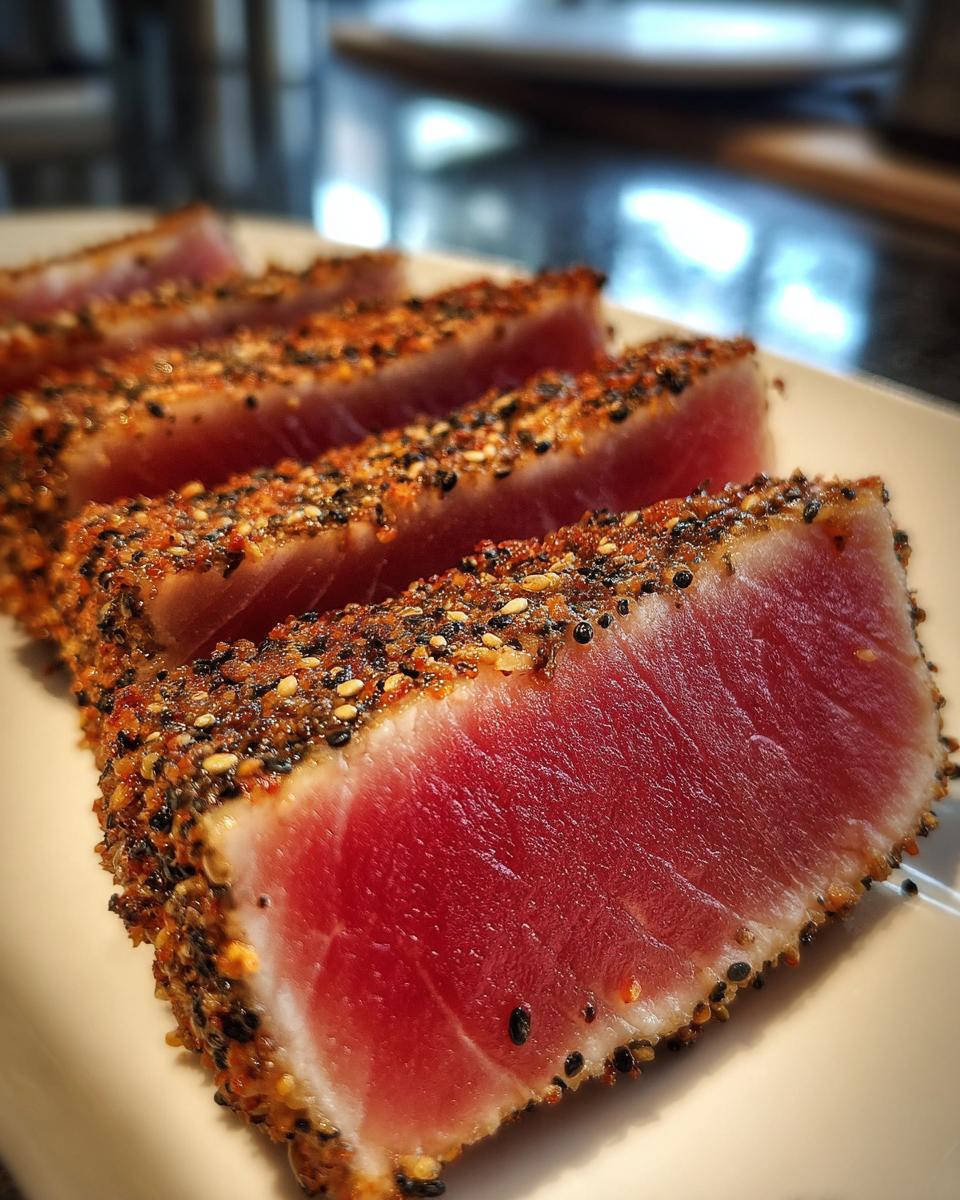
Wow, have I got a secret to share with you today! You know those incredible *Seared Ahi Tuna* steaks you see at fancy restaurants—crusty dark outside, cool, ruby-red center? I used to think that perfection was reserved for professional kitchens, but I was wrong! Thanks to studying the science behind heat transfer, I figured out the alchemy needed to nail that restaurant quality right here on your stovetop. This recipe is my absolute favorite because it’s unbelievably fast—we’re talking minutes, not hours—making it the ultimate quick seafood recipe for a sophisticated, healthy dinner. Trust me, once you see that crust form, you’ll feel like a flavor chemist!
- Why You Will Love This Perfect Seared Ahi Tuna Recipe
- The Essential Ingredients for Gourmet Tuna
- Mastering the Marinade for Your Asian Tuna Recipe
- The Science of the Perfect Sesame Crust on Seared Ahi Tuna
- High-Heat Searing Technique for Flawless Seared Ahi Tuna
- Tips for Success When Making Seared Ahi Tuna
- Storage and Reheating Instructions for Leftover Seared Ahi Tuna
- Frequently Asked Questions About Yellowfin Tuna
- Nutritional Snapshot of This Healthy Dinner
Why You Will Love This Perfect Seared Ahi Tuna Recipe
I know what you’re thinking: fancy tuna steak means complicated, right? Nope! That’s the beauty of applying a little bit of kitchen alchemy here. This preparation is all about reliable results with minimal effort. It takes the guesswork out of making something that looks incredibly gourmet.
Here is exactly why this method ends up on my menu at least once a month:
- Blazing Fast: Seriously, between the short marination and the searing time, you are looking at less than five minutes of active cooking. It’s the perfect solution when company shows up unexpectedly or you just don’t want to wait around for dinner. It truly is a quick seafood recipe!
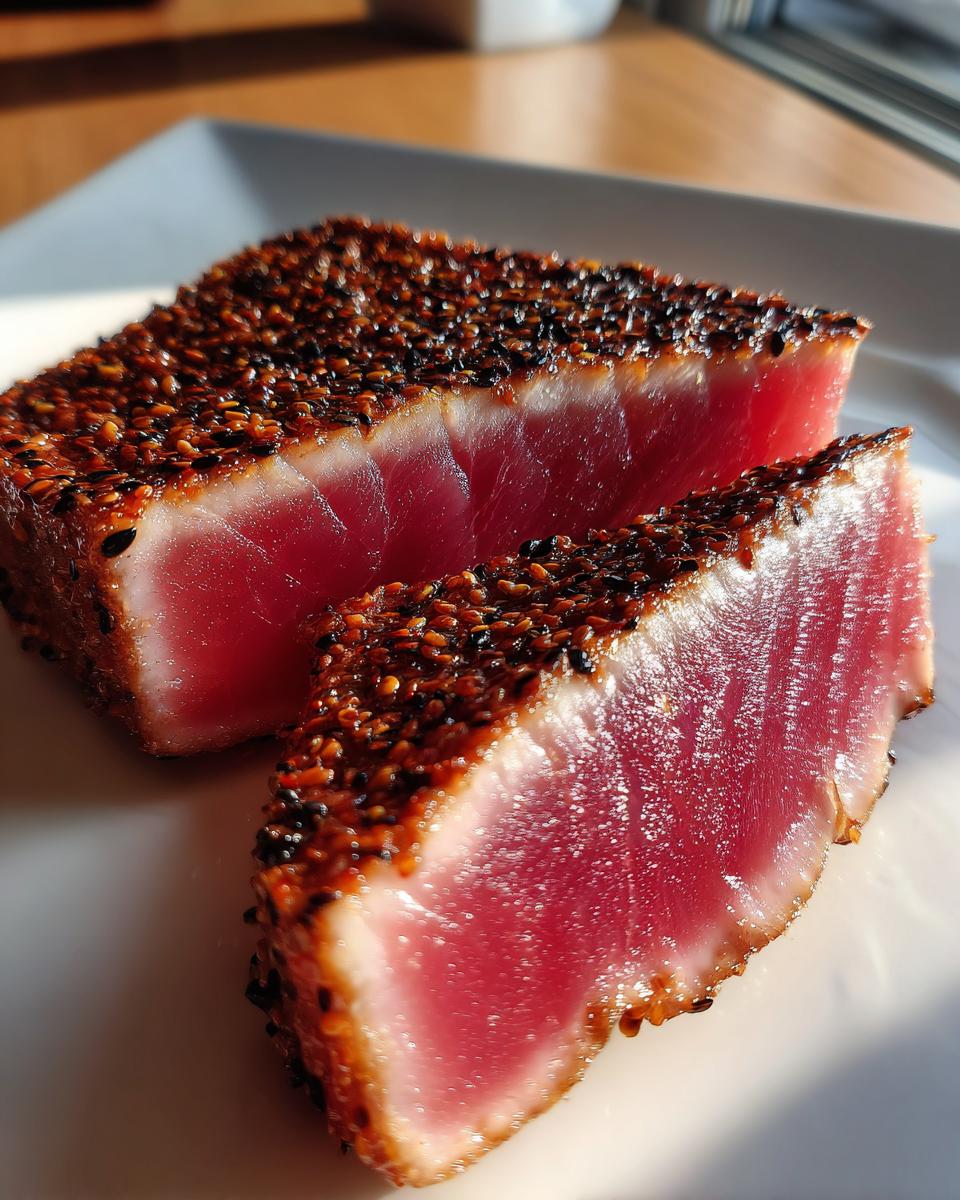
- Restaurant Quality at Home: Achieving that deeply browned, savory crust while keeping the inside perfectly cool and red is pure magic. You get that beautiful contrast in texture and temperature every single time.
- Easy Health Upgrade: This is such a lean, satisfying choice. When you’re looking for a high-protein, low-fat meal that still feels indulgent, this sesame-crusted beauty is your answer for a stellar healthy dinner.
- Flavor Punch: That short marinade infuses just enough savory, bright Asian flavor without overwhelming the beautiful, clean taste of the yellowfin tuna itself.
It’s reliable food that tastes like you spent hours fussing over it, but you actually didn’t. That’s what I call success in the kitchen!
The Essential Ingredients for Gourmet Tuna
Okay, before we even think about turning on the stove, we need to talk about the star: the fish itself. This isn’t the time to skimp, friends! Because we are searing this so quickly—we’re barely cooking it at all—the quality of your tuna steak is everything. I am talking about true, high-quality sushi grade tuna.
You want to look for deep, vibrant red or purplish-red steaks—that tells you it’s fresh, high-quality **yellowfin tuna** or bigeye. You should be asking your fishmonger specifically for steak thickness, too; aim for about 1.5 inches thick, which usually means you get those perfect 6-ounce portions.
Here’s the short list of what you’ll need to make this experience feel truly gourmet:
- Two (6-ounce) **sushi grade tuna** steaks (I prefer yellowfin, but bigeye works wonderfully).
- Two tablespoons of good, fragrant sesame oil for that incredible aroma.
- One-quarter cup of soy sauce or tamari—this is the base of our flavor town!
- One tablespoon of rice vinegar for that necessary bright tang.
- One teaspoon of fresh ginger, grated finely—fresh is non-negotiable here!
- One small clove of garlic, minced—it’s just a whisper of flavor.
- One teaspoon of brown sugar—this helps the crust deepen color beautifully.
- One tablespoon of black sesame seeds.
- One tablespoon of white sesame seeds for visual pop.
Ingredient Notes and Substitutions for Seared Ahi Tuna
Since the cooking time is so ridiculously short, pretty much everything else just needs to be fresh and accurate. But let’s chat about the few spots where you might need a little guidance.
First, the oil: You must use sesame oil for the flavor combination in the marinade and perhaps a little extra for searing, but remember, sesame oil has a lower smoke point. For the actual high-heat sear in Step 4, I actually cheat a tiny bit, or you can use a neutral oil like avocado oil instead. However, this recipe specifically calls for sesame oil, so if you use it, make sure your pan is hot but not smoking furiously, or you might burn the seeds before the tuna crusts. If you want to play it super safe, use a high smoke-point neutral oil like sunflower or avocado oil to sear, and then drizzle the finished tuna with a touch of toasted sesame oil right before slicing. That gives you the aroma without the risk!
For the rice vinegar? If you’re out, a splash of fresh lemon or lime juice will give you that necessary acidic bite, though the flavor profile will shift slightly. Just start with half a teaspoon and taste your marinade!
And remember that part about **sushi grade tuna**? It means the fish has been handled and frozen to certain strict standards to kill any parasites. Don’t compromise here, please! This is the science keeping your meal fabulous and safe. You’re looking for that gorgeous, uniform color in your **yellowfin tuna** when you buy it.
Mastering the Marinade for Your Asian Tuna Recipe
This is where my food science background really comes into play, and honestly, where a lot of people mess up their **Seared Ahi Tuna**! We are using an acid here—that rice vinegar—which is fantastic for flavor, but acid starts to denature the protein, almost “cooking” the outside of the fish, which we absolutely do not want.
So, Step 1 is whipping up that beautifully savory bath: soy sauce, vinegar, ginger, garlic, and a touch of brown sugar. Whisk it all together in a shallow dish; make sure that sugar dissolves completely. Then, my rule for Step 2 is strict: In it goes for exactly 15 minutes, no more! Set a timer, trust me on this one.
This short soak is just enough time for the flavors to penetrate the surface of the fish, giving us that lovely kick we want in our marinade science, but it doesn’t have time to turn your gorgeous, high-quality **yellowfin tuna** into fish jerky on the outside. When that timer buzzes, pull it out immediately and get ready to build that crust!
The Science of the Perfect Sesame Crust on Seared Ahi Tuna
Alright, we’ve got our marinated fish, and now it’s time to create that beautiful, flavorful shield! This step—Step 3—is absolutely crucial for achieving that signature look and crunch on your **Seared Ahi Tuna**. If the tuna is wet when you try to coat it, the seeds are going to slide right off in the hot pan, and we are looking for a crust, not a puddle of sesame paste!
Once you take those steaks out of the marinade, you need to let the excess drip off. Don’t pat them aggressively dry with a paper towel; we just want the surface damp enough for the seeds to stick, but not dripping wet from the soy sauce. Discard that remaining marinade—it’s done its job!
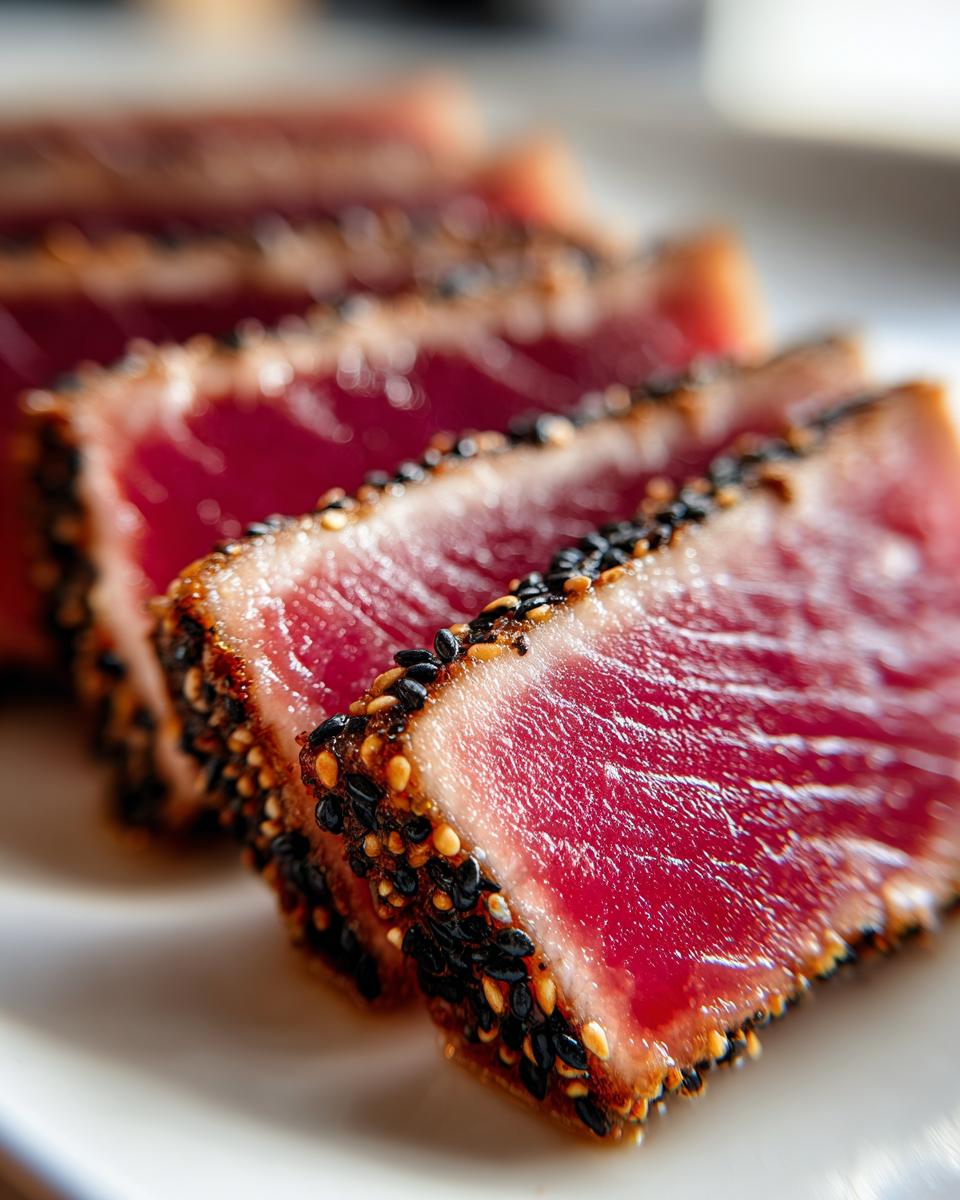
Next, you set up your seed station. Get a nice wide, shallow dish—maybe the one you used for the marinade—and mix those black and white sesame seeds together thoroughly. This blend gives you that amazing visual contrast.
Now, take one tuna steak at a time and gently press both flat sides directly into the seed mixture. I mean really press! You want the seeds to adhere firmly. Don’t just sprinkle them on top; you need to coax them into sticking securely to the fish. Apply gentle, firm pressure until the entire surface looks like a thickly coated sesame log. This dense seed layer is what protects the delicate interior of the **Seared Ahi Tuna** from overcooking when it hits that screaming hot pan. It’s all about forming an insulating barrier!
High-Heat Searing Technique for Flawless Seared Ahi Tuna
Okay, deep breath! This is the moment of truth, where the magic alchemy happens. We’ve got our beautiful, seed-crusted steaks, and now we need to unleash pure, unadulterated heat. For this stage—Steps 4 and 5—you absolutely need a heavy skillet. I’m partial to my trusty cast iron because it retains heat like nothing else. Place that pan over high heat. We are not joking around with medium heat here; we need this pan screaming hot!
You’ll add your sesame oil (or if you’re nervous about burning, use a neutral oil like avocado for the sear, then finish with a drizzle of sesame oil later—I won’t tell!). You want that oil to heat up until it just starts to shimmer, almost like it’s vibrating slightly. If you see wisps of smoke, that’s generally too far, but in a well-ventilated kitchen, you want it *very* hot. This extreme heat is what instantly sears the crust without creeping into the center of the **gourmet tuna**.
Carefully lay those coated tuna steaks into the hot oil. You will hear this incredible, aggressive sizzle, and that’s the sound of success! Now, the timing is critical. For that perfect rare center—the traditional way to serve **Seared Ahi Tuna**—we are looking at 60 seconds on the first side. Flip it gently, and give it another 60 to 90 seconds on the other side. That’s it! You are basically just kissing the outside with heat.
If you’re nervous about raw fish, you can go up to two minutes per side, but remember, the goal is a crusty, dark brown exterior and a cool, red interior. If you need tips on keeping your cast iron in top shape for this high-stress cooking, check out my guide on caring for your cast iron. For more background on why intense heat works so well here, you can look into the science of high-heat cooking methods.
Resting and Slicing Your Seared Ahi Tuna
I know, I know, you want to dig in right away! But trust me, even this super-fast sear benefits from a little pause. Step 6 involves taking the tuna out immediately and letting those steaks rest on a wooden cutting board for about five minutes. This resting time allows the very thin layer of cooked fish on the outside to relax and redistributes those precious internal juices. If you slice it too soon, all that delicious moisture spills out!
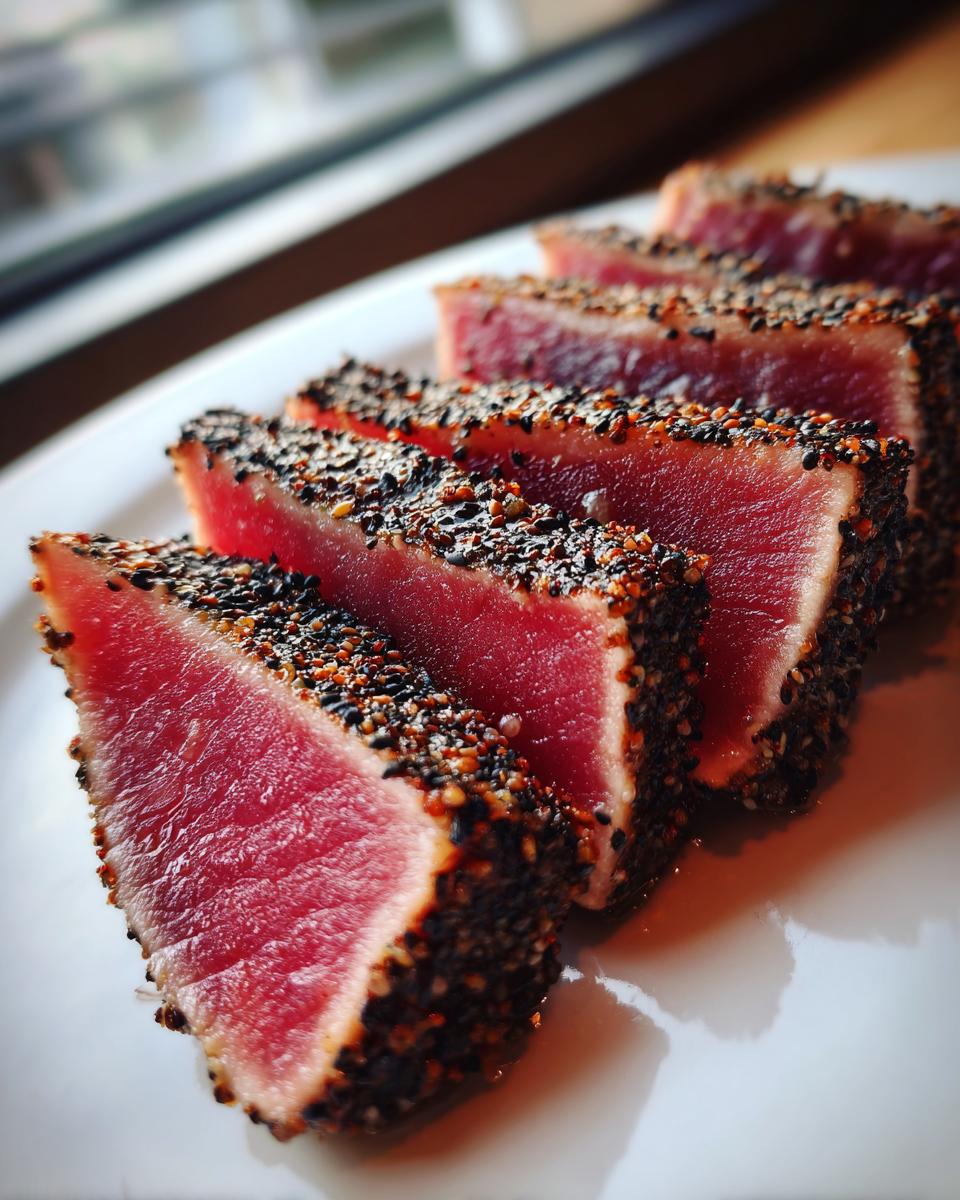
When you’re ready to slice, you must cut against the grain. For tuna, this means looking at the direction of the muscle fibers running through the steak. You want to slice perpendicular to those lines, aiming for about half-inch thick pieces. Cutting against the grain shortens the muscle fibers, making every bite unbelievably tender. It’s one of those small details that takes your **Seared Ahi Tuna** from good to truly spectacular dining!
Tips for Success When Making Seared Ahi Tuna
You’ve got the recipe, you’ve managed the perfect sear, but sometimes the difference between a great batch and an *unforgettable* batch is just knowing a few insider tricks. Since figuring out the alchemy of high heat, I’ve collected a few non-negotiables that I want to pass along to you. Think of these as my personal guarantees to ensure your **Seared Ahi Tuna** turns out perfectly every single time.
Here are a few of my favorite ‘Alchemy Chef Secrets’:
- Temperature is King: I cannot stress this enough—the skillet has to be seriously hot before the fish even looks at the pan. If you drop the tuna in and it *doesn’t* immediately sizzle loudly, pull the pan back up, wait another minute, and get the oil shimmering hot again. That immediate, aggressive sear creates the crust we are dreaming about.
- The Doneness Check: Remember the goal is rare center. If you are worried about judging the color in the pan, error on the side of undercooking by about 15 seconds. The tuna will continue to cook slightly during that brief 5-minute rest period we talked about. It’s much easier to cook a slightly raw piece a little longer than it is to salvage an overcooked, dry piece!
- Seed Management: If you find your sesame crust starts burning too quickly, it might be because you didn’t let that excess marinade drip off properly, or maybe your pan got *too* hot before you added the fish. If that happens—and don’t panic—you can carefully brush off the most heavily browned seeds mid-sear and flip it onto the less-cooked side. It sounds drastic, but it saves the flavor!
- Serving Suggestion Upgrade: While steamed rice is a classic pairing for this **Asian tuna recipe**, try slicing the tuna over a bed of quick-pickled cucumber ribbons instead. The cool, crisp acidity cuts through the richness of the sesame crust beautifully. It elevates this **healthy dinner** to true gourmet status!
Storage and Reheating Instructions for Leftover Seared Ahi Tuna
Now, here’s the reality check: this **Seared Ahi Tuna** recipe is absolutely, 100% at its peak performance the second it comes off that hot skillet and rests for five minutes. That contrast between the warm, crunchy crust and the cool, raw center is the whole point of the dish! So, if you have leftovers, I’m going to be completely honest with you—it’s just not going to be the same magic experience.
That lovely, delicate texture of the **yellowfin tuna** is quite fragile. Once it cools and sits for a while, it starts to firm up, and that beautiful crust tends to get… well, soggy. It loses its snap, and that’s just sad!
Proper Cold Storage is Key
If you absolutely must save some of that amazing **gourmet tuna** for lunch the next day, treat it like the precious ingredient it is. You need to minimize air exposure, which causes oxidation and moisture loss. Once the tuna has cooled down completely after slicing (don’t try to store it hot!), wrap the pieces tightly in plastic wrap first. Then, place those wrapped pieces into an airtight container. This double-wrapping method helps keep that residual moisture locked in.
Keep it in the coldest part of your refrigerator, and honestly, plan to eat it within 24 hours maximum. The sooner, the better!
The Truth About Reheating Seared Ahi Tuna
My advice, as someone who has tested this far too many times for science, is simple: Do not reheat it. Seriously, don’t put it in the microwave or on the stovetop. If you try to bring it back up to temperature, you’ll end up overcooking the already seared exterior, and the interior will turn gray and tough. Poof! There goes our perfectly cooked texture.
However, if you are determined to eat it warm later, you can *very gently* warm the slices—and I mean *gently*—by placing them on a dry, unheated, non-stick pan over the absolute lowest heat setting for maybe 10 seconds on each side. You are aiming to just take the chill off, not cook it further. But honestly? It’s better cold! Try slicing those leftover pieces thinly and tossing them into a fresh salad with a drizzle of ginger dressing instead. It transforms into a brilliant, high-protein addition to your lunch!
Frequently Asked Questions About Yellowfin Tuna
I always get questions back whenever I share this recipe because people aren’t used to handling such a premium piece of fish at home. It’s totally natural to have questions when you’re working with something as fantastic as **yellowfin tuna**! Mastering this dish is all about feeling confident in your ingredients.
Here are a few of the things I hear most often from home cooks trying this recipe for the first time:
What exactly is the difference between Ahi and Yellowfin Tuna?
This is such a great question, and the answer is often simpler than people think! Technically speaking, Ahi is the Hawaiian name for two specific types of tuna: Yellowfin and Bigeye. When you buy **sushi grade tuna** labeled “Ahi,” it’s usually one of those two species. Yellowfin is actually the workhorse of the Ahi world and what most high-quality recipes call for because it has a lovely firm texture and bright color. Bigeye is usually a bit fattier, which is great too, but consistency-wise, yellowfin is my go-to for this searing method. Either way, when you shop, look for that deep, consistent color that tells you you’ve got a beautiful piece of fish!
Can I use frozen tuna steaks for this Seared Ahi Tuna recipe?
This is a sticking point for me, and I have to be honest: I strongly recommend buying fresh, never-frozen if you can possibly source it. Because this **Asian tuna recipe** relies so heavily on a very short cooking time to keep the center raw, any ice crystals left over from the freezing process can compromise the texture when you sear it. If you *must* use previously frozen fish, you need to rely on proper thawing techniques. That means thawing it slowly overnight in the refrigerator, never at room temperature. Then, you must pat it bone dry before seasoning, or that residual water will steam the fish instead of searing it. Remember the core rule: dry surface equals fantastic crust!
Why can’t I marinate the tuna for longer than 15 minutes?
This rule is pure food science, and it’s key to making sure this turns into a **gourmet tuna** dish and not something mushy! Do you remember that rice vinegar in the marinade? Vinegar is an acid, and acid “cooks” the outside of the fish—it turns the red protein white, kind of like ceviche. If you leave that beautiful **yellowfin tuna** soaking for an hour, the enzymes will start breaking down the exterior structure, and you won’t get that clean sear; you’ll get a soft, mealy exterior that won’t hold the sesame seeds well. Fifteen minutes is the perfect sweet spot for flavor penetration without protein damage.
What temperature should my skillet be for the best sear?
We talked about this a bit in the main steps, but it bears repeating because it’s the most common failure point! You need the skillet surface temperature to be very high, likely around 450°F (232°C) or even a touch higher. The oil should be hot enough that when you add a tiny drop of water or oil, it sizzles aggressively right away. Don’t wait for heavy smoke, but definitely wait until the oil shimmers or ripples. That intense, immediate heat (which you can read more about in my different tuna types article) is what creates the Maillard reaction on the sesame crust instantly, locking in the cool center. If the heat is too low, the sesame seeds just absorb the oil and burn slowly, instead of sizzling instantly into a crust!
Nutritional Snapshot of This Healthy Dinner
I love sharing the science behind the magic, and that includes understanding what we are putting into our bodies! This **Seared Ahi Tuna** recipe isn’t just fast and delicious; it’s genuinely fantastic fuel. Since this is such a lean, flavorful way to eat seafood, I always keep the numbers handy. It’s proof that eating incredibly well doesn’t have to be complicated or heavy!
Here is a breakdown of the high-protein goodness packed into this dish. Remember, this is based on the recipe serving two people, using the specified 6-ounce steaks and standard measurements for the marinade ingredients.
Serving Size: 1 steak (approximate)
- Calories: 280
- Protein: 34 grams! That’s huge for a small portion.
- Fat: 14 grams (mostly healthy, unsaturated fats from the sesame oil).
- Saturated Fat: Just 2 grams.
- Carbohydrates: 5 grams.
- Sugar: Only 2 grams, mostly from that tiny bit of brown sugar in the marinade.
- Sodium: 650 mg (This is the salt powerhouse from the soy sauce, so you might want to use low-sodium soy sauce if you’re watching your salt intake!).
- Cholesterol: 75 mg.
Keep in mind, these figures are estimates based on the core ingredients outlined. If you substitute soy sauce for tamari, or use different oils, those numbers will absolutely shift! But what’s clear is that this **healthy dinner** delivers seriously high protein content for very few calories. It’s the perfect example of culinary alchemy leading to superb nourishment!
PrintPerfectly Seared Ahi Tuna Steaks
Learn to prepare restaurant-quality seared ahi tuna using simple techniques for a quick, healthy seafood dinner.
- Prep Time: 15 min
- Cook Time: 3 min
- Total Time: 23 min
- Yield: 2 servings 1x
- Category: Dinner
- Method: Pan-Searing
- Cuisine: Asian-Inspired
- Diet: Low Fat
Ingredients
- 2 (6-ounce) sushi grade tuna steaks (yellowfin or bigeye)
- 2 tablespoons sesame oil
- 1/4 cup soy sauce or tamari
- 1 tablespoon rice vinegar
- 1 teaspoon grated fresh ginger
- 1 clove garlic, minced
- 1 teaspoon brown sugar
- 1 tablespoon black sesame seeds
- 1 tablespoon white sesame seeds
Instructions
- Combine soy sauce, rice vinegar, ginger, garlic, and brown sugar in a shallow dish to create the marinade.
- Place the tuna steaks in the marinade, turning to coat both sides. Marinate for 15 minutes at room temperature. Do not marinate longer, as the acid can begin to ‘cook’ the fish.
- In a separate shallow dish, mix the black and white sesame seeds. Remove the tuna from the marinade, letting excess drip off, and press both sides of the steaks into the sesame seed mixture until fully coated. Discard the remaining marinade.
- Heat the sesame oil in a heavy-bottomed skillet (cast iron works well) over high heat until the oil shimmers slightly.
- Carefully place the coated tuna steaks in the hot skillet. Sear for 60 to 90 seconds per side for rare to medium-rare. The outside should be dark brown and crusty, and the center should remain cool and red.
- Remove the tuna from the skillet immediately. Let the steaks rest on a cutting board for 5 minutes before slicing against the grain into 1/2-inch thick pieces.
Notes
- For a perfect sear, ensure your skillet is very hot before adding the tuna.
- If you prefer a slightly more cooked center, increase the searing time to 2 minutes per side.
- Serve this gourmet tuna with a side of steamed rice or a simple Asian slaw.
Nutrition
- Serving Size: 1 steak
- Calories: 280
- Sugar: 2
- Sodium: 650
- Fat: 14
- Saturated Fat: 2
- Unsaturated Fat: 12
- Trans Fat: 0
- Carbohydrates: 5
- Fiber: 1
- Protein: 34
- Cholesterol: 75