
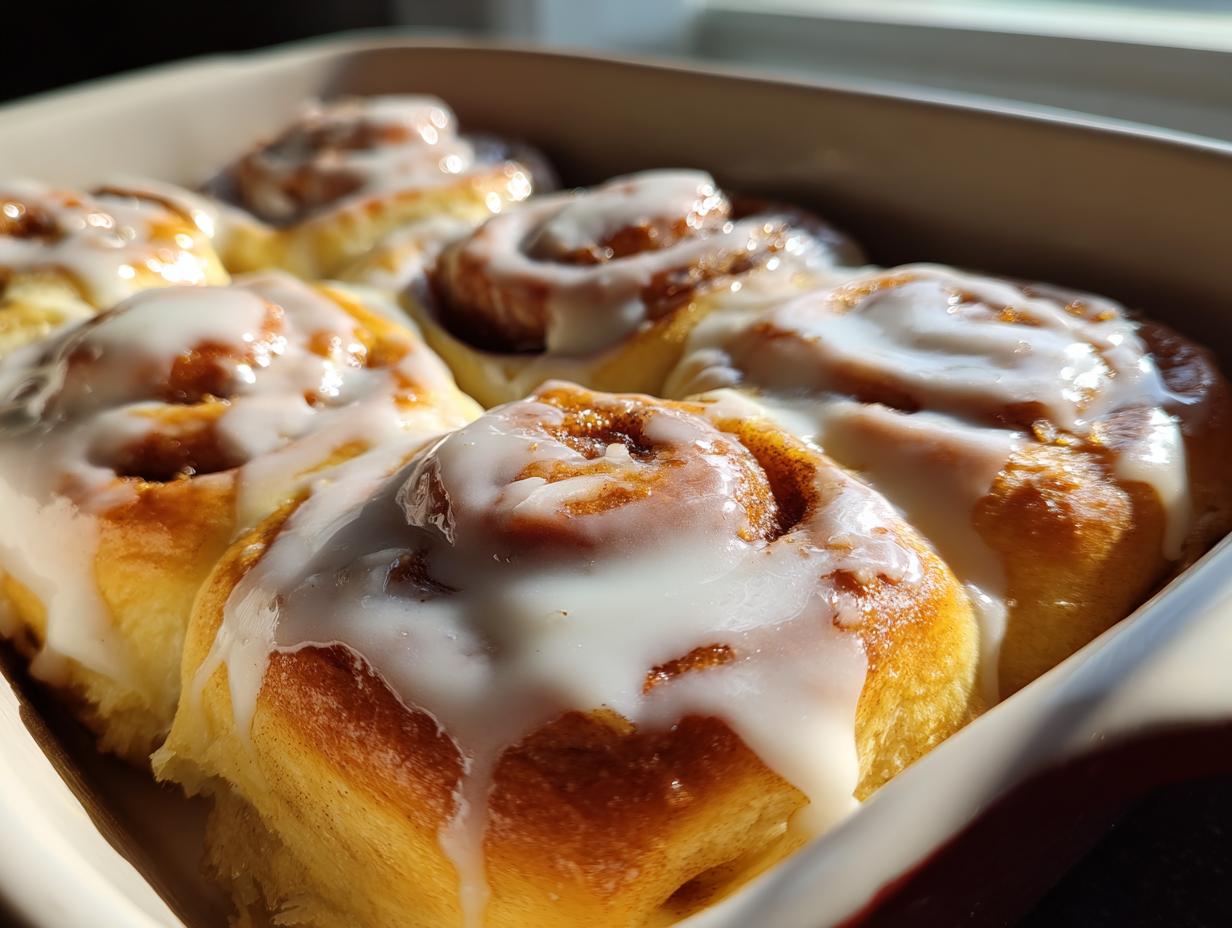
Oh my gosh, you know that moment when the house fills with that warm, intoxicating smell—cinnamon, caramelized sugar, and melting butter? That’s the signal that something truly special is coming out of the oven. If you’re dreaming of those perfect, gooey, pull-apart swirls that taste straight from the best bakery, then you’ve landed exactly where you need to be. I’m Juliana, and blending my mom’s rich heritage flavors with my formal food science background means I obsess over making sure every single one of these recipes works perfectly the first time. Trust me, this foolproof recipe is the one that finally delivers unbelievably fluffy homemade cinnamon rolls with that decadent cream cheese icing you’ve been hunting for!
- Why This is the Best Cinnamon Roll Recipe You Will Make
- Ingredients for Your Fluffy Cinnamon Roll
- Step-by-Step Instructions for the Perfect Cinnamon Roll
- Tips for Success When Making Cinnamon Rolls
- Ingredient Notes and Substitutions for Your Cinnamon Roll
- Make-Ahead and Storage for Your Yeast Roll Recipe
- Serving Suggestions for This Sweet Breakfast Recipe
- Frequently Asked Questions About Making Cinnamon Rolls
- Understanding the Nutrition in Your Homemade Pastry
- Share Your Kitchen Alchemy
Why This is the Best Cinnamon Roll Recipe You Will Make
Making a truly exceptional batch of cinnamon rolls means getting the science right on the dough and the filling balance perfect. I’ve tested so many variations, and this combination provides unmatched fluffiness that stays soft for days. I promise you, this is the recipe you’ll bookmark forever.
- The dough is rich—we use whole milk and an extra pocket of butter to ensure that tender, brioche-like chew.
- The yeast activation process is straightforward, making this a reliable yeast roll recipe even if you’re intimidated by yeast.
- The filling ratio is high! We load them up so you get that glorious, ooey-gooey swirl in every single bite.
Achieving Bakery-Quality Softness
The secret sauce here isn’t just the rising time; it’s the fat-to-flour ratio. More melted butter in the dough keeps the gluten strands incredibly supple while baking. This means these rolls don’t dry out like thinner recipes. If you’re curious about perfect yeast handling, check out my thoughts on tips for successful yeast activation.
Ingredients for Your Fluffy Cinnamon Roll
Okay, now for what you actually need to gather up! I always organize my ingredients before I start, especially for batch baking like this. It stops you from scrambling mid-knead looking for the salt! Remember, precision matters, especially with that yeast. Make sure you have everything measured out just like this list says, and you’re already halfway to a successful batch of homemade pastry.
For the Rich Yeast Roll Dough
This is the backbone of our fluffy roll. See how we’re using whole milk? That extra milk fat is non-negotiable for that soft texture!
- 1 cup whole milk, warmed to exactly 105-115°F (Too hot and you kill the yeast, too cold and it won’t wake up!)
- 2 1/4 teaspoons active dry yeast
- 1/2 cup granulated sugar, divided (We take 1 tsp out for the yeast)
- 1/4 cup unsalted butter, melted
- 1 large egg, room temperature (Let it sit out for 30 minutes first, it mixes in better!)
- 3 1/2 cups all-purpose flour, plus more for dusting
- 1 teaspoon salt
For the Gooey Cinnamon Filling
Don’t skimp on the good stuff here; this is where all the flavor explodes when it bakes. We want a paste, not a pile of dry sugar!
- 1/2 cup unsalted butter, softened (Really soft! You need to be able to smear it easily.)
- 1/4 cup packed light brown sugar
- 2 tablespoons ground cinnamon
For the Sweet Cream Cheese Icing
The perfect ending! For the smoothest glaze, both your cream cheese and butter need to be fully softened. There’s nothing worse than icing with lumps!
- 4 ounces cream cheese, softened
- 1/4 cup unsalted butter, softened
- 2 cups powdered sugar
- 1 teaspoon vanilla extract
- 1-2 tablespoons milk (You’ll add this slow until it’s perfect!)
Step-by-Step Instructions for the Perfect Cinnamon Roll
This is where the alchemy happens! Don’t rush the rising times; that’s how we get those signature fluffy interiors. Because I studied the science behind yeast, I can tell you timing matters more than effort here. We are layering texture from the very first step to give you the best cinnamon roll experience imaginable.
Activating the Yeast and Mixing the Cinnamon Roll Dough
First things first: wake up that yeast! Combine your warm milk (remember, 105-115°F is the sweet spot!) with one teaspoon of the sugar and the yeast. Let it sit until it gets foamy—that’s our visual cue that your yeast is alive and ready to work its magic. Once it’s nicely bubbly, toss in the melted butter, the rest of the sugar, the egg, salt, and most of that flour. Mix it just until it comes together into a shaggy mess.
Now, pay attention! Turn that dough out onto a lightly floured surface. You need to knead this vigorously for a solid 6 to 8 minutes. This isn’t cardio; it’s developing the gluten structure that traps all the wonderful gases, which is what makes these rolls rise up light and airy rather than dense.
First Rise and Preparing the Filling
Pop that smooth dough into an oiled bowl, cover it up tight, and let it rest for about an hour and a half, or until it’s doubled in size. If your kitchen is chilly, here’s my old trick: put the covered bowl in the oven with just the light on. It creates the perfect consistent warmth. While you wait, grab that softened butter, brown sugar, and cinnamon and mash them together until you have a thick, spreadable paste. That’s your flavor bomb!
Rolling, Filling, and Shaping the Cinnamon Roll Log
Gently punch the air out of your risen dough. On a well-floured counter, roll that ball out into a precise 12 by 18-inch rectangle. This dimension is key for even sizing later! Spread that gorgeous cinnamon paste evenly over the dough, making sure to leave about a half-inch strip clear along one of the long sides—this is your glue strip!
Starting from the edge opposite the empty border, roll that dough up as tightly as you can manage into a long log. When you get to the end, pinch that border shut firmly so the log holds its shape. Then, use a sharp knife or unflavored dental floss to cut the log into 12 equal pieces. Place them cut-side up into your prepared baking pan.
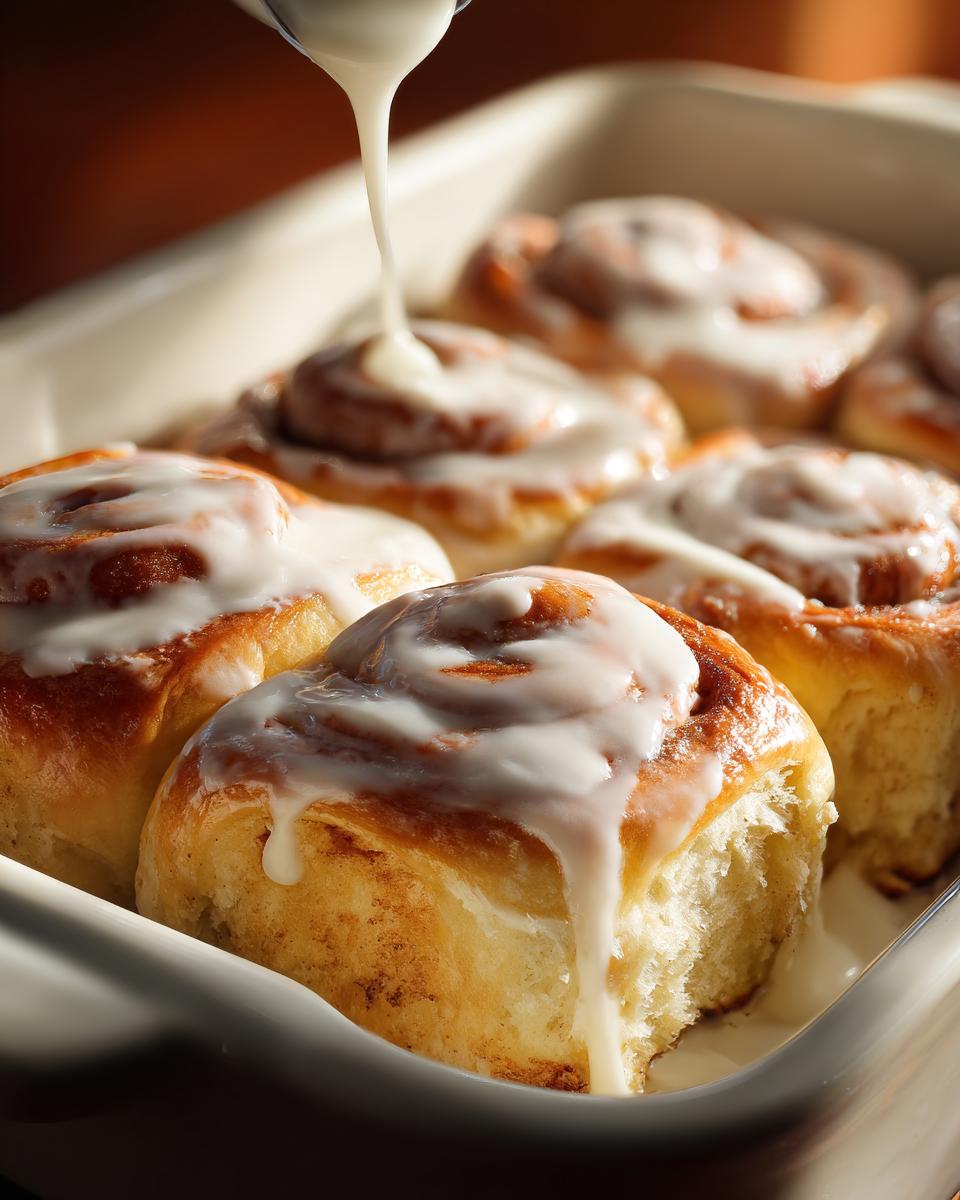
Second Rise, Baking, and Icing the Sweet Breakfast Recipe
Cover those beautiful rolls again and let them puff up for another 30 to 45 minutes. You want them puffy and touching each other before they go in. Preheat your oven to 375°F. Bake for 20 to 25 minutes until they turn golden brown. While they cool just slightly, whip up that luxurious cream cheese icing until it’s thick but still pourable—remember, add milk slowly! Then, take that icing and be generous across your warm sweet breakfast recipe. No teasing allowed!
If you want to dive deeper into the science of how dough structure works, I wrote a whole piece on baking science principles, and here is a guide I like for oven temperature assurance!
Tips for Success When Making Cinnamon Rolls
Even with a rock-solid recipe, sometimes the kitchen throws us a curveball! Don’t panic if your dough seems slow or your filling tries to escape. Remember, this is alchemy, not perfection. I’ve seen every issue crop up, and usually, it just means we need a tiny adjustment to temperature or technique. Getting these minor things right is what separates a good cinnamon roll from an absolute showstopper.
Troubleshooting Common Cinnamon Roll Dough Issues
If your dough isn’t doubling after an hour and a half, the most likely culprit is the temperature of your milk—it was probably too cold, or even worse, too hot and killed the yeast. If it’s cool, try moving the bowl to that warm spot (oven light trick!) and give it another 20 minutes. If it’s still sluggish, gently warm up a half cup of milk and stir it carefully into the existing dough to give the yeast a little boost.
What about filling leakage? That almost always happens when you don’t roll the log tightly enough, or you forget to pinch that final seam shut. If your filling seems too runny, it means your softened butter was actually melted butter when you mixed it in, which is too liquid. Next time, make sure that butter is the consistency of actual frosting. Also, make sure you leave that 1/2-inch border clear on the long edge; that border allows the dough to seal itself snugly instead of just spreading the filling out.
Ingredient Notes and Substitutions for Your Cinnamon Roll
I know sometimes the pantry just doesn’t line up perfectly with the recipe card, and that’s totally fine! We aren’t trying to follow rigid rules here; we’re looking for wonderful results. While this recipe is balanced around whole milk and proper butter temperatures, I’ve made substitutions in a pinch before, and I want to share what worked and what totally flopped.
If you don’t have whole milk, 2% works okay, but you might find the dough slightly less rich. Please, please, please don’t use skim milk—we need that fat content for structure! If you absolutely must substitute the milk, try using a non-dairy alternative like oat milk or soy milk cup-for-cup. Avoid almond milk, as it tends to be too thin and sometimes causes the yeast to act strange.
Now, let’s talk about that luscious filling. If your butter came straight out of the fridge and is hard as a rock for the filling, don’t microwave it until it’s liquid! That turns your filling into a greasy mess that leaks out everywhere. Instead, just cut the cold, hard butter into little cubes and mash it really aggressively with the brown sugar and cinnamon using a fork. It takes more arm work, but it keeps the filling thick enough to stay put during that second rise.
For the icing, if you run out of cream cheese, you can make a simple, thinner glaze using just powdered sugar, vanilla, and milk or water. But, if you do that, try adding a teaspoon of lemon juice instead of milk—the slight acidity cuts through the sweetness nicely and mimics some of the tanginess that the cream cheese originally provided. Just know that the cream cheese version is seriously superior for that authentic taste!
Make-Ahead and Storage for Your Yeast Roll Recipe
One of the best parts about working with a fantastic yeast roll recipe is that you get to plan ahead! Weekday mornings deserve this kind of treat, but who has time for rising dough before 7 AM? I’ve perfected the overnight method, and honestly, waking up to the promise of hot rolls steaming in the oven almost makes me a morning person.
The Overnight Proofing Method
This is my secret to a relaxed Sunday brunch. Once you’ve finished kneading the dough (Step 3), let it complete its first rise as normal until it doubles in size—that’s usually about 1 to 1.5 hours. Instead of shaping the rolls immediately, go ahead and punch the air out gently. Now, quickly roll it out, spread your filling, and roll up your log. Cut your 12 rolls and place them snugly into your greased 9×13 pan.
Cover that pan tightly with plastic wrap—make sure it’s sealed well so the dough doesn’t dry out! Place the entire tray in the refrigerator. Let it chill overnight, anywhere from 8 to 14 hours. The cold temperature slows down the yeast activity, allowing the dough to develop flavor without ballooning out of control.
When you wake up, all you have to do is pull the pan out, uncover it, and let it sit on the counter while your oven preheats to 375°F. It usually needs about 1 to 2 hours on the counter to warm up and finish that second rise. This means you get to enjoy warm, fresh-from-the-oven rolls with minimal morning effort!
Storing Baked Rolls for Later
If you happen to have any leftovers—which is rare in my house—storage is simple. For rolls eaten the next day, just keep them covered tightly at room temperature in the pan. The heavy icing acts as a nice seal, locking in that moisture. If you need them to last longer than 24 hours, the fridge is your best bet.

To reheat them and bring them back to that gooey, fresh-baked state, pull the rolls out of the fridge about an hour before you want to eat them to take the chill off. Then, you can microwave an individual roll for about 15 to 20 seconds, or if you have a crowd, pop the whole pan (covered in foil, so the icing doesn’t melt completely off) into a 300°F oven for about 10 minutes. That warmth will completely revive the texture and make them taste like they just came out of the oven! It’s true magic for any leftover sweet breakfast recipe.
Serving Suggestions for This Sweet Breakfast Recipe
These glorious rolls are practically a celebration on a plate all by themselves, aren’t they? But when I serve them up for a big Sunday brunch, I like to balance out that richness a little bit. A massive, sugary roll needs something bright or something savory nearby to keep everyone happy without feeling weighed down immediately!
First off, the coffee pairing is critical. You need something robust to stand up to all that sugar and cream cheese. I always suggest a strong pour-over or perhaps a dark roast French press. If you want fancy, an iced vanilla latte is delightful, but I always have a link saved for my favorite coffee pairings that cut the sweetness.
For something fresh on the side, keep it simple! Since the sweet breakfast recipe itself is so heavy, a simple fruit platter works wonders. Sliced bright citrus—oranges or grapefruit—offer a wonderful textural and flavor contrast. Or, if you’re feeling a little more effort, a bowl of lightly sweetened whipped cream cheese with fresh berries on top is just divine.
If you are serving these as part of a larger spread, try adding one savory anchor item. Scrambled eggs are classic, but honestly, crispy bacon or some high-quality breakfast sausage is the perfect salty foil to bring out the brown sugar in the filling. It just makes the whole morning feel complete!
Frequently Asked Questions About Making Cinnamon Rolls
I know you’ve got questions lingering after all that baking science talk, and that’s okay! It’s my job to make sure your kitchen alchemy turns into the absolute best results possible. Let’s clear up any last doubts you might have about achieving that perfect, towering cinnamon roll!
Can I skip the kneading process for these easy cinnamon rolls?
Oh, friend, I really, really wish you could! Kneading isn’t just about gathering the dough into a ball; it’s the physical act of building up the gluten network. Think of gluten as the scaffolding for your roll—it’s what traps all the gas created by the yeast. If you skip the 6 to 8 minutes of kneading, your dough will be weak, and your beautiful cinnamon rolls will likely deflate in the oven and turn out dense instead of fluffy. For this recipe, don’t skip that step!
What temperature should the milk be for the yeast?
This is such a critical piece of science that I can’t stress it enough! You need the milk to be between 105°F and 115°F. Why that specific narrow range? If the milk is too cool (under 100°F), the yeast stays sluggish and won’t foam up, leading to a long, disappointing rise. If the milk gets too hot—anything over 125°F—you actually cook or kill the yeast entirely. When that happens? Zero rise, guaranteed flat pastries. Always use a thermometer if you can, or test it by dipping your clean finger in; it should feel pleasantly warm, like a baby’s bath, not hot.
How do I make sure my rolls stay soft the next day?
The best trick is what we talked about in storage: keeping them covered tightly at room temperature overnight helps. The moisture from the icing helps keep the tops nice. If they’ve been refrigerated, the biggest mistake people make is trying to eat them cold! They must come to room temperature, or better yet, warm them up gently! A quick 10-second zap in the microwave, or warming the whole pan covered in foil at 300°F for ten minutes, instantly brings back that melt-in-your-mouth softness they had straight out of the oven. It’s the key to enjoying leftovers of your amazing sweet breakfast recipe!
Understanding the Nutrition in Your Homemade Pastry
Okay, let’s talk fuel! I know when you’re making something this incredible—a real centerpiece of a homemade pastry spread—you aren’t doing it for the macros, but it’s good to have a general idea of what’s in this magnificent treat. Since every kitchen uses slightly different brands of butter or sugar, I always stress that these numbers are a close estimate based on standard measurements for one glorious, heavily frosted roll.
Think of this as nourishing your soul first, and counting calories second! These rolls are rich because they have plenty of real butter and luxurious cream cheese icing—that’s why they taste so good!
- Serving Size: 1 roll
- Calories: 450
- Sugar: 45g (Yes, that’s high, but that’s the point of a celebratory breakfast!)
- Fat: 22g
- Saturated Fat: 13g
- Carbohydrates: 58g
- Protein: 7g
Just a little disclaimer, because of that science background I mentioned: these nutritional values are based on standard ingredient use and portioning listed in the recipe. If you use a lighter cream cheese or skip a tablespoon of sugar in the filling, those numbers will shift slightly! Enjoy every bite!
Share Your Kitchen Alchemy
Truly, the greatest joy for me is seeing my precise testing and flavor development translate into something delicious and memorable in your own home. That’s what Alchemy Chef is all about—taking that scientific approach and achieving pure, delicious magic!
If you followed these steps and your house smells like a dream, please, please let me know! Did you finally conquer the challenge of the perfect gooey center? Were these the softest cinnamon rolls you’ve ever pulled apart?
Head back up to the top of the page and give this recipe a rating. Five stars means you think it’s the definitive guide, and your feedback helps other home cooks feel confident stepping into the kitchen!
And I absolutely LOVE seeing your creations! Snap a photo of your beautiful rolls, maybe sitting next to your morning coffee, and share it on social media. Tag us so I can see the beauty you’ve created. Seeing your successful transformation—that’s the ultimate reward for all the testing we do here!
PrintFluffy Homemade Cinnamon Rolls with Cream Cheese Icing

Follow this reliable recipe to create soft, pull-apart cinnamon rolls with a rich, sweet cream cheese glaze. This recipe uses simple techniques for bakery-quality results.
- Prep Time: 30 min
- Cook Time: 25 min
- Total Time: 2 hr 40 min
- Yield: 12 servings 1x
- Category: Breakfast
- Method: Baking
- Cuisine: American
- Diet: Vegetarian
Ingredients
- 1 cup whole milk, warmed to 105-115°F
- 2 1/4 teaspoons active dry yeast
- 1/2 cup granulated sugar, divided
- 1/4 cup unsalted butter, melted
- 1 large egg, room temperature
- 3 1/2 cups all-purpose flour, plus more for dusting
- 1 teaspoon salt
- 1/2 cup unsalted butter, softened
- 1/4 cup packed light brown sugar
- 2 tablespoons ground cinnamon
- For the Icing: 4 ounces cream cheese, softened
- 1/4 cup unsalted butter, softened
- 2 cups powdered sugar
- 1 teaspoon vanilla extract
- 1–2 tablespoons milk
Instructions
- Activate the yeast: In a large bowl, combine the warm milk, yeast, and 1 teaspoon of the granulated sugar. Let stand for 5-10 minutes until foamy.
- Mix the dough: Add the melted butter, remaining granulated sugar, egg, flour, and salt to the yeast mixture. Mix until a shaggy dough forms.
- Knead: Turn the dough onto a lightly floured surface and knead for 6-8 minutes until smooth and elastic.
- First Rise: Place the dough in a lightly oiled bowl, turning to coat. Cover and let rise in a warm place for 1 to 1.5 hours, or until doubled in size.
- Prepare the filling: In a small bowl, mix the softened 1/2 cup butter, brown sugar, and cinnamon until combined into a paste.
- Roll the dough: Punch down the risen dough. On a lightly floured surface, roll the dough into a 12×18 inch rectangle.
- Spread filling: Spread the cinnamon-sugar mixture evenly over the dough, leaving a 1/2 inch border on one long edge.
- Shape the rolls: Starting from the long edge opposite the border, tightly roll the dough into a log. Pinch the seam closed.
- Cut the rolls: Cut the log into 12 equal pieces. Place the rolls cut-side up in a greased 9×13 inch baking pan.
- Second Rise: Cover the pan and let the rolls rise again for 30-45 minutes until puffy.
- Bake: Preheat your oven to 375°F. Bake for 20-25 minutes, or until golden brown.
- Make the icing: While the rolls cool slightly, beat the cream cheese, 1/4 cup softened butter, powdered sugar, and vanilla extract until smooth. Add milk one tablespoon at a time until you reach a thick but pourable consistency.
- Glaze: Spread the cream cheese icing generously over the warm cinnamon rolls. Serve immediately for the best texture.
Notes
- For the softest rolls, ensure your milk is warm enough to activate the yeast but not hot enough to kill it.
- If your kitchen is cool, place the rising dough in your oven with just the light on for a consistent warm spot.
- You can prepare the dough the night before, let it rise once, punch it down, wrap it tightly, and refrigerate. Roll and bake the next morning.
Nutrition
- Serving Size: 1 roll
- Calories: 450
- Sugar: 45g
- Sodium: 350mg
- Fat: 22g
- Saturated Fat: 13g
- Unsaturated Fat: 9g
- Trans Fat: 0.5g
- Carbohydrates: 58g
- Fiber: 2g
- Protein: 7g
- Cholesterol: 55mg